
Learn Tubular Peyote
Before you start to actually learn tubular Peyote, I have a couple of pieces of information that I think will help you.

So, we’ll cover those first, then move on to learn the technique and I will suggest some easy patterns to try.
If you are new to Peyote stitch, then I think it’s a good idea to learn the flat technique before you learn tubular Peyote. So, if you don’t already know how to work in even count Peyote, follow this lesson first. Then, come back here to learn tubular Peyote.

(Click here to take these bead weaving classes now)
Before you start to learn tubular Peyote
I want to share a couple of facts before we start.
First, if you already know how to work in flat Peyote, tubular is going to feel like a natural progression. It begins in a similar way, but instead of working back and forth as you add rows, you are going to be working round and round in a circle.
This means you need to learn a new element: it’s called a step up. So, when we come to learn tubular Peyote in a minute, the lesson will focus on the step up. The rest should feel familiar.
Odd Count versus Even Count Peyote
Did you know that, technically, there are two forms of tubular Peyote? Just like the flat variation, we have ‘odd count tubular peyote’ and ‘even count tubular Peyote’.
So, as with the flat Peyote, the difference lies in the number of beads you pick up to start. Naturally, pick up an even number for even count and an odd number for odd count.
However, something strange then happens. If you pick up an odd number of beads, you won’t have a step up. Your rows will just flow from one to the next. In effect, you spiral continuously along the tube.
This is fine if you just want to make a rope. But if you are using tubular Peyote in a more structured project, like a beaded box, it creates a problem.
More structured work needs you to be able to identify the start and finish of each row. Usually the step up provides you with that clear transition from one row to the next. But in an odd count tube, you don’t have the step up, so no transition.
In my experience, even count Peyote is the most commonly used technique. Many patterns don’t make the distinction between the two variations, but just refer to the technique as ‘tubular Peyote’. Often, they should really be talking about ‘even count tubular Peyote’. But this is just a detail to note.
I’m going to start by teaching you even count Peyote. Then we’ll come back to odd count briefly at the end.
How to do Even Count Tubular Peyote
For this little lesson, I invite you to find some size 8 seed beads. Try to find three different colours. By using a different colour for each row, it makes it very easy to work out what you are doing.

If you need some beads, just click on the photo and that will take you to a good supplier.
You also need your beading thread, beading needle, scissors and a beading mat.
Step 1 – rows 1 and 2
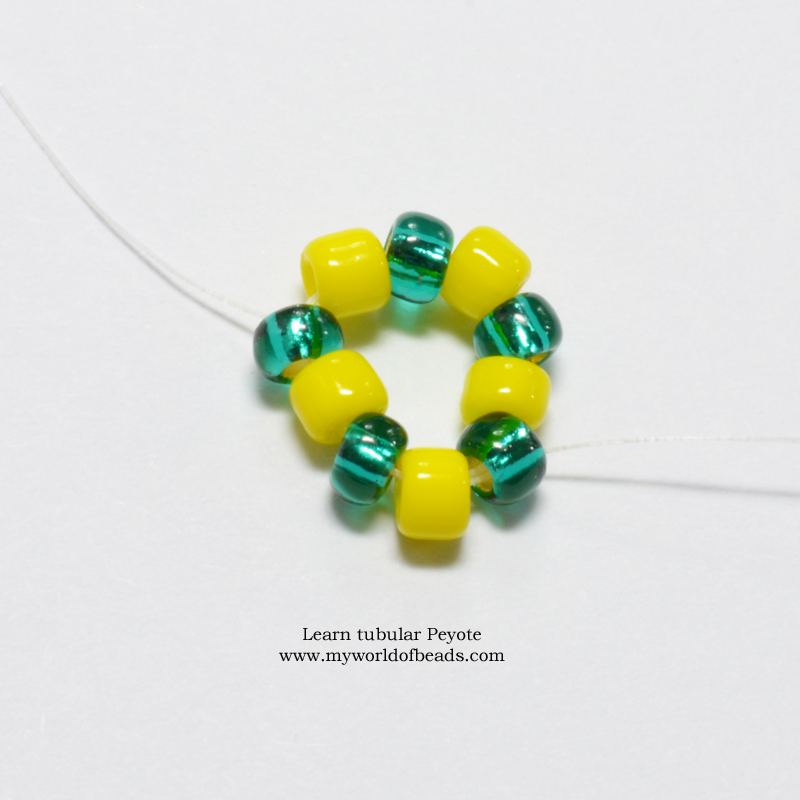
Pick up 10 of your beads, but alternate between colour 1 and colour 2. (ie pick up one colour 1, one colour 2, one colour 1, one colour 2 for a total of ten beads)
Note: for tubular Peyote, you don’t need to use a stop bead.
Slide the beads to about 6″ (15cm) from the end of your thread, then pass through all the beads again, so you have created a circle.
Now, you have a couple of choices here. Sometimes a pattern will tell you to knot your working and tail threads together to hold the circle firm. So, if you want to do that, you would need to make sure your two threads are exiting together, then just tie a double knot with them.
Personally, I don’t usually recommend this for tubular Peyote as I find it restricts the beads too much when you are trying to get the tension right.
So, I suggest you just move on through a couple more beads, making sure your circle is firm and won’t pull apart too easily.
Whichever method you use, move through to exit from a colour 2 bead.
Step 2 – row 3
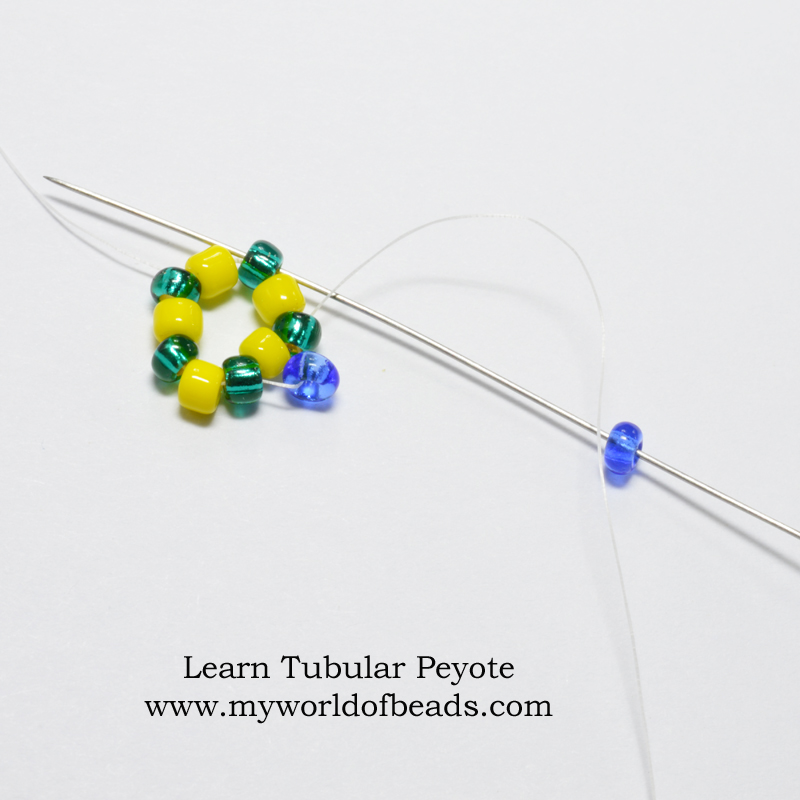
Now, pick up one colour 3 bead and pass through the next colour 2 bead in your circle.
Note: this is just the same as your flat Peyote – you have a strip of beads and as you add new beads you are missing out a bead in the strip each time. It’s much easier to see with different coloured beads. But if you are using all one colour, then you will be picking up a new bead, skipping the next bead in your circle and passing through the bead after that.
You should add a total of five beads. This would complete your third row (remember, this is peyote where that initial line of beads makes up your first two rows. Refer back to this blog if you’re confused by that.)
The Key to Success
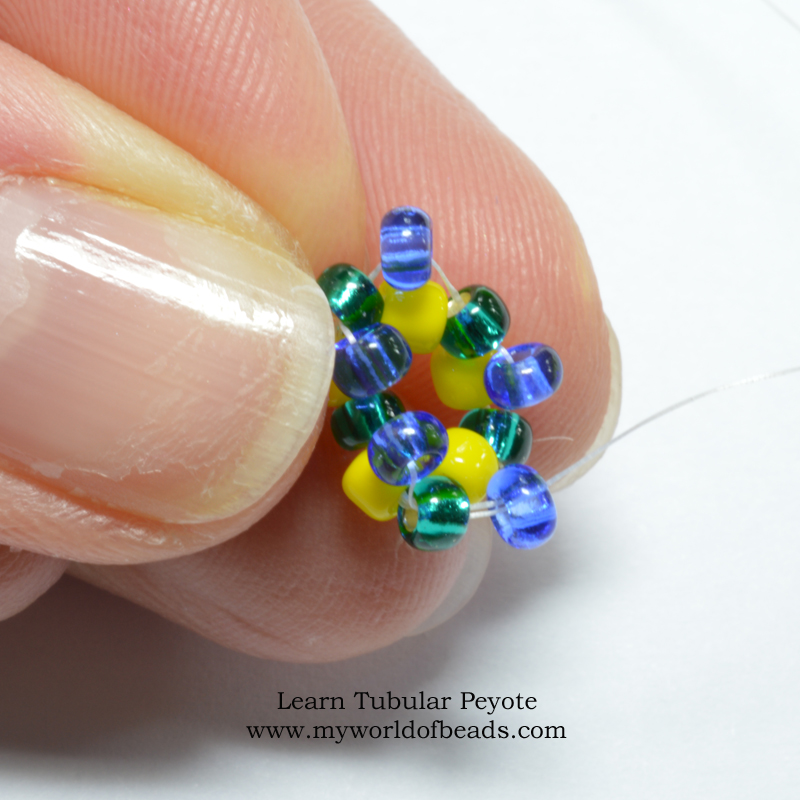
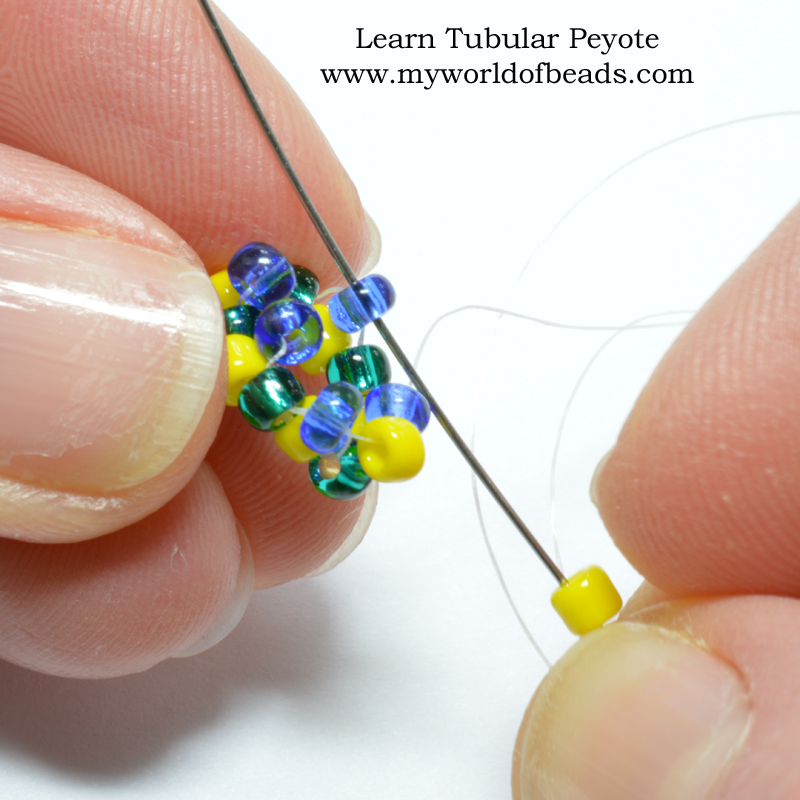
The trick to success in this row lies in how you hold your beads. They will naturally want to splay outwards into a circle.
If you allow them to do this, you’re going to end up with very loose tension.
Instead, cup them between your thumb and forefingers, as I am in the photo. This will push them into the tube shape and allow you to pull your thread tight. So, you set yourself up for good tension right away.
It’s the same principle that you learned with even count Peyote when I encouraged you to stop at the end of row 3 and pull on both threads to get your beads into position. Whichever variation of Peyote you are doing, getting good tension in the early rows is the key to keeping good tension throughout the project.
Step 3 – step up
Now, look at your beads. Where are you going to go next? The colour 2 bead, where you are exiting, is a ‘down’ bead. So, you can’t just add a new bead.
First you need to ‘step up’. Quite simply, pass into the next bead. This also happens to be the first bead in row 3 – your first colour 3 bead.
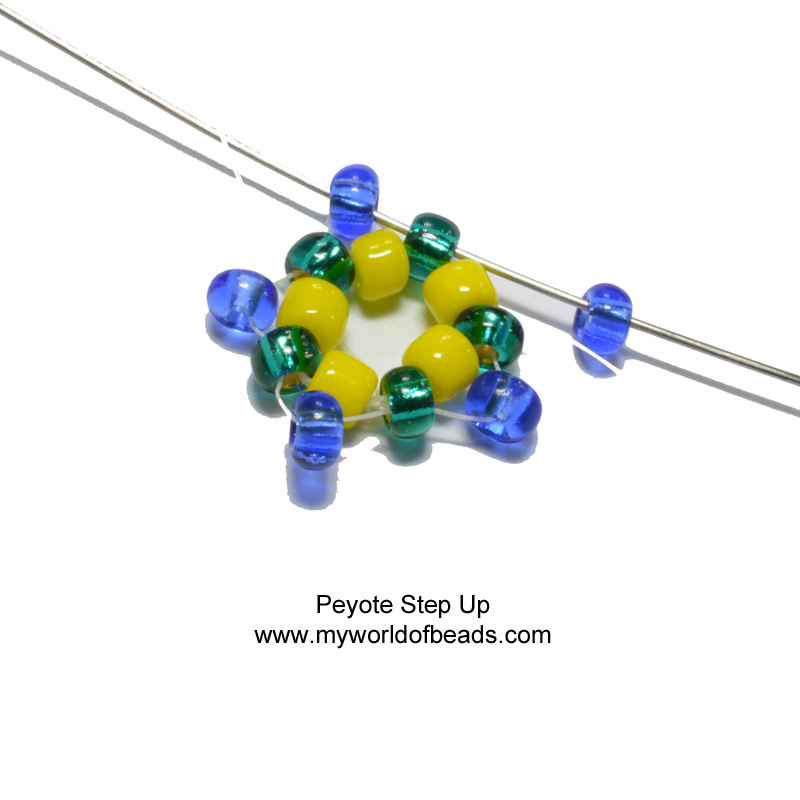
So, now you are exiting from an up bead and you’re ready to begin the next row.
Step 4 – keep going!
You have now learned even count tubular Peyote. So, you just need to keep on repeating row 3.
I suggest you keep alternating through your colours. So, in this row you will add colour 1 beads, passing through colour 3 beads and step up through your first colour 1 bead.
In the next row, you will add colour 2 beads pass through colour 1 beads and step up through your first colour 2 beads.
That way, you can see what you’re doing and hopefully avoid getting lost!
To see all this demonstrated on video, click here and take this online beading class now.
Top tips as you learn tubular Peyote
Just as I advised for flat Peyote, you can help yourself by counting out your beads for each row before you start the row.
That way, you will be alerted to look out for the step up.
Common mistakes in tubular Peyote are the same as in flat Peyote (adding too many beads in a space, or skipping a space). Plus, forgetting the step up.
With the different coloured beads, you will find that the step up is easy to spot. But what happens when you work with just one colour? Try that next…
Odd Count Tubular Peyote
Next, I want you to try a little sample of odd count tubular Peyote. You can go back to the start of the section learning even count. In step 1, pick up 11 beads, instead of ten. Again, alternate between your two colours of beads.
Now continue to add row 3. When you reach the end, you will find that you don’t have anywhere to step up – you can just keep on beading. So, keep adding rows, using a different colour for each row. Then take a look and see how your structure looks compared to your even count sample…
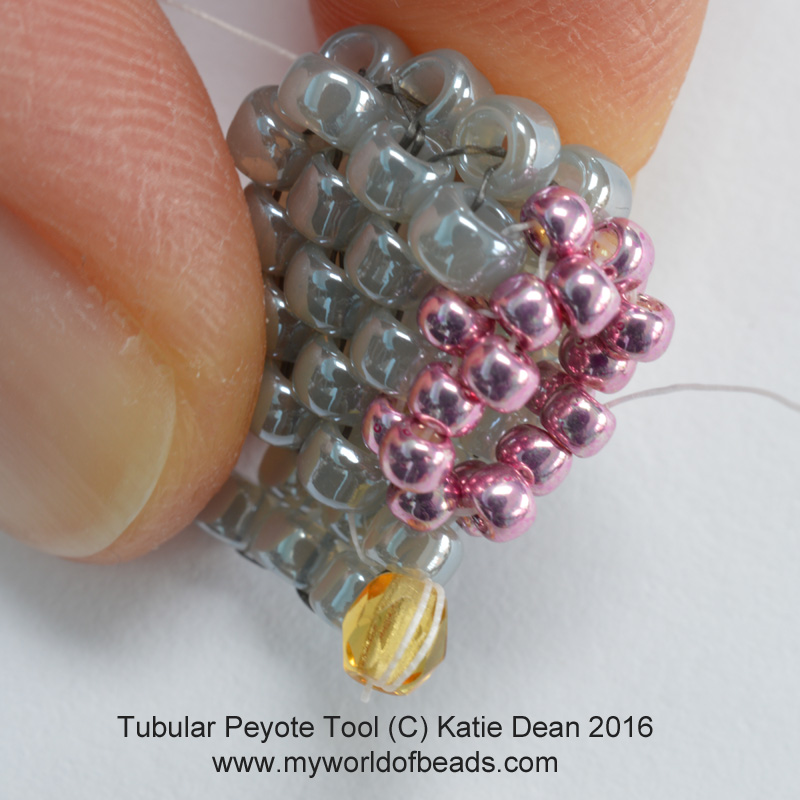
Learn Tubular Peyote with a cheat…!
Most people find the hardest part of tubular Peyote is getting started. Those first few rows are tricky because you don’t have much to hold onto and the beads can spill out everywhere.
So, I have good news for you if you are struggling with the start.
I developed a cunning, yet simple, little tool that you can use to get started. Rather than lengthen this blog post any more, I have a separate post on my little tool, which you can find right here. So, take a look!
Reading a tubular Peyote chart
As you progress in your efforts to learn tubular Peyote, you may start to try a project where the tube includes a pattern. So, you will find yourself following a Peyote chart.
I don’t want to go into detail about how to follow Peyote charts right now. I’ve got another blog on that topic, which you can find here. But I do want to mention something that you will need to understand as you learn tubular Peyote.
Even though your Peyote tube is a three-dimensional object, you will find the pattern chart is still set out in two-dimensions.
Different designers may have different ways of doing this. The reason is, that step up means that each new row begins one bead along on the pattern. So, in flat Peyote, you are used to the start of your rows following a straight vertical line, up either side of your chart.
Well, in tubular Peyote, the start of the row follows a diagonal line. So, in a chart like the one below, the first bead in each row is the bead marked by the diagonal line. You would follow the chart from the diagonal line along the row from left to right. Then, when you reach the right-hand edge, you need to continue following the rest of that row from the left-hand edge of the chart until you reach the bead on the diagonal line, where you started.
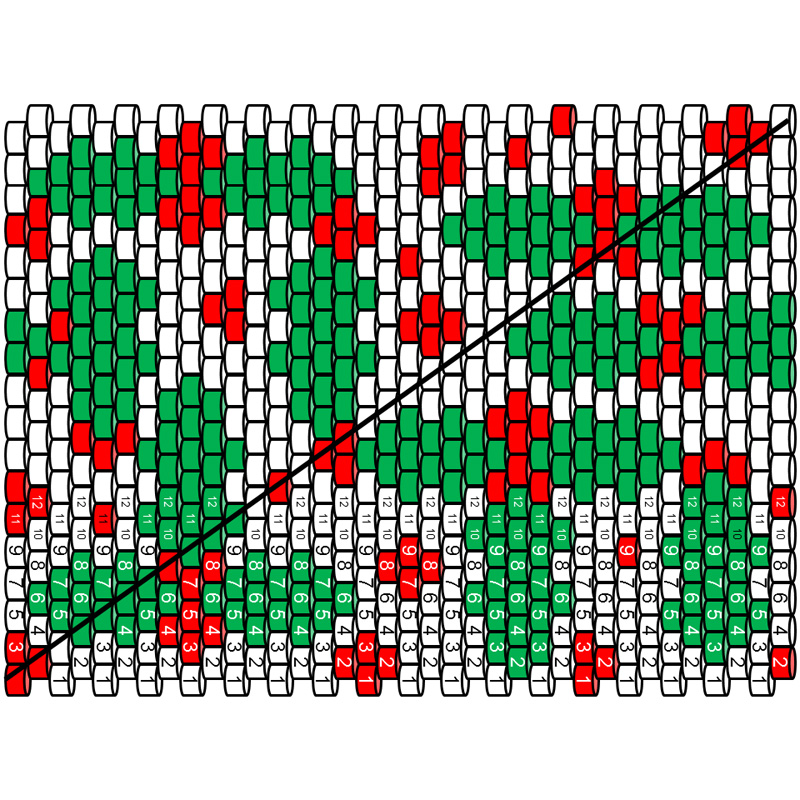
This probably sounds very complicated. But it makes a lot more sense when you are actually beading.
Don’t get bogged down in worrying about this for now. Just make a mental note for when you get on to adding patterns into your Peyote tubes.
Where to go from here…
When you feel like you have mastered tubular Peyote, you can move on to learn how to increase and decrease in the middle of a row. This then progresses on to circular Peyote. Use this link to find the other Peyote stitch lessons and work at your own pace.
If you follow this link, you can get a PDF to print out and keep for future reference. It covers the lessons you have learned here.
The best patterns for practising
You will find loads of patterns that use tubular Peyote. I want to give you just two here. If you try these now, you can put into practise the lessons you have just learned.
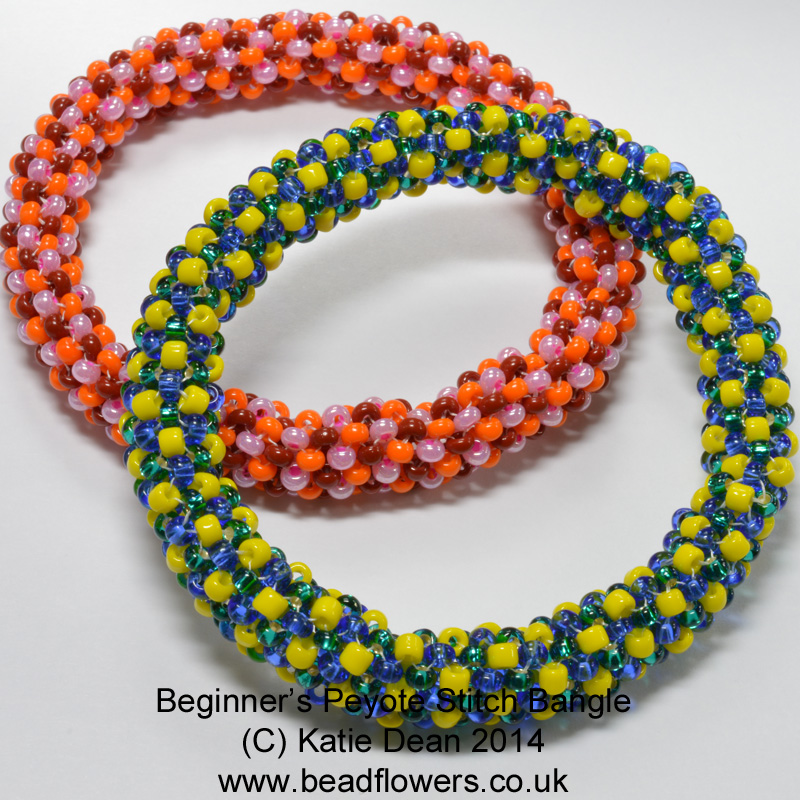
This beginner’s tubular Peyote kit is a brilliant place to start. You get everything you need to make two attractive bangles. So, that gives you plenty of practise with the basics. (Click on the photo to get the kit).

Then, this is another bangle, but it adds a simple pattern into the design. So, you can take the next step! The tutorial for this gives you the bead counts in both pattern and written form. So, this is a great way to learn tubular peyote with a patterned design. Again, click on the image to get the tutorial.
You can also take this online beading class to learn from video and learn a full range of beading techniques.


If possible, are you able to include a side by side comparison of odd and even tubular peyote? I suspect I’ve gone wrong somewhere with my odd tubular peyote as the result looks chaotic, but I’m not sure where as I don’t know what it’s supposed to look like. Thanks!!
Hi Ty, you’ve asked a great question there, but I’m afraid a photo won’t help you. The two types of tubular Peyote look exactly the same. The only way you can tell is, with even count, your rows have a clear start and finish. Which is why you get the step up. I think you can see in my sample photos with the different coloured beads, how the step up occurs.
If you were beading in odd count, you would have no start and end to a row – just a continual spiral around. So, your odd count Peyote should look like even count – it would only be as you are beading that you find you don’t have the step up going on, so one row blends seamlessly into another.
Thank you!