
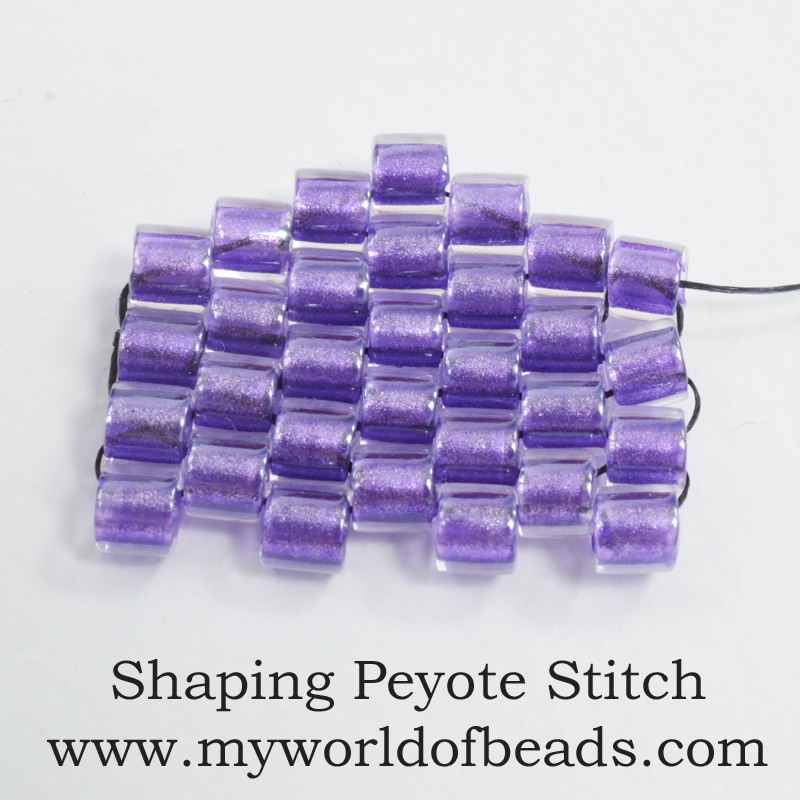
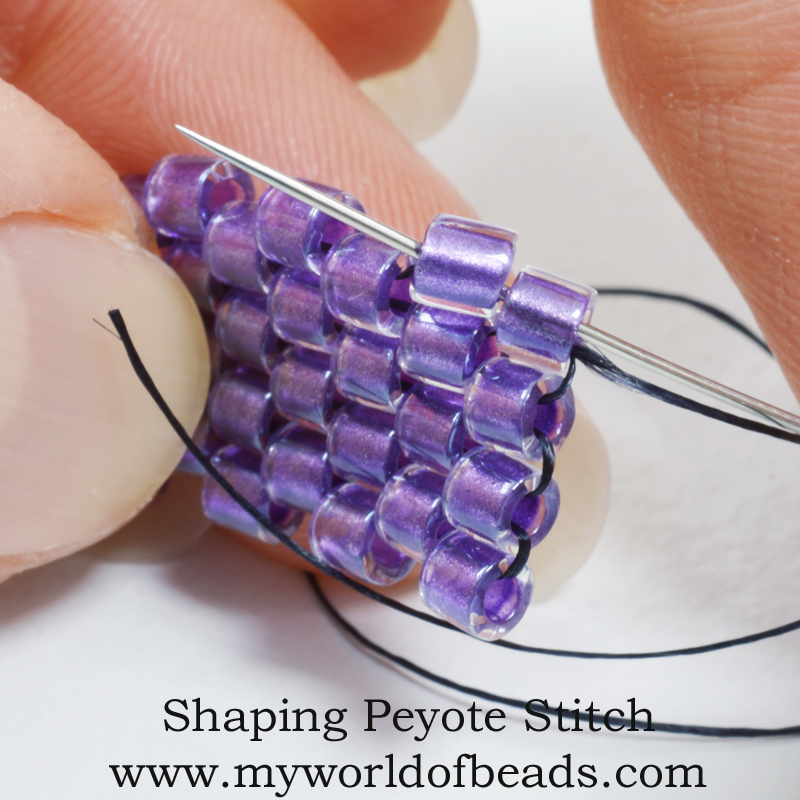
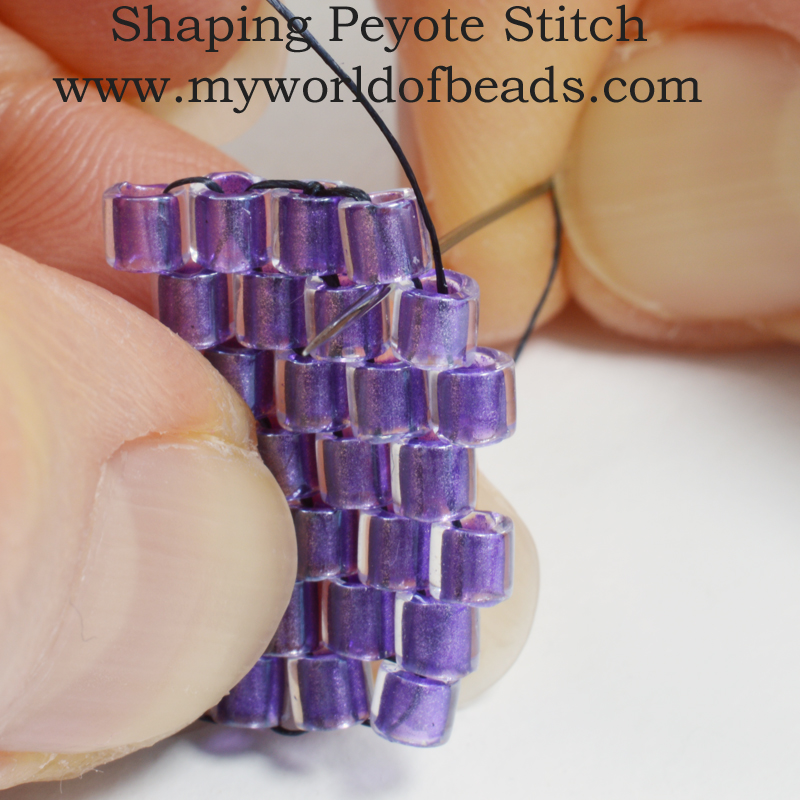
Shaping Peyote Stitch
Once you have mastered the flat version, shaping Peyote stitch is the next logical step. So, make sure you are familiar with even count Peyote before you start this little lesson.

Now, I’m going to show you a few different ways in which you can shape a piece of flat Peyote. These include how to increase and decrease at the end of a row.
If you’re looking for ways to make geometric shapes, or for shaping Peyote stitch in order to create 3D objects, then I covered that in another blog. So, you will find that blog here. Take a look at that as well.
Shaping Peyote stitch: zig zag edge
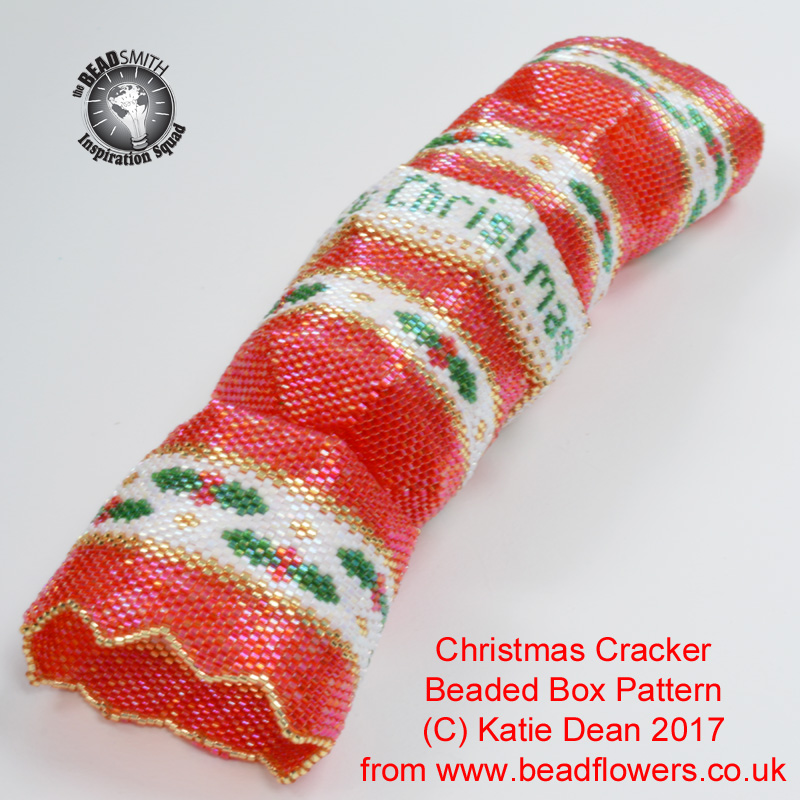
This is a lovely way to finish off the edge of a project. It might not be the most practical edge if you are planning on adding a clasp! But it is a great edge for tubular Peyote. You can see how I used it for my Christmas cracker beaded box, above (if you want the pattern to try this, just click on the photo).
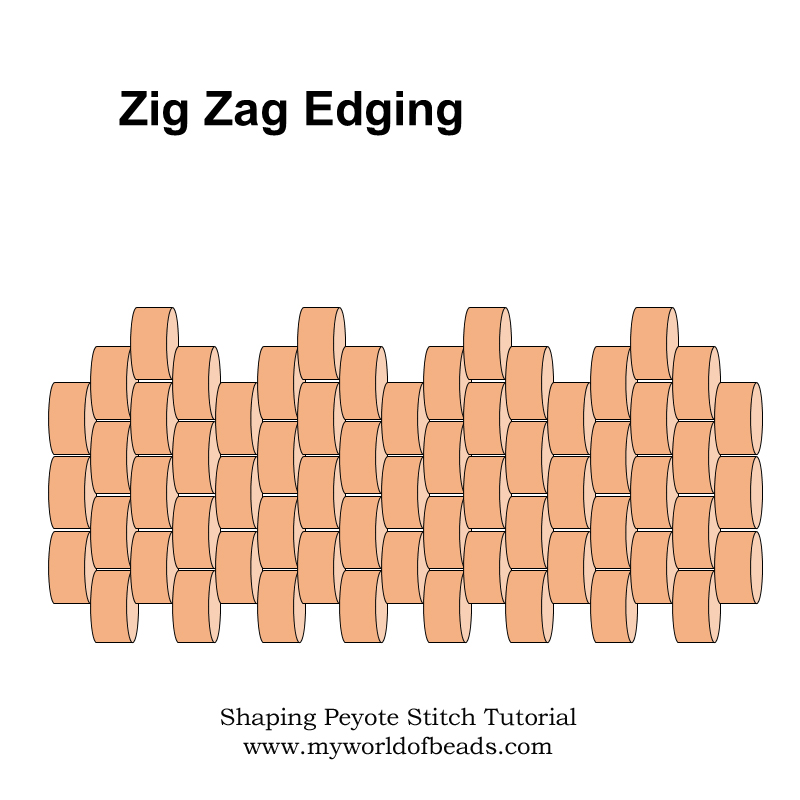
How to add a zig zag edge
So, how would you go about shaping peyote stitch to give you that zig zag edging?
It’s very simple. Start to add your row as normal. Add 1 bead, then, instead of adding a bead in the next space, you are going to miss it.
So, pass your thread on down through your ‘down’ bead and continue to exit from your next ‘up’ bead. You’ve skipped the space.
Repeat this sequence. So, add 1 bead, then skip your next space. Your row will end up with the zig zag edge that you saw in the first diagram, above.
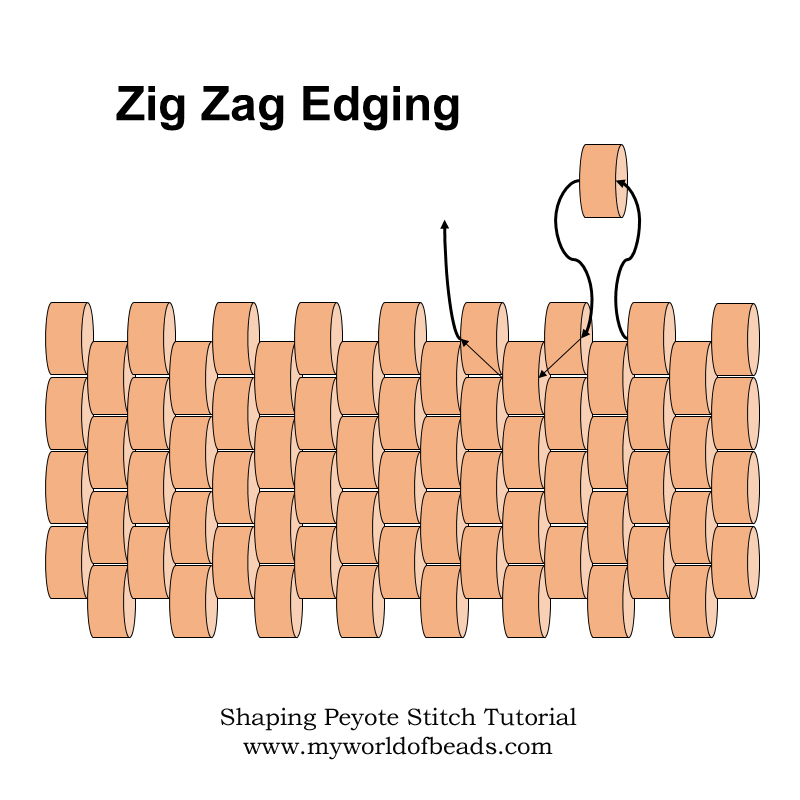
What if you want to add bigger zig zags?
Well, you would just do this over more rows. So, take a look at the diagram below…
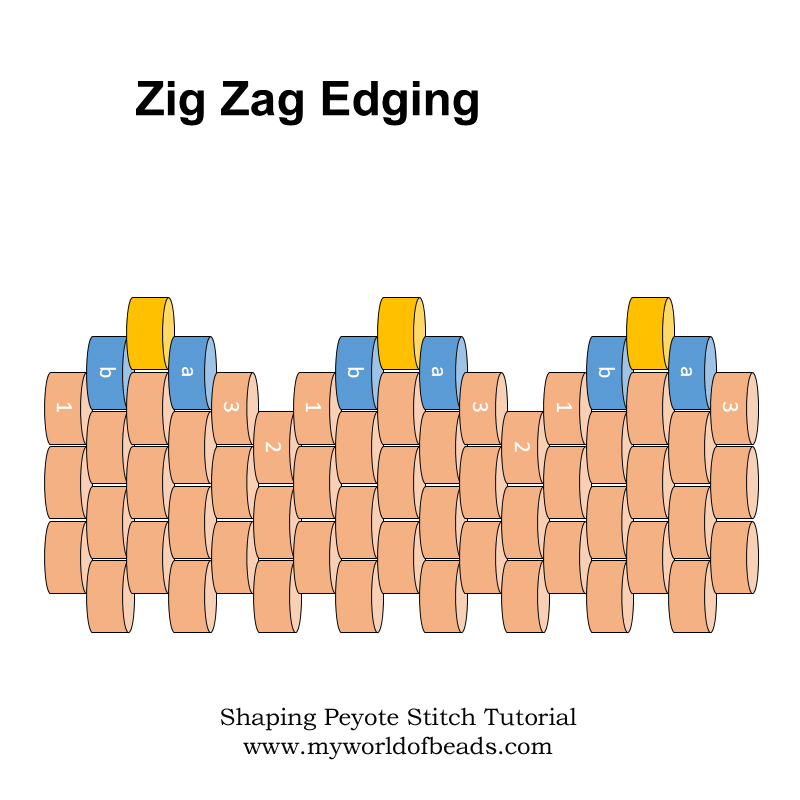
In row 1, I added the blue beads, ‘a’ and ‘b’. Then follow your thread path to miss out the next space. (ie this shaping would follow a pattern of ‘add 2 beads, miss 1 space’).
Then, in row 2, I added the yellow beads. So, you would need to weave up to your top space (exiting from bead ‘a’). Then, add your single bead and weave down through beads ‘b’, 1 and 2, then up through beads 3 and ‘a’.
Hopefully you are beginning to see the pattern. You can extend this as wide as you like. Just increase the number of beads you add in a group before missing your space in the first row. Then continue to bead rows, following the shaping you have set up.
Shaping Peyote stitch: end of row decrease
If you’ve been trying to follow the zig zag back and forth along a strip, you will already have realised you need to know how to decrease at the end of a row.
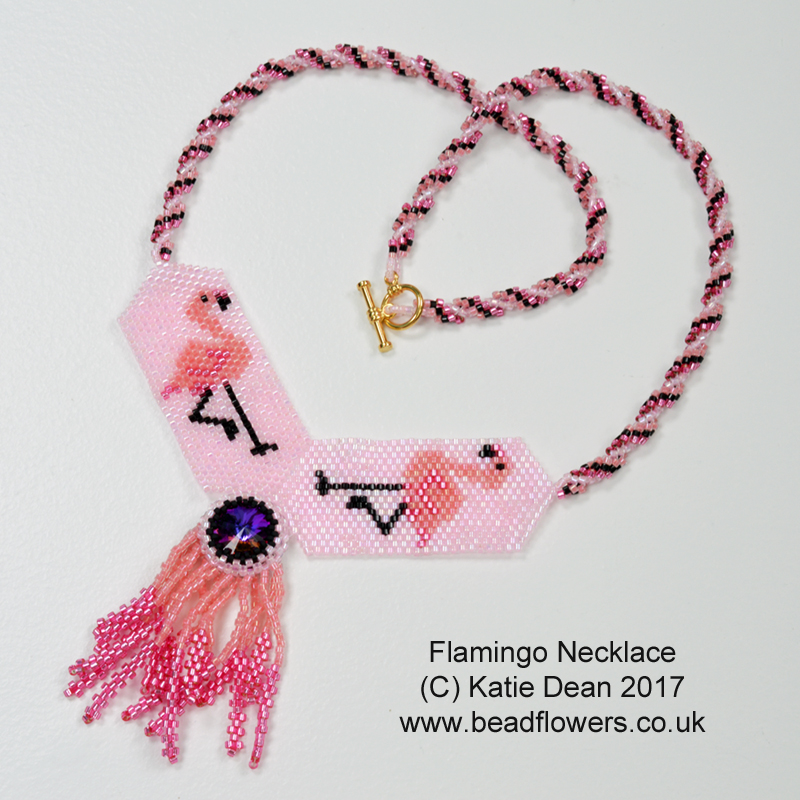
This will shape your beadwork inwards. You could take it right up to a point, as I did in this Flamingo necklace. (Again, just click the image if you want a copy of the pattern). Then you have the option of adding that point onto another component. It’s also a nice way to taper a wide bracelet down to attach a narrow clasp.
How to decrease at the end of the row
Shaping Peyote stitch by decreasing at the end of a row is also simple.
Take a look at the diagram. You have just finished your row, so you would be exiting from bead 1, at the red arrow.
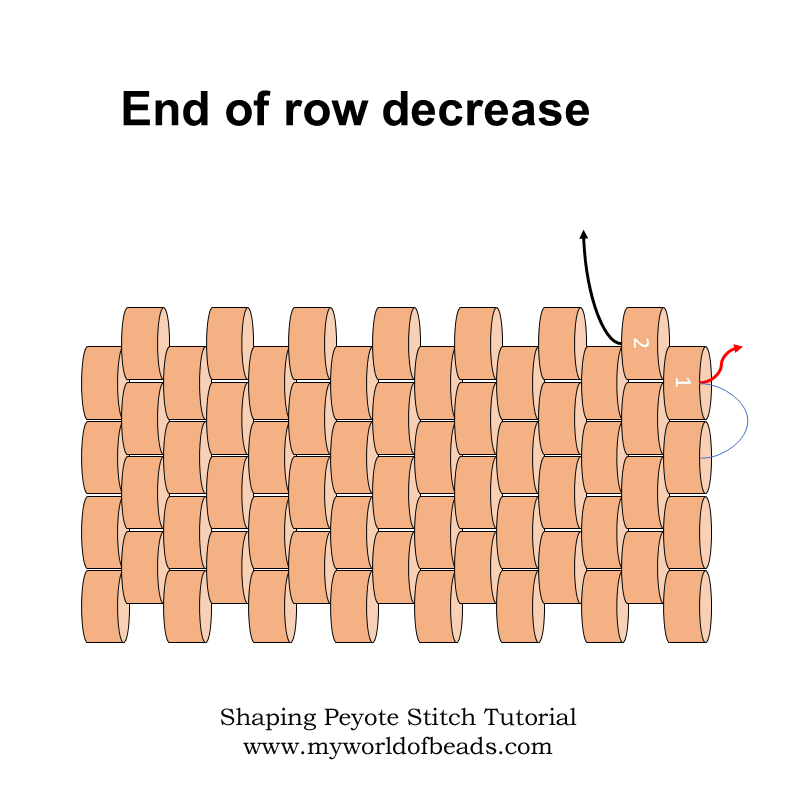
You want to hook under the thread on the edge, just below bead 1. Then pass back up through beads 1 and 2. So, you’re ready to continue beading back along the row.
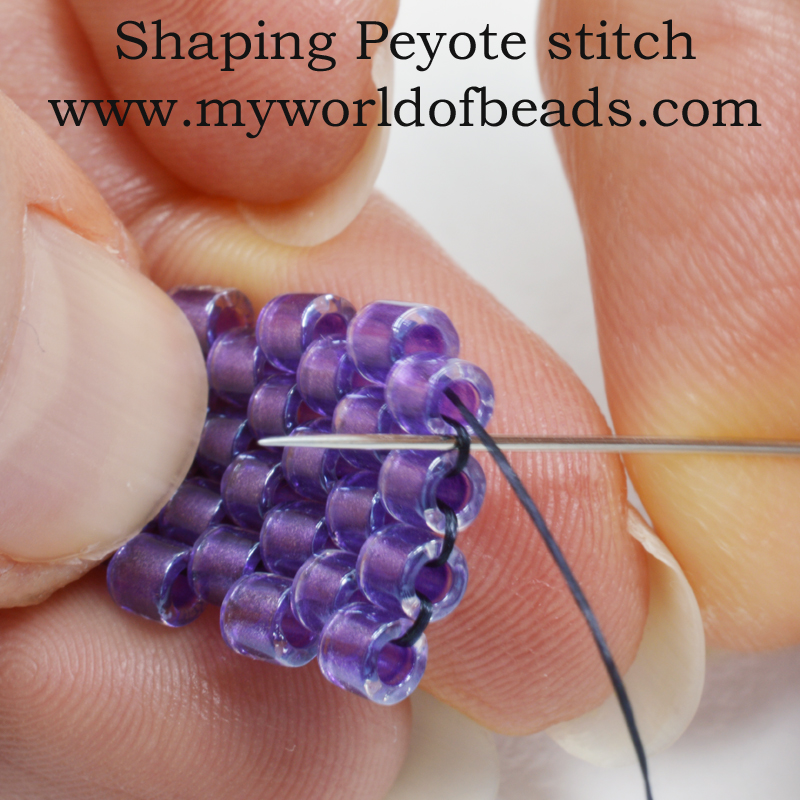
This is how that process would look in reality.
Now, work back along your row. You can use the same technique to decrease at the other end. Stitch another row.
This time, when you exit, your thread will be between beads in the diagonal alignment you’re setting up.
If you don’t want to make any more decreases at this point, you can just continue to bead as normal, with the usual even count turnaround.

If you do want to make another decrease, you would still need to hook under the thread below the bead you are exiting (bead 1). But this time, your thread is nestled between two beads – bead 1 and bead x.
The process is the same, it will just feel a little different. You may not be able to see your thread, so you will need to ‘feel out’ the hooking process. Then pass back up through beads 1 and 2 as before.
If you want to give this process a try, then this butterfly beaded beads pattern is a great project for learning the technique.
Shaping Peyote stitch: end of row increase
What if you want to make your beadwork wider, instead of narrower? Assuming you also want to keep it flat, you’re going to need to make an increase at the end of your row.
If you also want to keep to the Peyote stitch structure, then you’ll be looking at a staircase increase.
How to do the staircase end of row increase
Bead your row as normal. When you get to the end, you need to pick up 3 beads. Slide them right up to the edge of your work and then pass back through the first bead. (These are the yellow beads in the diagram).
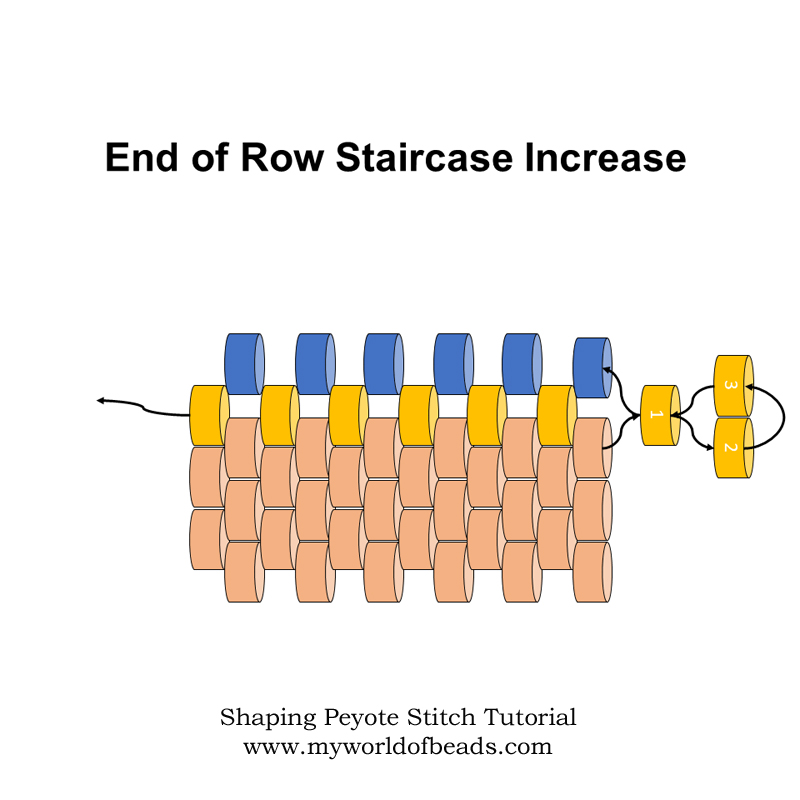
Immediately, pick up 1 new bead and then continue to work back along the row. These are the blue beads. So, your three additional beads will be sticking out at the end, sitting in a Peyote structure.
Turnaround and bead back along the next row (red beads). At the end of the row, you will have an extra stitch, where you made the increase before. You could turn around and work back here, if your work is wide enough.
Or, you could make another increase…
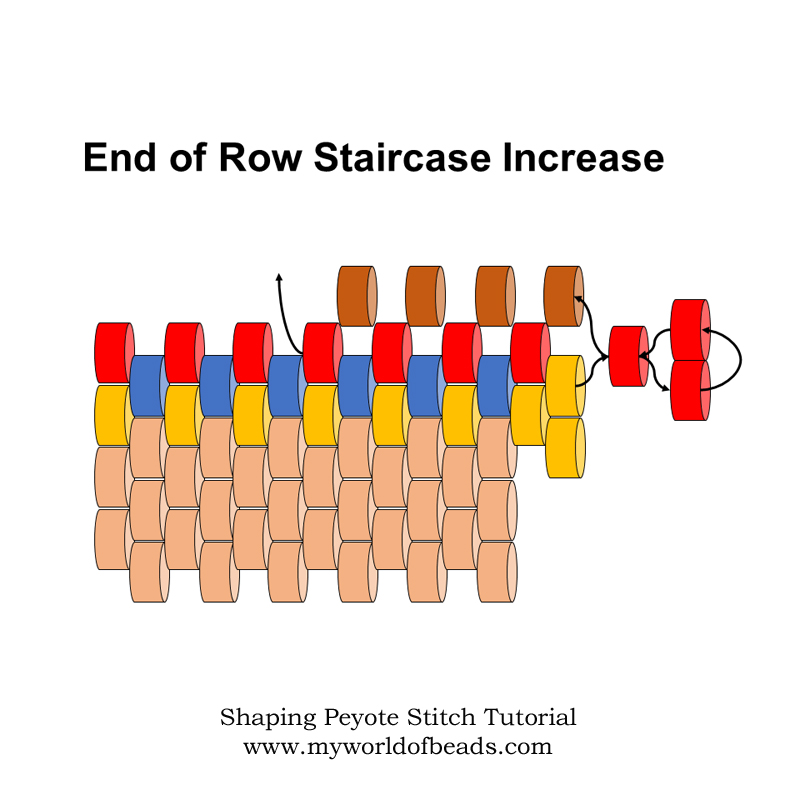
So, again, pick up 3 beads (red), pass back through the first one, sliding this little structure into place. Then, pick up a new bead and begin working back along the next row (brown beads).
That’s it! You can add this shaping on either or both ends of your work.
Shaping Peyote stitch…with brick stitch
What if you want that end of row increase to give you a smooth line? Looking at the staircase variation above, you always end up with a wiggly edge. OK, this reflects the Peyote structure, but maybe it’s not what you want.
Whenever I am shaping Peyote stitch, I look at the possibility of just using brick stitch instead of fiddling around with thread paths to increase or decrease.

In the sample above, I have a nice smooth increase. Would that be possible to achieve with a Peyote thread path? I’m sure I could fiddle around and calculate something.
But it’s actually much quicker to just break this down into two sections.
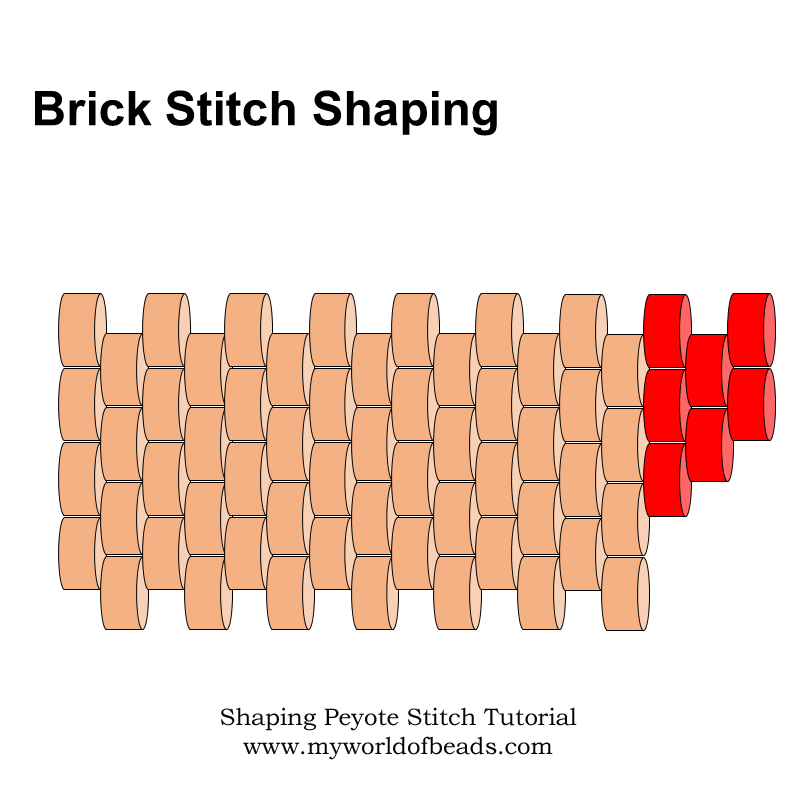
First, bead the brown section, just using simple even count Peyote. Then, come back, turn your work on its side, and bead the red section using simple brick stitch.
If you need a lesson in how to shape brick stitch, grab this free tutorial. It will show you the basics.
So, any time you see a very shaped piece of Peyote, ask yourself this… Would it be easier to try and use shaping Peyote stitch techniques? Or, would it be simpler to work out the Peyote blocks, then add the shaping with brick stitch?
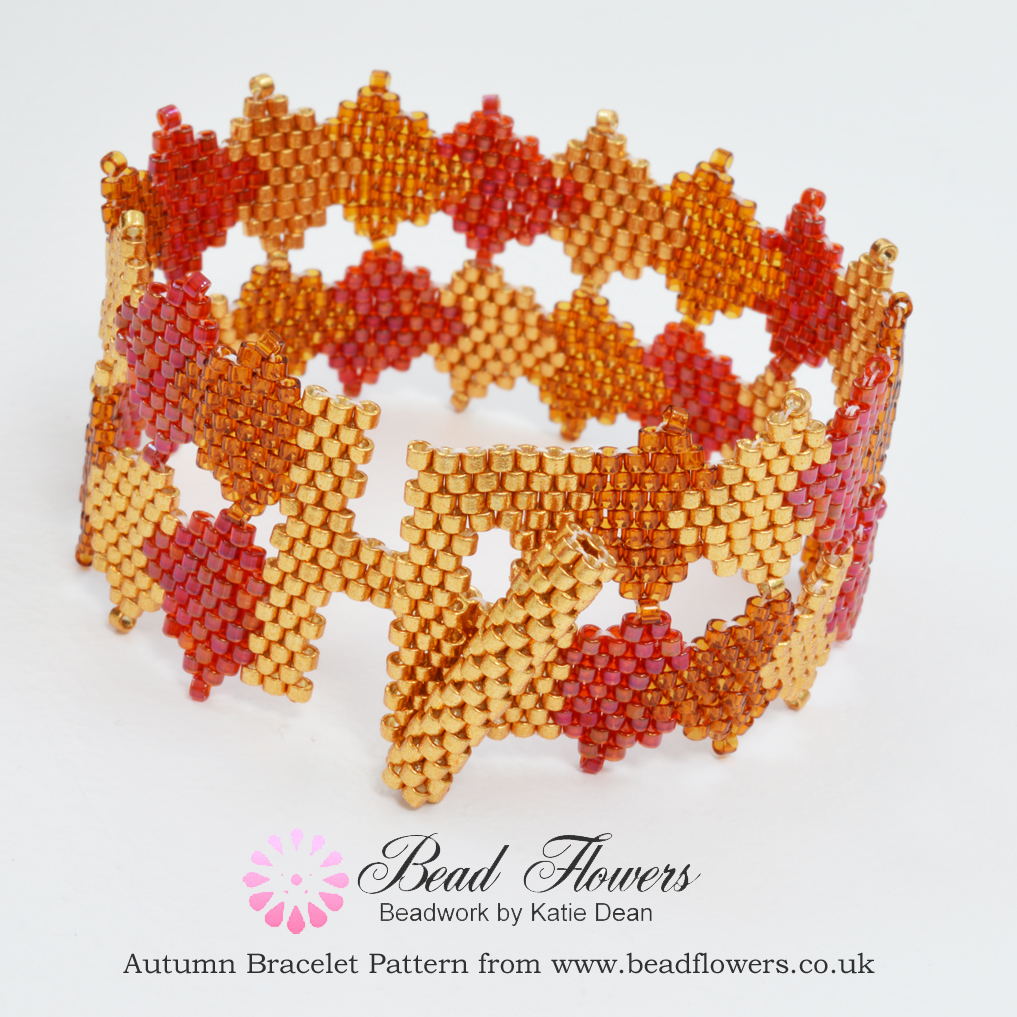
Patterns for shaping Peyote stitch with brick stitch
If you’re intrigued by that invitation, I have a couple of patterns you can try.
This bracelet is actually a beginner level project. It uses the brick stitch shaping to add the edging. So, it’s a lot simpler than you might imagine! (Click on the photo to get the pattern).
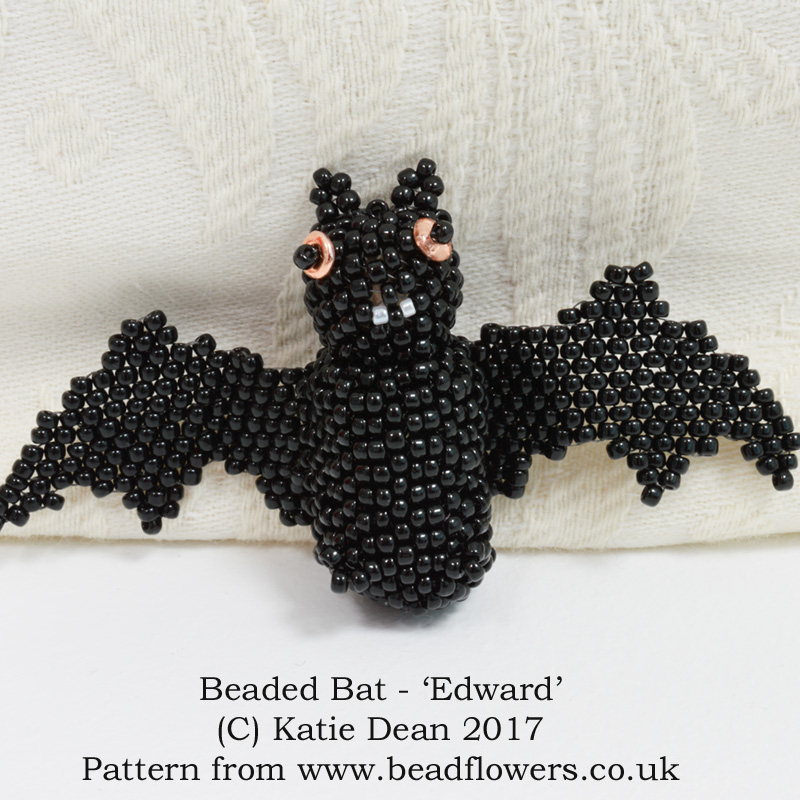
Then, I used the same idea (breaking down and mixing Peyote and brick stitch), when I made this beaded bat.
This would be a project to try if you have a little bit of Peyote stitch experience. You’re also going to be using some tubular Peyote. Plus increasing and decreasing in the middle of a row.
What next?
Hopefully this has given you a good guide to shaping Peyote stitch. You will come across lots of different ideas and variations within patterns. But at least you are now familiar with the basics.
Remember to bookmark this page so you can come back if you need a reminder in future. And do share it with your beading buddies too!
If you’re ready to learn more about Peyote stitch, this link will give you plenty more bite-sized lessons. So, you’ll be an expert in no time!


vos conseils et explications sont géniaux !
merci
marie
Merci Marie!