
How to Finish a Bead Loom Bracelet
I know I left you hanging over the past few weeks…but hopefully, you’ve had the time to use the free pattern. So, now Caroline is back to show you how to finish a bead loom bracelet.

In this post, you’re going to learn how to remove your work from the loom. Then, neaten your threads and add a clasp. Caroline has also included a lovely, simple decorative edging that you can use if you wish. So, let’s get started…
How to finish a bead loom bracelet
When working on your cuff, some people say that you need to do the edging first, before you take it off the loom. Others recommend taking it off the loom first and attaching a clasp before edging. There is no right or wrong order, it is a matter of personal choice. I will tell you the way I do things, but you are free to change the order if you wish to.
Before removing your work from the loom, however, I do recommend that you pass your weft thread through all the beads on the first two rows again to reinforce them. I use the weft thread to start the decorative edge of my cuff. So, do NOT knot it and cut it off at this stage.
First steps
Once you have completed the main part of your bead weaving (the body) it is time to think about the next steps. This is the part that most people look at and don’t want to deal with… the warp threads. But it really is not as difficult as you may think.
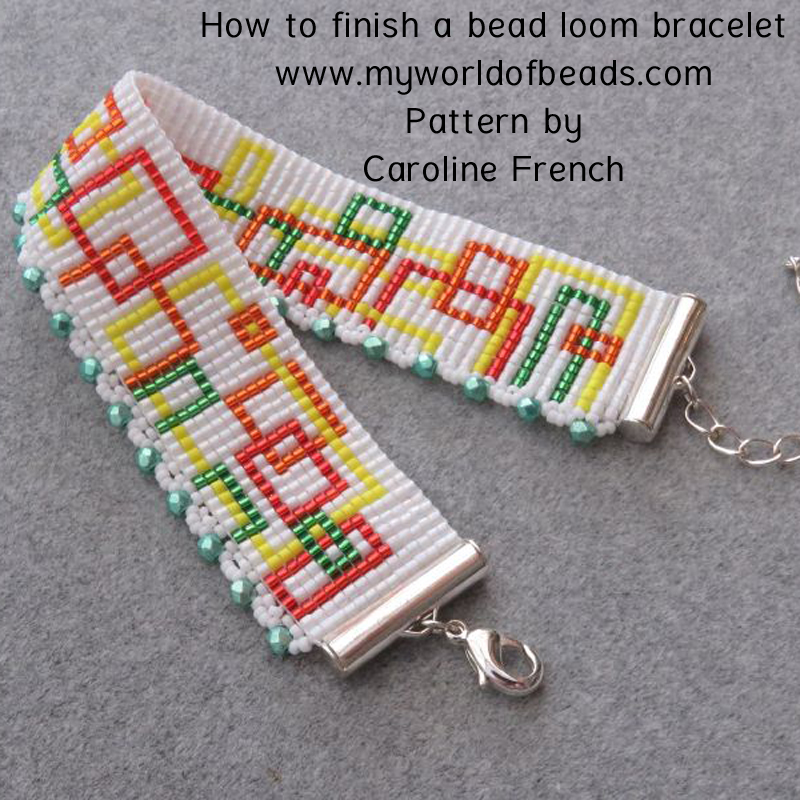
To make life easier for the novice bead weaver I am going to tell you about the method I used when I made my very first loom piece. Use a ready-made clasp that has a ‘slider tube’ on the ends that covers the first row of beads.
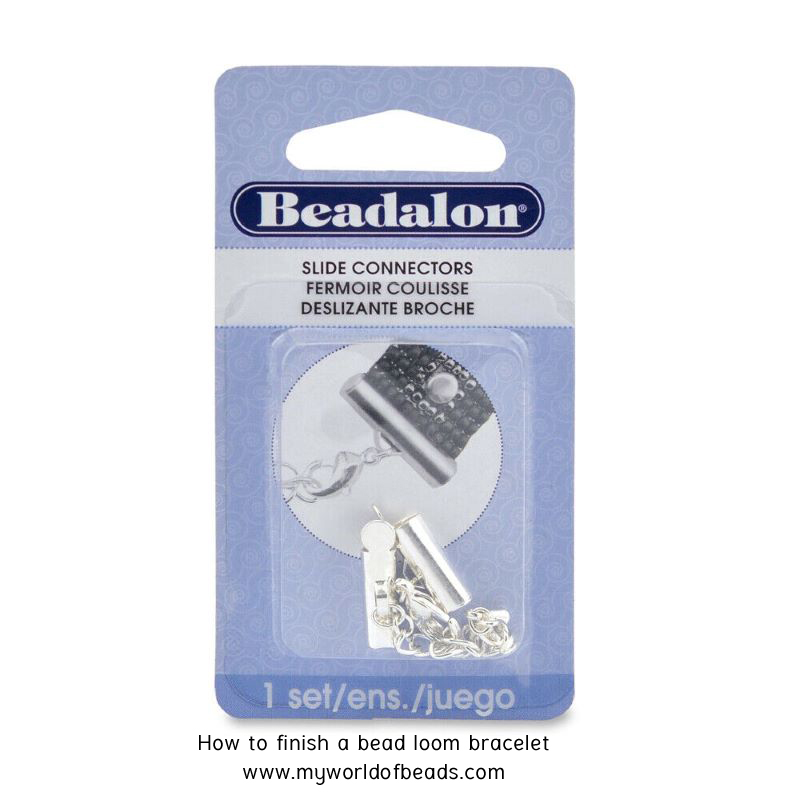
Click here to buy one of these slide connector clasps
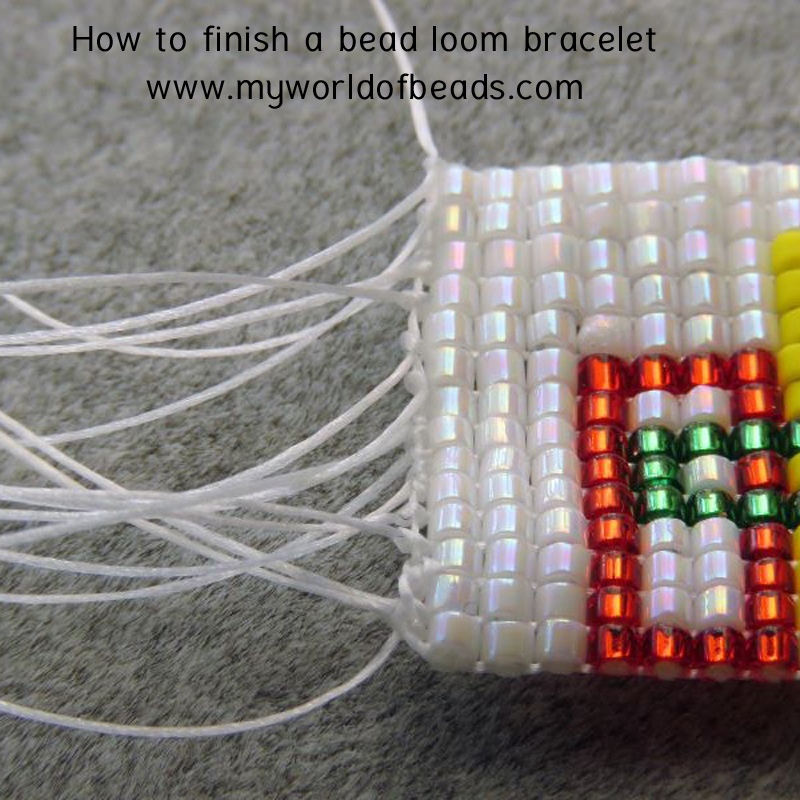
Firstly you will need to remove your work from the loom. Loosen off the rollers and take the work off the loom. I would advise that you leave the piece to ‘rest’ overnight. This will allow the warp threads to relax as they may have stretched while on the loom. You should certainly do this if you are using Nymo which does have a tendency to stretch.
Make sure you identify the weft thread that you have been using. You’ll need to use this later for the edging.
Dealing with Warp threads
You are now going to start knotting the warp threads together. Take the first two warps and tie them in a double knot, but do not go too tight. The knot should sit snug up against the bead. Take the next two warp threads and do the same. Work all the way across the piece until they are all tied.
Put a dab of glue across all the knots and allow it to dry.
When the glue is dry you can trim off the excess thread (not too close to the knots – see the tip below). Then, slide the first row of beads, with the knots, on into the slider clasp. Push down the end of the clasp and ‘hey presto’ your clasp is attached.
When trimming the threads I would leave 3 or 4 mm of thread sticking out from the knot so you do not risk cutting into the knot. These clasps have quite a bit of space inside them so it should be fine. If you find there are bits of thread sticking out of the end just poke them inside with an awl before closing the clasp end down.
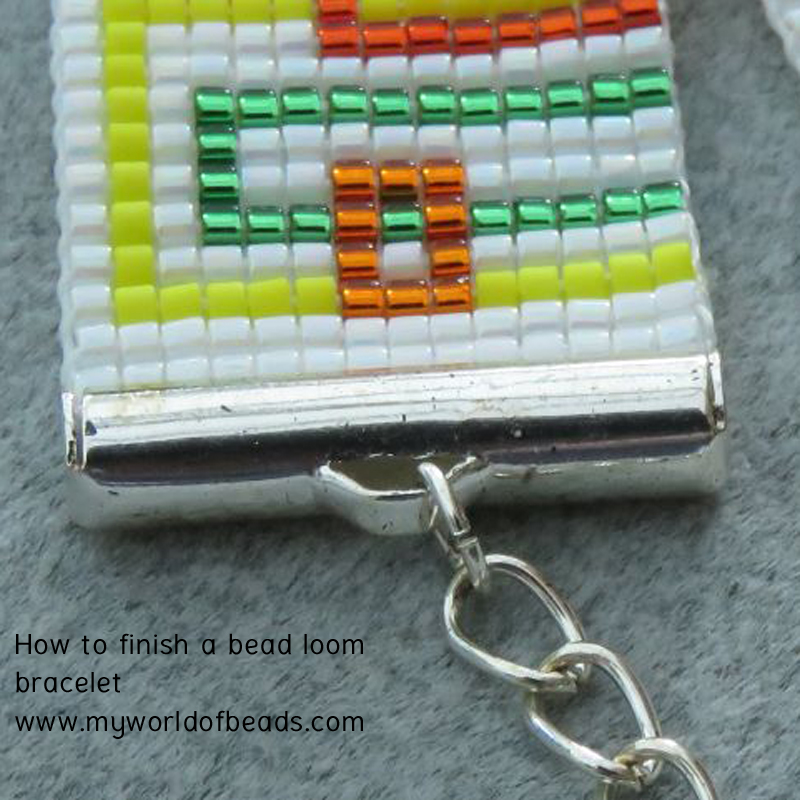
Repeat this whole process on the other end of the bracelet, to attach the other half of your clasp.
Decorative Edges
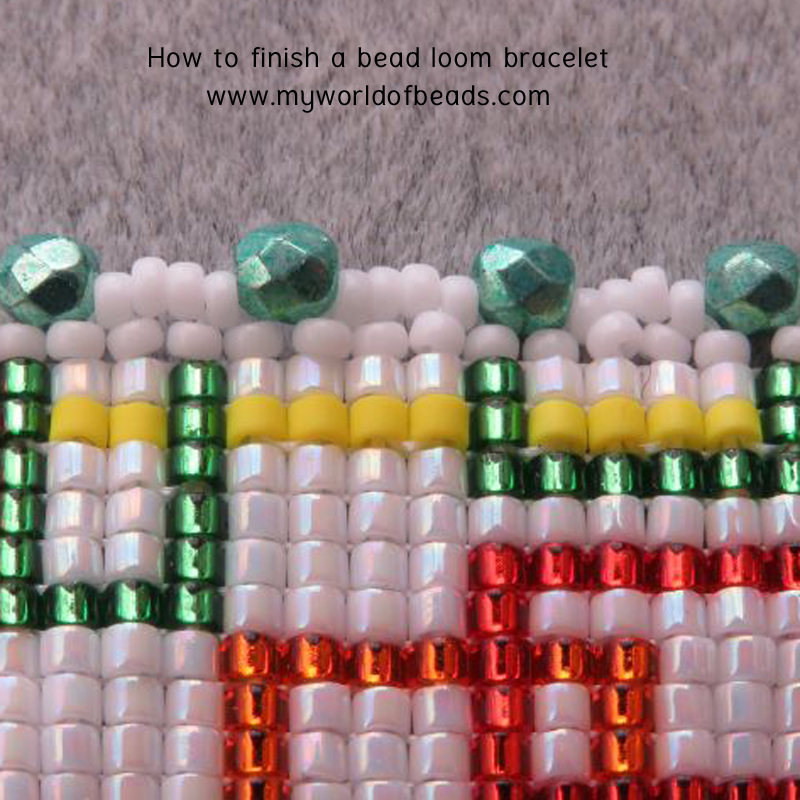
There are many different ways to decorate your cuff if you wish to. I am going to show you how to do a simple decorative edge using the size 15 seed beads and fire polished beads detailed in the pattern. I use the weft thread to start the edging.
But what if you have accidentally knotted the weft thread and chopped it off? Don’t worry… You just need to attach a new thread and weave it through the bracelet to exit from the corner bead of your work. This is a link to my video showing how to do this.
https://www.youtube.com/watch?v=ikbyuunS2uU&t=5s
Step 1
Using the weft thread work your way back along the length of the piece adding a 3 bead picot edge. (i.e. pass out of the first edge bead on the bracelet, pick up 3 seed beads and pass down into the next edge bead. Pass out of the next edge bead and keep repeating).
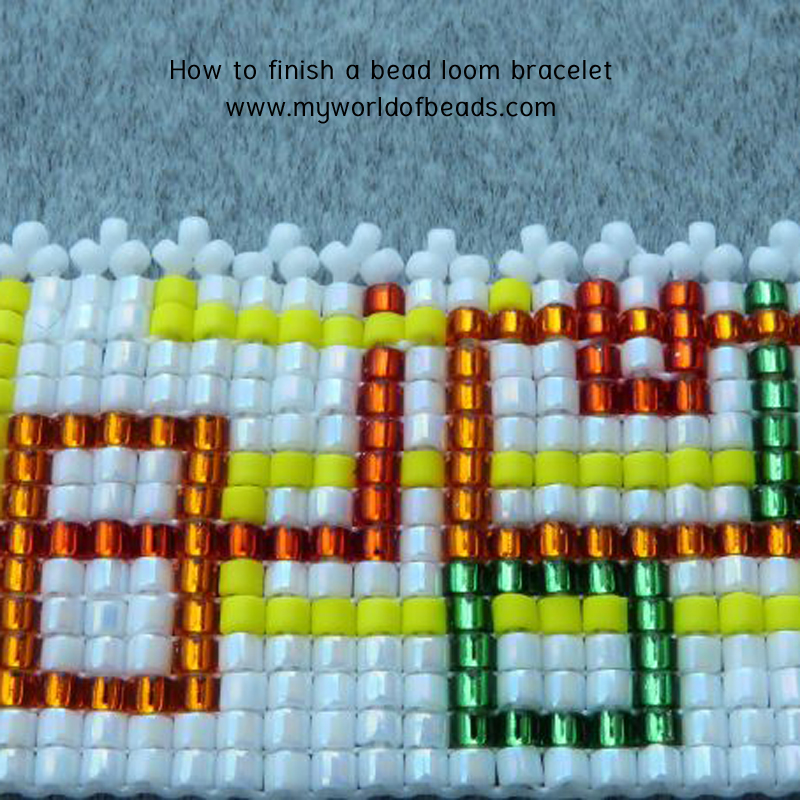
Weave your thread so that it emerges from the middle bead of the picot edge. (Point bead).
Step 2
Pick up a FP bead and go through the point bead of the next picot along.
Pick up 2 15’s and go through the point bead of the next picot along.
Alternating between the FP bead and the 2x 15’s work your way to the other end of the cuff.
You can now finish off your thread by weaving around the beads and knotting and trimming off your thread.
Congratulations on finishing your Bead Loom Cuff!
More from Caroline
I hope that demonstration of how to finish a bead loom bracelet, has shown you it’s not as hard as you might fear!
If this has got you interested in bead loom weaving, then you can find more patterns from Caroline in her Etsy store.
And, if you prefer to learn more, from video, have you seen Caroline’s ebook? It has a beautiful selection of projects, allowing you to grow your skills from beginner onwards. She has demonstrated all the techniques on video. So, if that sounds good, use this link to grab a copy of the ebook now.
And, stay tuned for some more great tips to make your bead loom weaving easier.


Thanks it helped me alot.
I am just starting with beating and my question is this how do you determine by looking at pattern what the width is and the correct closure size to use
Welcome to the wonderful world of beading! A good tutorial should tell you what size of clasp to use. If the tutorial doesn’t give that information, then you would be best to make the project, measure the finished size, and purchase the appropriate clasp. I don’t recommend just “looking” – maybe when you get to be experienced and have made a lot, you can reach the point where you know that a certain number of beads of a particular size and brand will require a certain size clasp. But that would only come with experience, and could still be open to mistakes.
I’m a crafter but novice to loom beading. These instructions are so clear and easy to follow. Thank you!