
Peyote stitch increasing and decreasing
If you’ve been following my Peyote stitch blogs in roughly the order I recommended, you should have learned how to work in flat and tubular Peyote by now. So, it’s time to learn Peyote stitch increasing and decreasing. This will allow you start creating shapes.

There are two ways of increasing and decreasing. First, you can add beads in the middle of a row. Second, you can add or remove beads at the ends of a row. The first method works in both flat and tubular Peyote. So, I want to talk about that here.
If you’re wanting to learn about Peyote stitch increasing or decreasing at the end of a row, look out for my blog on Peyote stitch shaping. This link will take you to all the blogs for learning Peyote stitch.
Peyote stitch increasing and decreasing in the middle of a row
Before I get on to teaching you the Peyote stitch increasing and decreasing method, I want to share a little bit of theory.
Don’t worry, this is really simple. But if you understand it, it should really help you to understand the technique.
An increase or decrease in the middle of a row actually takes place over two rows.
So, in the first row, you change the number of beads (ie add or remove a bead). This action will pull your work slightly out of shape. So, in the second row, your spacing will look a bit odd. But this is the row that ‘confirms’ the increase or decrease. So, your tension is critical here. The beads you add in this row will cement the change in number and begin to pull your work back into line.
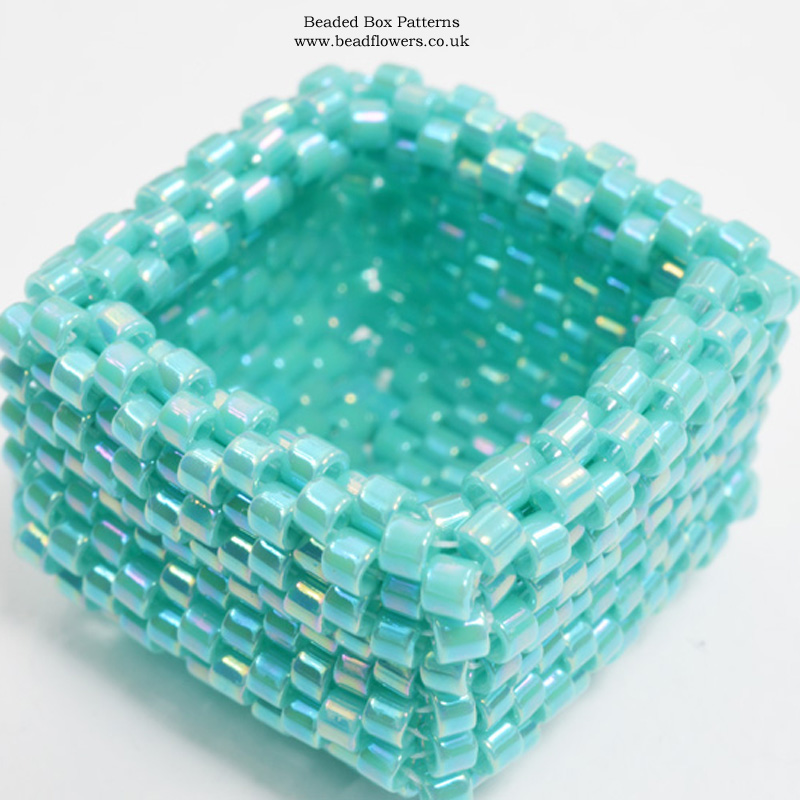
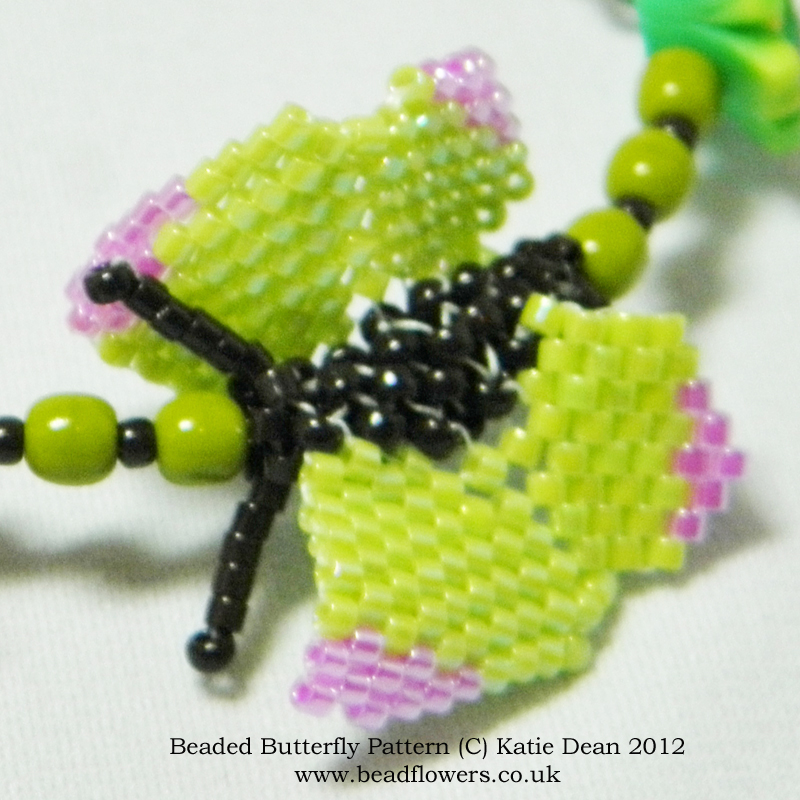
When you look back at your work, you will be able to see the point where you made the increase or decrease, but if you have kept good tension, you shouldn’t end up with a hole in your work there. I’ve shown a couple of examples so you can see how an increase or decrease will look in a finished piece of work.
In the box, above, you see the decrease used in three-dimensional work to create and shape the box.
In the butterfly below, see what happens when you layer increase upon increase without your secondary ‘confirming’ row. I’ll be inviting you to experiment for yourself in a minute when you’ve learned the basic Peyote stitch increasing technique.
Learn Peyote stitch increasing
Now, grab your beads. If you have a sample strip of Peyote, grab that as well – you can use it to practise increasing.
If you don’t have a sample to hand, then follow the instructions in this blog to make a short piece of even count Peyote.
Increase row 1
You are going to start working the next row of your Peyote stitch. But, when you get to a space in the middle of the row, you are going to add two beads instead of one.
Normally you would regard this as a mistake. But in this case, it is deliberate as this sets up your increase.
After you’ve added your two beads, continue to bead the rest of the row as normal, with one bead in each stitch.
In the diagram below, your row 1 beads are shown in red.

Increase row 2
Now, start to work back, adding your next row. When you reach the stitch with two beads, you are going to pass through JUST the FIRST bead.
Then, pick up a new bead and pass through the second bead in your pair.
Continue on with the rest of the row as normal. The row 2 beads are shown in green in the diagram above.
So, you have confirmed your increase and you should already notice that your work is sitting differently.
Continuing the piece
You can now continue to add rows as usual. You will use just 1 bead in each stitch in your row. But note: the number of beads per row will be one more than it was when you started your strip.
You will also see that your strip bulges or curves outwards.
You can make more increases in rows further along. If you line them up, you will end up with a curved end to your work. So, try a few experiments. Can you see when it feels right to increase? What happens if you increase in more than one stitch in a row?
You’ve learned the technique for Peyote stitch increasing. So, you are now ready for any project that requires you to use increasing.
Learn Peyote Stitch Decreasing
You can continue to use your test strip, or you can create another strip to practise decreasing.
You probably won’t be surprised to learn that the principle is the same in reverse.
Decrease Row 1
So, start beading your row as normal. But, somewhere in the middle of this row you are going to pass through two ‘up’ beads at once, without inserting a bead between them. I have shown this row in red beads in the diagram below.
Pull your thread tight so your beads pull inwards. This is the decrease.
Continue to stitch the rest of the row as normal.

Decrease Row 2
Start your next row as usual. When you reach the stitch where your two beads are pulled together, you will find you have a larger gap. So, you might be tempted to add two beads to fill this.
(Side note: some patterns may add two beads to graduate the decrease over multiple rows).
But, you are going to add 1 bead and just pull tight. This will ‘confirm’ your decrease and make your work pull inwards. I have shown your beads for this row in green in the diagram above.
Continue to stitch the rest of the row as normal.
Adding more rows
You can continue to add rows as normal. You may find the first couple of rows sit a little strangely as your beads find their way into position. But you should notice that you now have one less bead per row than you did to start with.
Again, you can experiment. What happens if you decrease in more than one place? What if you add some decreases in later rows? How does this all change the shape and feel of your work?
The best pattern for learning this technique
You can certainly experiment on your own, as I have suggested. But if you want an easy project that will let you really practice Peyote stitch increasing and decreasing, this bracelet is ideal.

This project uses two colours to help you identify the increases and decreases. So, you avoid the usual pitfall of getting lost in your work. I used tubular Peyote because that allowed me to create a workable piece of jewellery.
If you wish, you can extend the length of this and make a necklace. Click on the photo to get your copy of the pattern.
Variations on the theme
In some patterns, you may find slight variations on this peyote stitch increasing and decreasing technique that I have just shown.
You can create a more gradual change in shape by forming the increase/decrease over three rows. This would allow you to add a pair of beads, stitching through that pair, to help ease the ‘jump’.
Don’t worry about this – if a pattern calls for you to carry out a more gradual shaping, it should explain the technique in detail. So, as long as you understand the principles explained here, you will be fine!
What next?
Make sure you bookmark this page so you can return to it any time you need a reminder.
You can also follow this link to get a free PDF tutorial which details these techniques. So, you can print that out and keep it to hand with your beading projects.
You’re now ready to move on and try circular Peyote.


This is really helpful, thanks….
I’m very happy to hear that, Gladys! Thank you for stopping by!
Really clear instructions on this handy stitch. Sometimes when I am doing free form pieces I feel like I’m making it up.
Thank you for your kind comments – I’m so glad you found this helpful!
This is so helpful! Thank you so much for your generosity.
You are very welcome, Susan! I’m happy to be able to help, and thank you so much for your kind words and support. Wishing you happy beading!