
Materials for Kumihimo
In my last post, we took a look at the basic Kumihimo tools. So, now you’ve got those together, you need to gather up your materials for Kumihimo. This is just a very brief look at the basics. So, it will get you started, but there is more to learn if you want to move on to advanced projects.

Basic materials for Kumihimo
Now, Kumihimo is the Japanese craft of braiding. So, your basic materials will consist of something you can use to braid. I have found this is actually quite a broad range of things.
If you’re used to beading, you may be used to being told you need to use very specific types of materials. I’m talking specific thread, specific beads, etc.
Well, speaking as a beginner here, I’ve found I’m able to create beautiful Kumihimo ropes with a really broad range of materials.
So, back when I first invested in a Kumihimo disk, I didn’t have any specific Kumihimo cord. Now, I’m always impatient to get started when I want to try something new. So, rather than try and order any, I just grabbed some 3mm wide ribbon that I happened to have in my craft stash.
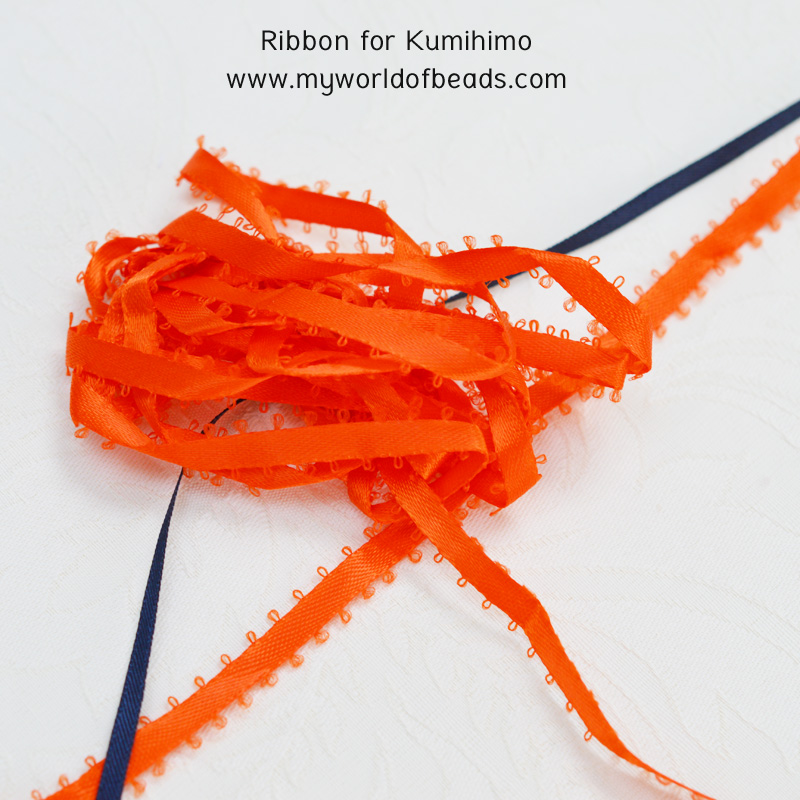
Now, I quickly became addicted to the braiding. So, I ended up raiding my craft stash for any vaguely narrow ribbon. And it all worked beautifully.
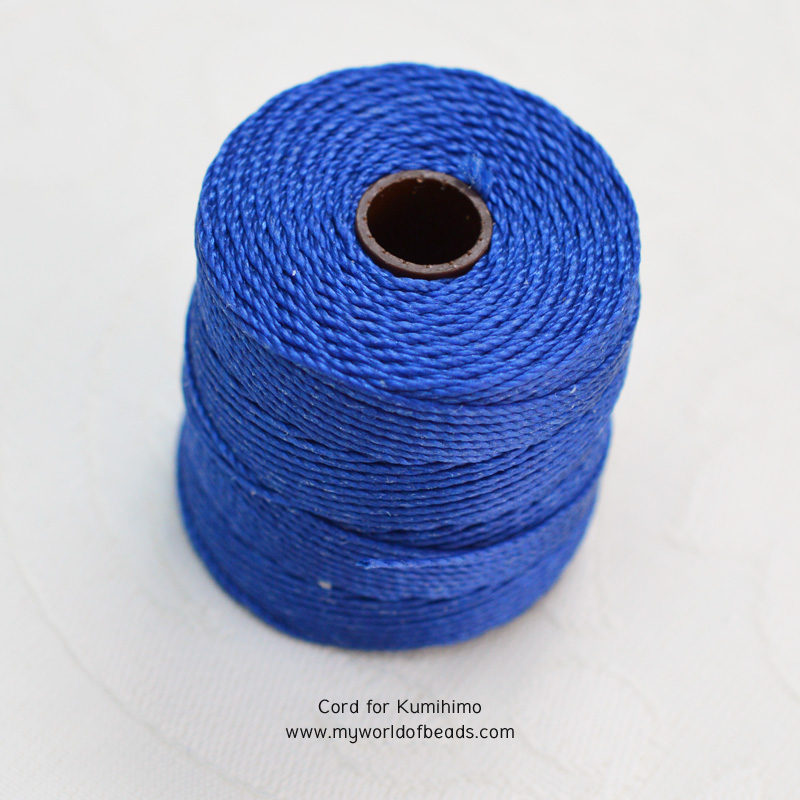
Then, I went back and investigated. So, I discovered that I probably should have been working with S-lon or C-lon cord. So, I did invest in some of that. You see, when you want to add beads to your cord, ribbon isn’t going to be ideal! (See how inexperienced I am?!)
I just want to add another little aside… If you feeling like experimenting, you can create braids with literally anything…including thin strips of fabric. So, don’t be afraid to go a bit crazy here and braid what you like.
The right cord…
But, getting back on track, like most beginners in any new channel of beading, I had no idea what I was buying. You see, C-Lon and S-Lon cords are basically nylon thread. So, they’re not designed exclusively for Kumihimo. In fact, the narrowest of these threads are really meant for use in bead-weaving with a needle.
It turns out, that I was wrong in thinking I could use any old thing for Kumihimo! If you want to achieve professional results and work on more complex projects, you do need to invest in the right kind of cord.
So, let me hand you over to Pru Mcrae to explain more about that. (Click this link to read Pru’s excellent blog post on cord for Kumihimo).
What about the beads?
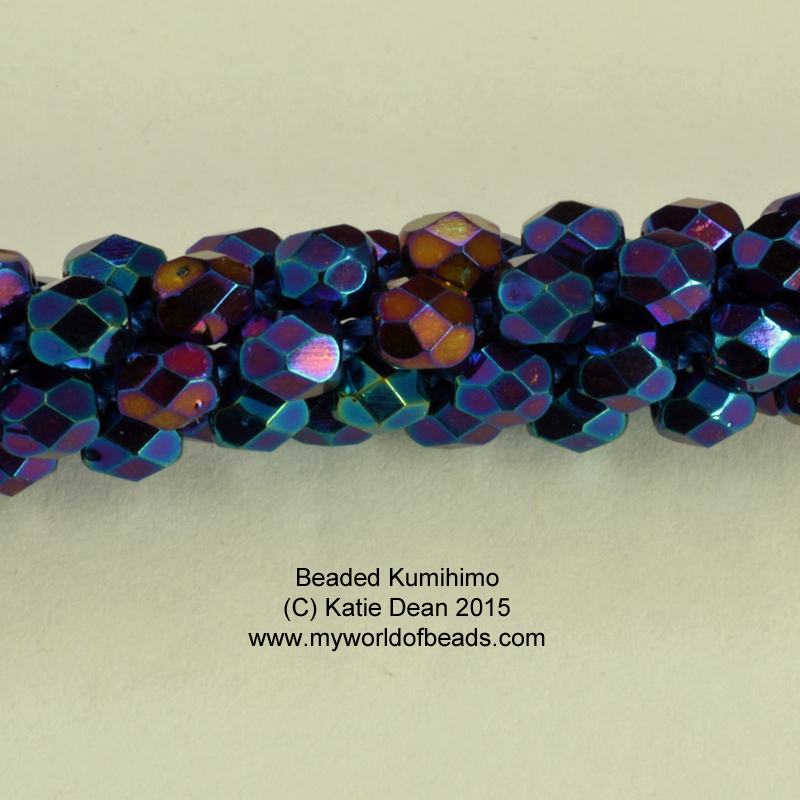
I’ve mentioned making Kumihimo ropes with beads. So, what kind of beads are we talking here? Well, really, I’m thinking single-holed seed beads.
I’ve worked with firepolish beads in 3mm and 4mm. This was the kind of rope that created…
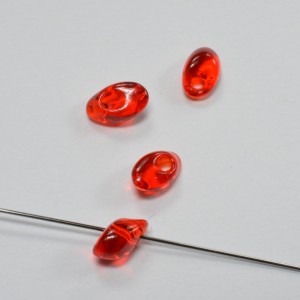
I also tried a few braids using Magatama beads. They have a naturally interesting shape, which gives a fabulous texture when it comes to Kumihimo…
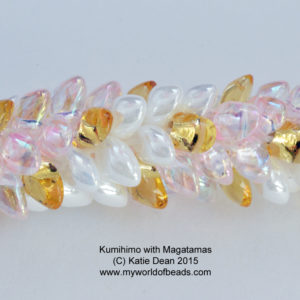
You could also try drops or daggers to give a similar effect. Then, of course, you can work with normal seed beads. Any size is possible to use, but size 8 or 6 would be a great place to begin.
So, basically, you have a lot of different options. Feel free to experiment, but also look out for tutorials and learn different braid structures.
When you come to add beads, your braid doesn’t change – you simply see beads instead of thread. So, you can use the braid structure and bead colouring to create wonderful designs and patterns.
Glue and End Caps
So, now you’ve braided your rope. How do you finish it off? Well, first, you need to seal the end of the braid to stop it unravelling. So, you will do that either with a knot, or with glue. Again, I’m no expert here, so I recommend you grab a tutorial and follow that. But I did find myself investing in some jewellery glue for the first time, when I started on Kumihimo.
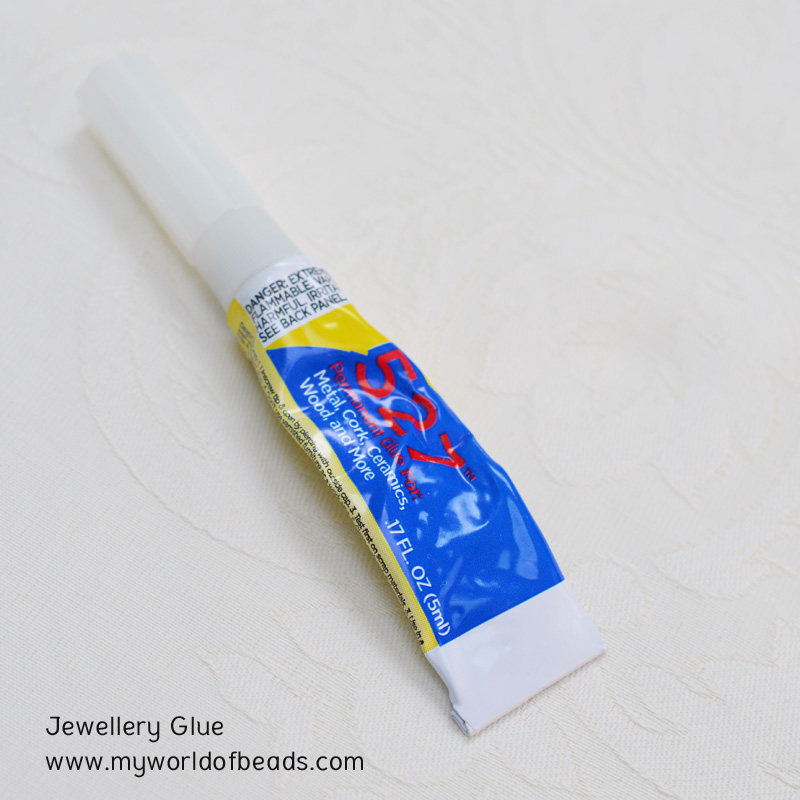
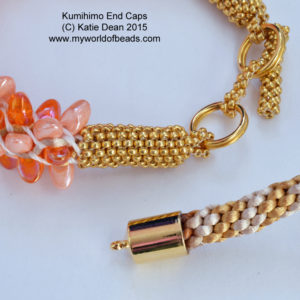
Your glue is also going to come in handy for the next step. If you want to turn your rope into a bracelet or necklace, you will need to attach a clasp.
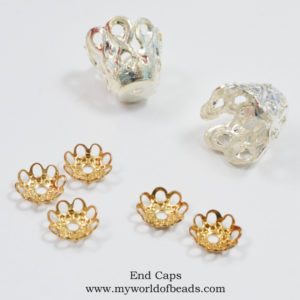
So, yes, clasps will become an essential part of your materials for Kumihimo. But you also need end caps. These fit over the end of a rope (glued in place) and allow you to attach the clasp.
Now, when I made my very first projects, I hadn’t invested in all the materials for Kumihimo. So, I was just using what I could from my existing stash. Since I was coming to this from a background of bead-weaving, I had plenty of seed beads. So, I used those to create beaded end caps for some of my projects. And I’m going to share with you my technique for doing that. Look out for that free tutorial in my section all about Kumihimo, at this link.

So, that should get you set up to begin creating your own beautiful braids… With, or without, beads!
Remember, I’ve got more information about different aspects of Kumihimo on here. So, if this is a craft you already love, or something you’re keen to try, there’s no better time to get started!


