
Making Basic Jewellery – Simple Techniques
There are two main ways of making basic jewellery. One involves stringing beads and I have dealt with that in a separate post. The other involves working with simple tools and findings in various ways. So, I’m going to take a brief look at some of those techniques here. I will link to some tutorials that you can use to try this for yourself.

Making Basic Jewellery with Loops
If your aspirations for making jewellery extend to earrings, then you will need to learn how to make wire loops and wire wrapped loops. You can use both these varieties of loop to secure beads onto a head pin or eye pin. Then, simply attach an earring finding onto the loop.
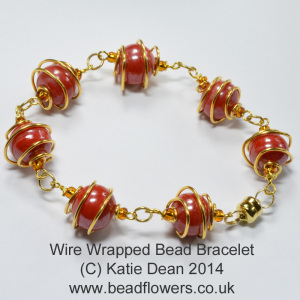
You can also create a collection of beads on head pins. Then, use jump rings or split rings to link these into a bracelet or necklace. That’s what I did with the wire wrapped bead bracelet that you see above.
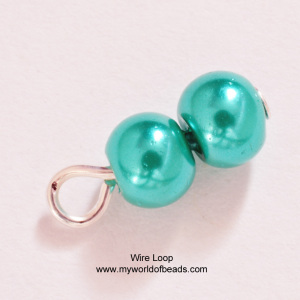
Wire loops and wire wrapped loops
The difference between a wire loop and a wire wrapped loop is two-fold. The wire loop basically just folds the wire around a pair of round nosed pliers. It can be unfolded in order to attach other elements before re-folding. The trick to the technique lies in placing the pliers correctly and measuring your wire accurately.
The basic wire loop is created by rolling your wire around the pliers until you have created a complete circle. You can see a sample in the left-hand photo, above.
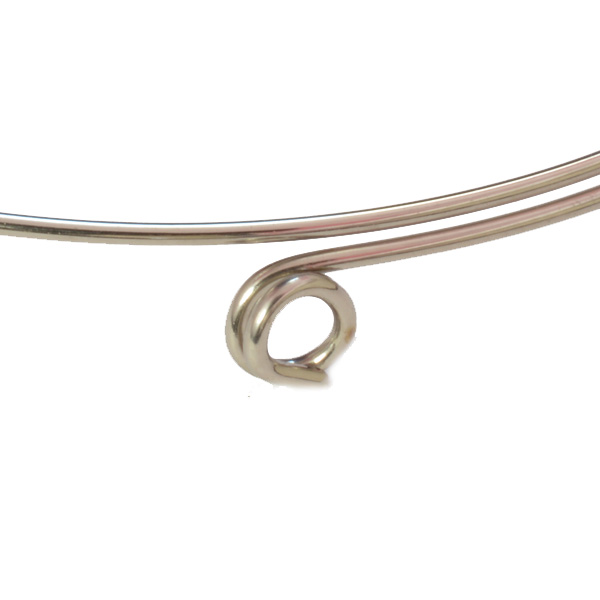
If you keep rolling the wire, you can create multiple circles next to one another. I find this creates a very secure finish for memory wire as it prevents the beads from slipping into the loop section and it also stops them from ‘gapping’. The photo below shows how this looks on a plain piece of memory wire.
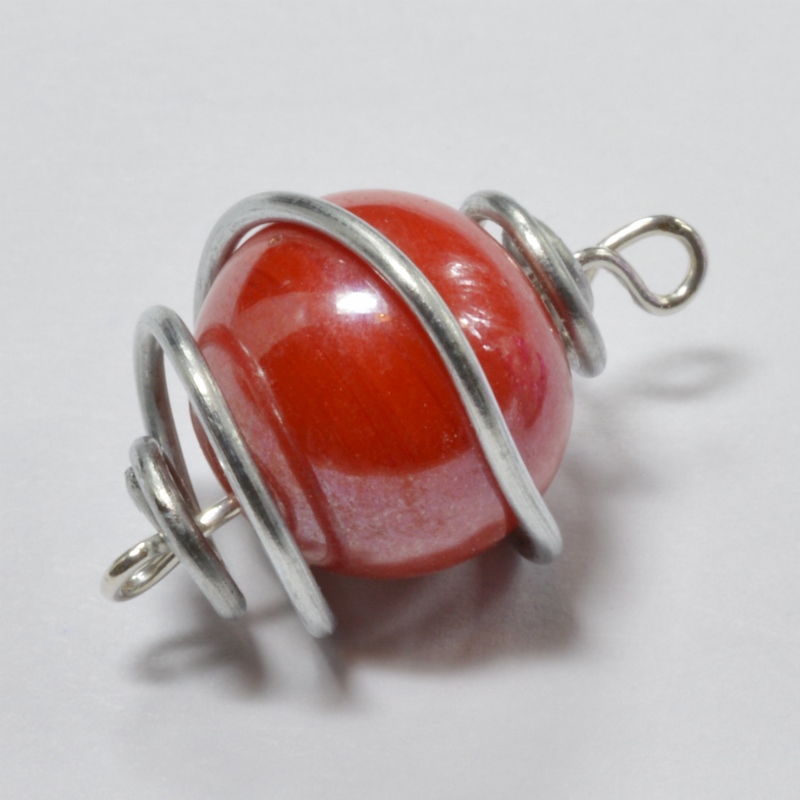
The wire wrapped loop has an additional element: as you make the basic loop, you create a stem of wire between the loop and the top of the bead. Then you wrap the wire around this stem to seal the loop in place. That is the technique I used to secure the bead onto my eye pin in the photo below.
You cannot unfasten this style of loop. But when done correctly, it gives a secure and attractive finish to your jewellery. I have a free tutorial you can try here.
Once you have mastered wire loops, you will be equipped for making jewellery with connections. So, this could be a basic pair of earrings, or a series of beads on pins that you link together.
Using Jump Rings and Split Rings
The final techniques to master for making basic jewellery are opening and closing jump rings and split rings. You need to understand the difference between these types of ring so that you will know when to pick the best variety for your project.
Opening and closing them is simple. Use a pair of pliers, but remember to slide the rings open so that you will be able to slide them closed again – never attempt to just ‘pull’ them apart. You can find a techniques sheet for using the different rings here.

Armed with this selection of techniques, you are now ready to start making jewellery. I have talked about the basics here. Yet, you can use all of these techniques to create truly stunning wearable art.
If you like this article and want to read more, you can buy the Focus on Making Jewellery edition of My World of Beads in magazine format. This will give you four basic jewellery projects as well as articles on selling your work and basic techniques.


