
How to cut beading thread for a professional finish
This post is in response to a question from a Better Beader member. She is a relatively new beader and has been finding that when she cuts her beading thread at the end of a project, she is left with visible ends of thread. So, she was asking how to cut beading thread so that you don’t end up with those small ends. As it happens, I have a few tips that might help…

How to cut beading thread: the golden rule
My first tip is this…
I have now been beading for 17 years and I still have projects where I don’t quite manage to cut the thread truly flush with the beads. So, I will end up with a tiny end showing if I look up close.
Unless it’s for a competition where the judges are going to be looking for perfection, my top tip is: don’t worry! Just think of it in the same way as you would a spirit bead.
Now, before you close this blog and walk away in disgust because I’m advocating that you shouldn’t seek perfection, let me clarify…
If your thread end is long enough to be sticking out so you notice it easily, then yes, you probably do need to look at the technique you’re using to cut your thread. You may actually be able to use a pair of tweezers to grip the thread and trim it closer with a thread burner. (More on that technique later).
So, some ‘long’ thread ends can be shortened with a bit of ‘fiddling’.
But, if you are regularly ending up with, say 5mm, or so of thread visible, then you need to follow these steps…
Use the right tools
Beading, like any other skill, works best when you use the best tools for the job.
When it comes to cutting thread, you have a few options. If you were just starting out, you might have just grabbed the nearest pair of scissors. After all, they will cut the thread. But they may not be the best option for trimming the thread in close so it doesn’t show.
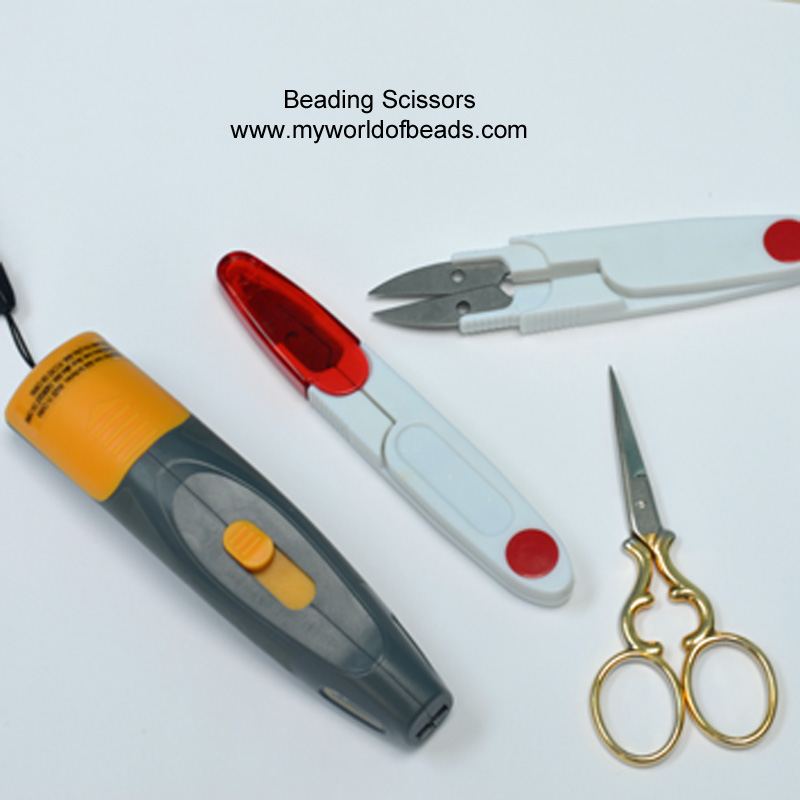
You can use scissors, but try to get a good pair of embroidery scissors. They have a very fine blade, so you will be able to angle them in close to your work. If you like the sound of those, this link will take you to a good brand that I recommend.
Your second option are thread cutters. Again, these have a very fine blade, so they will allow you to trim close to your work. You might see them referred to as ‘snips’. They are usually lightweight and really easy to carry around in your beading kit.
I particularly like this brand as it comes with a safety lid so the blade isn’t exposed when it’s not in use. Here’s the link to find out more.
The third option – in some people’s view, the best – is a thread burner. This is particularly good for cutting Fireline beading thread. I find it also allows me to get in really close to the beads when I trim my thread. So, I use mine a lot. And here’s the link to the burner that I use.
You’re going to see all of those down below in my little video, ‘How to cut beading thread’. So, you can get an idea about what you think might work best for you. I also have another blog post that just looks at the pros and cons of the different types of cutting tools. You can find that here.
Tips for learning how to cut beading thread
Just in case you need it, let me lay out those tips I gave you in the video, once again:
- Choose your method of finishing your thread – it could be knotting between beads, or just weaving through your work. (You can check out this blog post for a couple of options for finishing thread).
- When you feel your thread is going to be secure, you are then ready to trim it. So, make sure you have woven through to a point where you can access the thread easily.
- Pull it through the work really, really tight, levering it back against your beads. Then trim as close to the beads as possible – this should let the thread ‘ping’ back slightly so it ends up inside a bead. Just take care not to cut any other threads!
As with any aspect of beading, trimming your thread ends is something that can prove tricky at first. But the more experienced you become, the easier it gets. The important thing is you can now see what you are aiming for.
One more thing to watch out for
Another thing you’ll discover is that not all beads are equal. If you are working on a project with shaped beads, you’re going to find it’s easier to trim in close to some beads than others.
Typically, I find that large beads or beads with very rounded edges are tricky to get close to. So, if you have a choice of different beads, try and work out which will allow you to trim in close. Then, when you weave through at the end, come out of one of those beads before you trim.
Over to you…
So, hopefully that will set you up to achieve a more professional finish to your projects. If you found this helpful, please share this blog and the video with your beading buddies.
And, if you want more handy tips like this, delivered to your inbox once a month, just join our mailing list below!


I find that I am able to trim the closest if I hold my work from the thread, letting the beadwork hang with gravity just above my work surface. Then I gently press my cutting tool against the beadwork and snip. Using gravity in this way gives really close cuts every time.
That’s a great tip, Rachel – thanks for sharing it!