
Freeform Peyote Stitch: Your Essential Guide
Are you one of those people who quakes in fear at the mention of freeform Peyote stitch? Or do you love the sense of freedom that it brings you?

Well, if you fall into the first category, I hope this blog will convince you that there really is nothing scary about freeform. If you already love it, then perhaps this will give you a new way to think about the stitch.
What is freeform Peyote?
I think the easiest way for me to explain this technique is ‘beading without structure’.
Now, I was tempted to write ‘beading without rules’. That wouldn’t be a bad definition, but I think it is that idea of ‘no rules’ that scares people.
Maybe that’s a little strange. Wouldn’t you think that ‘no rules’ should mean ‘no mistakes’? In my book, that is precisely what it means.
So, in any of the ‘standard’ Peyote techniques, you have a strict thread path to follow. If you deviate from that path, then bad things happen. (That is, your beadwork looks messy).
At least that’s the way we’re often taught to think about beading. But what about that old saying ‘rules are made to be broken’?
To my mind, this is exactly what freeform Peyote stitch is all about. Learn the rules of Peyote, apply them and break them to ‘freeform’.
How to do Freeform Peyote Stitch
OK, so for many, this is the scary part. I don’t have a set of instructions for you to follow. There is no ‘method’ for working in freeform Peyote. Or is there…?
I think actually, there is. You do have a structure and a framework to guide you, but you then have the freedom to travel wherever you want.
Step 1
Before you start your freeform Peyote project, you should learn some Peyote techniques. I think the most helpful to learn would be these:
- Even count peyote
- How to increase and decrease
- Two drop Peyote
- Circular Peyote
So, if you already know all those variations of Peyote stitch, you’re off to a great start. If you need to learn, or revise, any of them, just check out this link for mini lessons that will cover all those techniques.
Step 2
Gather your materials. So, what beads should you use for freeform Peyote?
In the spirit of the stitch, anything goes! You can mix different sizes of seed beads. You can also mix up different brands.
Maybe you incorporate some slightly larger beads too. You could include some multi-holed, or shaped seed beads. Pearls, crystals and firepolish are also great options.
Basically, freeform Peyote stitch is a brilliant way to use up leftover beads from your stash. You can combine as many different types as you want!
Step 3
Choose a colour scheme. This is no different to any other beading project. So think about how to create interest and balance.
If you need some more advice about colour schemes, this link will take you to some helpful blogs.

Step 4
Start beading! Now, here’s the part where most people lose confidence and put the project to one side.
So, how do you start?
Exactly the same way as you would in any other Peyote technique: pick up a string of beads.
You might use all the same beads. Or you might try mixing up different beads.
So, first, decide how long your string is going to be. Do you want it the length of a bracelet (to fit right around your wrist)? Or how about the length of a necklace? Maybe you decide to just start with the width of your bracelet/necklace and build along to create length.
Step 5
Now, you just need to play the ‘what if’ game…
- What if I start working in even count?
- What if I add a couple of ‘two drop’ Peyote stitches?
- Or, what if I make an increase or decrease?
- What if I use some different beads here, or change colour?
- What if I string several beads and make a little circle? Could I then develop this into a section of circular Peyote?
- Or what if I string a length of beads and join them to my first length further along? How can I fill in the area I’ve just created?
- What if I zip beads together?
Just start working, adding beads as you wish, asking yourself these questions all the time. See where your imagination takes you! As your structure grows, you can think about using strings of beads to create an ‘outline’ for an area. Then fill it in. Which beads will fit best? Think about shape, think about colour.
If you are making a necklace, then remember, you need to shape it to sit around the neck. But apart from that, anything goes.

How to correct mistakes in freeform Peyote
Here’s the best news. There is no such thing as a mistake with this technique. If you don’t like where your beads are sitting, then add more beads on top, or squeeze a bead in between your existing beads. This will push everything out of alignment and give you a new shape to play with.
The more pieces of freeform Peyote you try, the more your brain will start to see patterns, form its own ‘rules’ and develop your style.
This technique is all about freedom. It’s about losing your inhibitions and letting go of the idea that there is ‘right’ and ‘wrong’.
So, I invite you to grab your beads right now and start trying this. Don’t dive into a huge project right away. Just try making lots of little samples and see what happens.
A freeform Peyote project to try
And, if you’re still not brave enough to just try this on your own, I have a free pattern to guide you through your first attempt.
So, follow this link to download your pattern and give freeform Peyote a try!
Where can you use freeform Peyote?
The short answer is: anywhere!
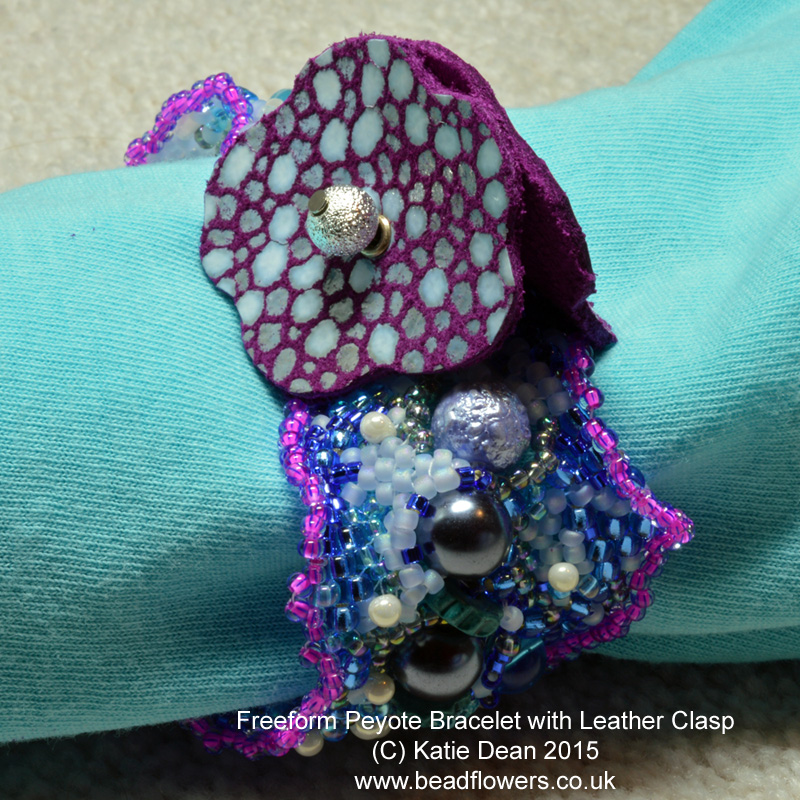
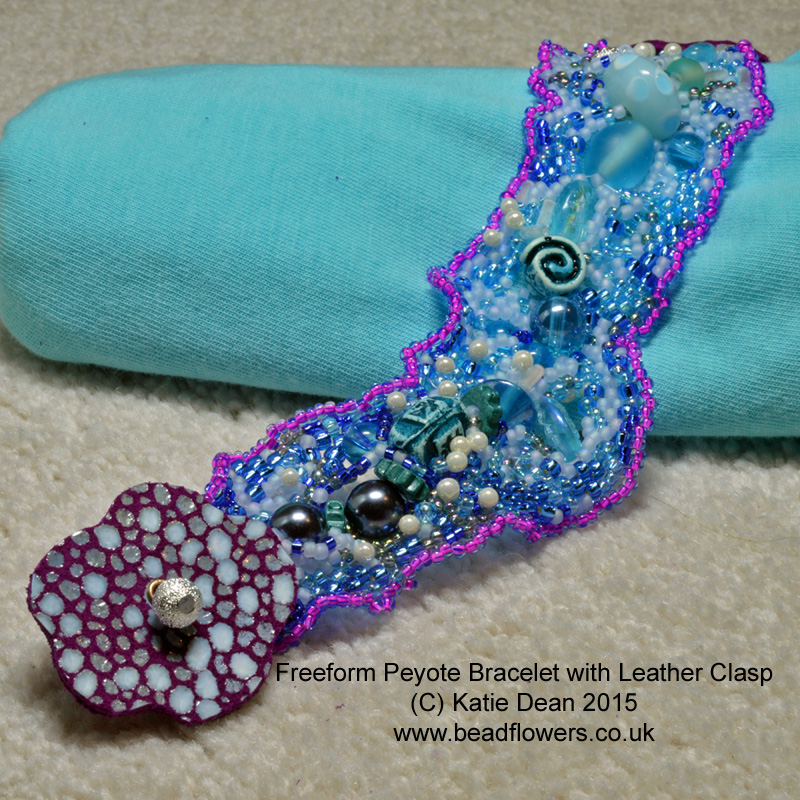
You can make an entire piece of jewellery using this technique. Or you can use it to add an edging to a piece (see the ‘Bead Graffiti’ pattern example, in the photo near the top of this post).
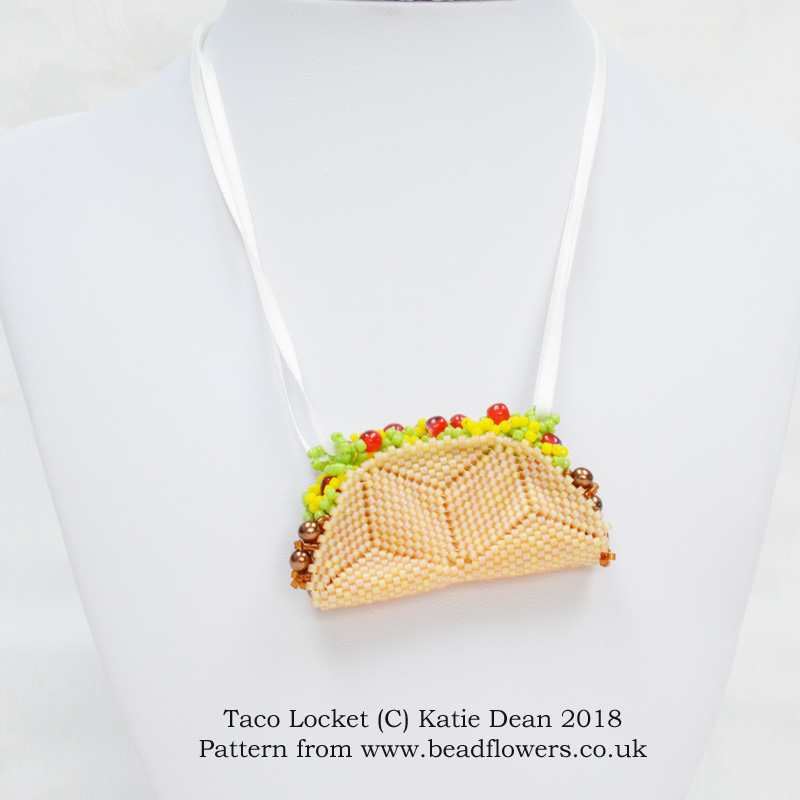
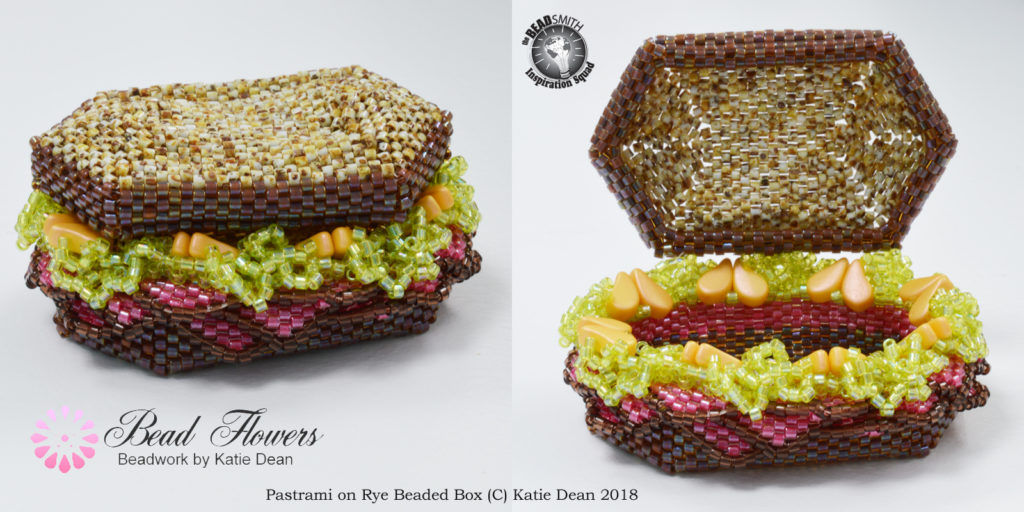
You might also use it as an element within a design to create an effect. I used this idea in my Taco locket and my Pastrami sandwich to give the effect of salad filling.
So, I’ve been scattering images of projects that use an element of freeform, throughout this blog. That may be a good place to start experimenting with freeform as you will just use a small amount, within a larger structured project.
So, if any of those ideas appeals, just click on the photo to get a copy of the pattern.


