Basic Kumihimo Tools
Now, as I said in my last blog post, I’m a beginner when it comes to Kumihimo. So, the information I’m sharing here is enough to get you started. But I will be calling in some proper experts to give you more help too. For now, let’s get back to the basic Kumihimo tools.

You may or may not know, Kumihimo is a traditional Japanese form of braiding. It has been used for centuries and is intended for creating ropes and braids. Usually these are used on fashion items, or to create things like curtain ties.
A few years ago, the beading world began borrowing from this craft to incorporate beads and create jewellery. It has been a hot craze…and no wonder, since the basic techniques are simple to do and very soothing. As with anything else, you can get a lot more complex as you develop your skills.
So, what has all this got to do with the basic Kumihimo tools?
What are the basic Kumihimo tools?
I’ve just said that this is a traditional Japanese craft. Well, the traditional tool is something called a Muradai. That allows you to set up the cords and create the braid. If you’re interested in finding out more about that, check out this blog.
Disks
When it comes to Kumihimo in the beading world, we use a disk. Now disks come in different shapes and sizes, depending on what kind of project you want to create.
Here are a couple of examples…
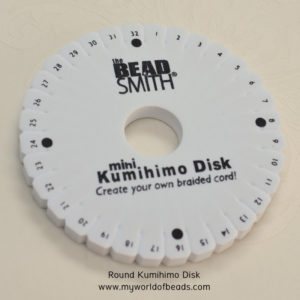
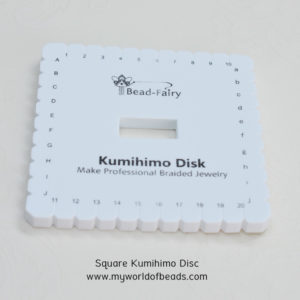
The immediate difference you’ll see is in the shape. You will use round disks for creating ropes or cords. The square disks are designed to create a flat braid.
You will also find that you can buy disks in different sizes. This doesn’t affect the finished braid. But you may find you feel more comfortable with a larger disks – or with a smaller disk. That has a lot to do with the size of your hands and the way you hold your work. So, the size isn’t critical when you start out. But you might want to try different sizes as you get more experienced.
You will see the disks are numbered and have a hole in the middle. What you probably can’t see as clearly is that the edges are grooved.
So, when you set up the disk, you will be asked to thread your cord into specific numbered grooves. The cords cross in the centre, so as you braid, the braided cord will move downwards through the central hole.
Kumihimo patterns typically tell you the order in which you move the cord according to number. For example, ’16 to 32′ would mean removing your cord from slot 16 and placing it in slot 32.
Weights
Now, I’ve just mentioned that your braid will descend downwards through the central hole in the disk. Well, I discovered that it really helps if you have a weight to guide it through. Incidentally, this also helps you get a more even tension.
You can try a makeshift object when you first start. But I immediately invested in a Kumihimo weight, which looks like this…
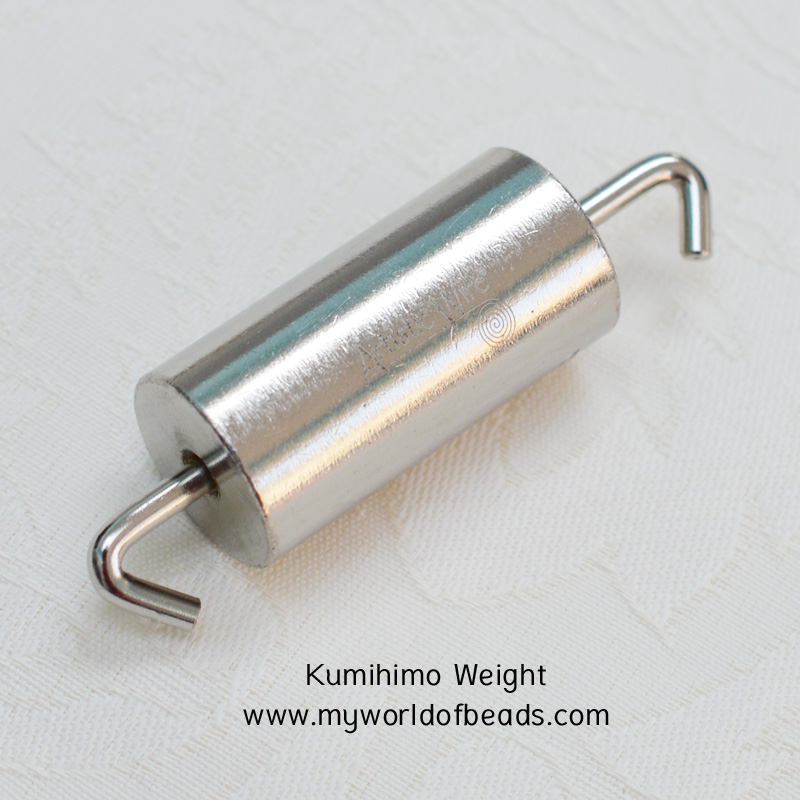
So, you hook the weight onto your combined cords, at the point where they cross over, in the centre of the hole in the disk. The weight hangs downwards and will keep pulling your completed braid down as you work.
Bobbins
The other basic Kumihimo tools that I quickly discovered I needed, were bobbins. You see, braiding uses up a lot of cord. So, even to create a bracelet for a small wrist, you’re going to need a very, very long length of cord.
All your cords are going to be hanging from the outside edge of the disk while you work. So, if you leave them hanging loose, they soon get tangled together as you move cords from place to place to create the braid.
That’s where the bobbins come in. You can wind each cord onto a bobbin. So, you then have bobbins hanging from the edges of your disk, instead of long lengths of thread. You just unwind the cord as you need it and tangled cords are no longer a problem!
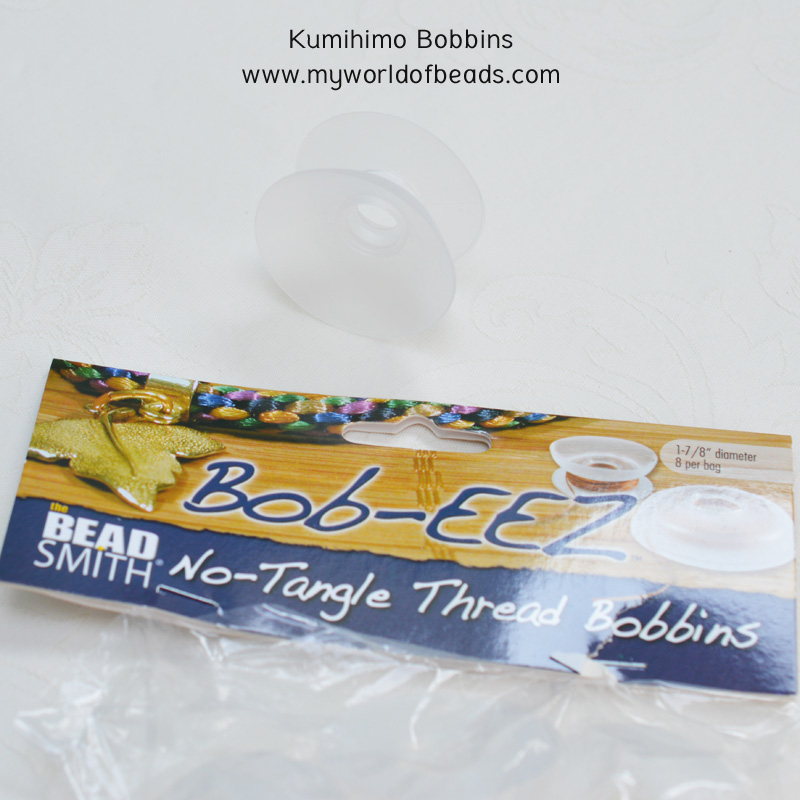
Now, the nice thing about all this is that the bobbins and even the weight can be used in other types of craft project. You can buy bobbins in different sizes. So, even if you are working with beads on your cord, you can still wind everything onto a bobbin to save those tangles!
If you would like to see some Kumihimo in action, check out this video from Pru Mcrae.
What next?
Well, if you’re keen to learn more about Kumihimo, check out the other posts in this section.
If you want to learn more about beading in general and improve your skills, then why not join my mailing list? You get a free gift to welcome you. Then, every month I deliver a newsletter direct to your inbox. This is packed full of helpful information about beading materials, different techniques for beading, tips, advice on selling your work, the latest book reviews, and more! So, if that sounds good, click here to sign up now.