
Jewelry Photography Setup
 Jewelry photography setup is key to making sure your photos sell your work in the best way they can. In this article I will be focusing on how to vary the setup you need for composing the best shot you can for different scenarios. If you are looking for more information about the equipment you need for jewelry photography setup, then try this article.

Once you’ve managed to get the basics of focus and lighting right, the next most important thing is to understand how to set up your photos. This will depend entirely on why you are taking the photo. Is it to enter into a competition? Perhaps you want shots to use on a website to sell your work? Or, are you trying to take step-by-step photos to illustrate a pattern or send in for a magazine article? Each scenario requires you to think about different things.
Let’s start with competition photos. A lot of jewelry or beading competitions require you to send in photos of your work for the first round. In some cases, the entire competition is based only on judging photos and your actual piece of work will never been seen ‘in the flesh’ by the judges. It is of course essential that you make sure your photos are sharply in focus and well-lit so that the judges can appreciate the true colouring and the techniques you have used. However, you will also want to think about how to show the piece so that it conveys the most realistic perception possible. Is the bracelet below better viewed as a flat band, or on the wrist, or as it would appear when fastened, but without any model?


It may even be worth thinking about the display issues before you start designing. I say this because I have come a cropper in designing pieces that are so detailed and intricate that it is almost impossible to photograph them in such a way as to do them justice. A prime example is my 2013 Battle of the Beadsmith necklace, ‘High Stakes’. This piece was fully reversible and had different detailing on the front and back, so finding angles from which to take it proved so difficult, especially when I had only four photos to make sure it progressed through the first round. Needless to say I failed there!
However, it’s worth using it as an example for my first point. Is your photo jewelry setup best on a model or on a plain background? Never be tempted to use props or other styling devices for a competition entry photo – it will only detract from your work and may even annoy the judges. To answer the question: a model will demonstrate things ![]() like perspective, size and the way in which the jewelry sits when it is being worn. If there is something unusual about any of these aspects, then you probably should use a model. Generally the rule for competition photography is to keep it as clean and simple as possible, so if your jewelry is just a single strand necklace of 18″, there is no benefit to showing it on a model – just lay it out flat on a plain background. In fact, putting it on a model may even make life difficult for you as details
like perspective, size and the way in which the jewelry sits when it is being worn. If there is something unusual about any of these aspects, then you probably should use a model. Generally the rule for competition photography is to keep it as clean and simple as possible, so if your jewelry is just a single strand necklace of 18″, there is no benefit to showing it on a model – just lay it out flat on a plain background. In fact, putting it on a model may even make life difficult for you as details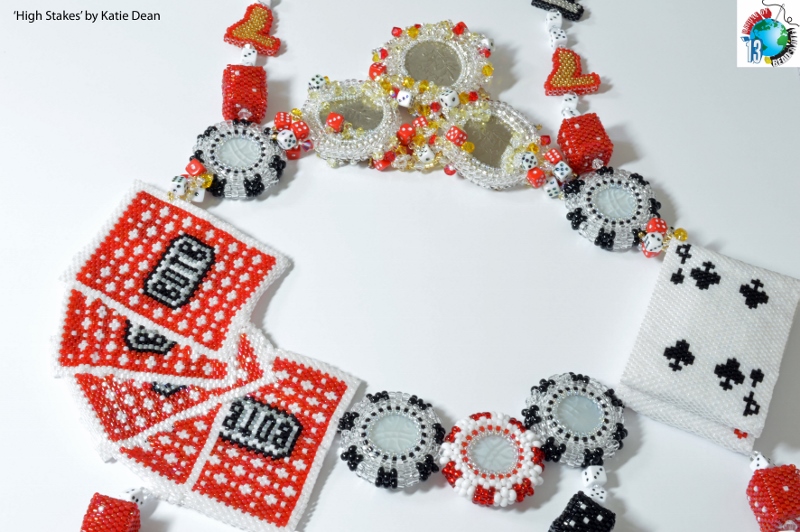 like the clasp may be hidden out of sight by the model. You can see two photos of my ‘High Stakes’ necklace: one as it is worn and one as it appears flat – see what you think. I actually included both as, although the flat version showed all the elements of the piece, it didn’t really give much of a feel for the scale of the necklace, so I needed to model it for that reason.
If you are using a plain background, then think a little about the colour. White is always best, but if you have made something using a lot of white beads or silver metal, you may find it merges into a white background, so you will have to think about another colour. This can have an impact on lighting, so I have looked at this decision in this article. If the competition is a really big deal, then it would be worth looking into using a professional photographer to make sure you get excellent shots. I can recommend the services of Michael Wicks!
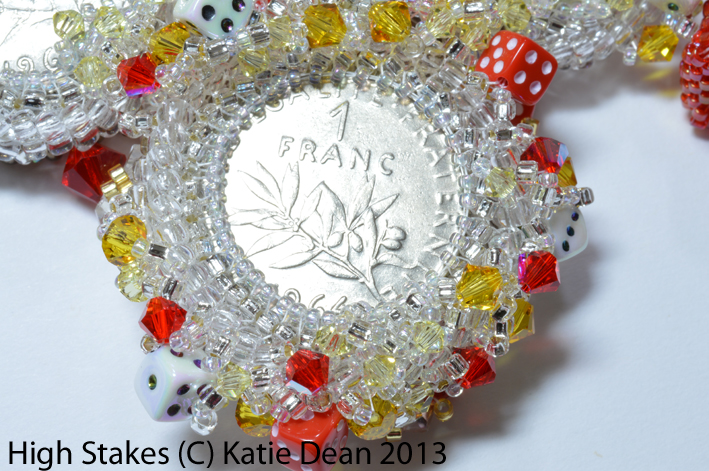 For a competition, you will also need to show some very detailed shots to give the judges the opportunity to look at your technical ability. They will be looking for good tension, checking that you have no loose beading thread, or in traditional jewelry, checking that jump rings have been professionally opened and closed and crimps have been done neatly. If you have done something particularly technically difficult, and done it well, then make sure you photograph that to show the judges.
Finally, this may seem obvious, but check the rules! Make sure you enter the correct number of photos and make sure they are the correct file type and size. Incorrect photos are usually disqualified, no matter how amazing your work.
If you are photographing your work to sell in a shop, then all those points about conveying the size, colour and shape accurately will of course apply. Your customer is buying from a photo, so the more accurate the details, the better. Again, you should include some detailed shots so that they can appreciate the complexity of your work. However, photography for this purpose is all about selling, so you may want to think about styling your shots with some props. If you are doing this, then think carefully. The props should not overpower the jewelry, so make sure the main focus of the photo is still your work. Your choice of prop should also reflect the message you want to give your customer. If you are selling a really expensive piece, then your props want to conjure up a feeling of affluence…think about hanging earrings from a champagne glass, or draping a necklace or bracelet over a champagne bottle for example. If your style is all about gothic and is aimed at that market, then is it a good idea if your jewelry photography setup includes a twee bunch of flowers? I staged a couple of different shots for a bracelet – see which you think looks better. To some degree, this is a matter of personal taste, so it may be worth consulting a few friends to get their opinions as well. I also tried using a patterned background, but as you can see, this completely overwhelms the bracelet, so do take care.


If you are photographing jewelry for step-by-step instructions, then there is only one rule: make it as clear as possible. Think about what you are trying to show. You want the detail of the step to fill the shot, but you should also think about whether it is helpful  to show hands – in the photo to the left, I wanted to illustrate a technique for threading a needle, so this photo is all about how to use your hands to help you. In the photo to the right I wanted to show the detail of the finished loop,
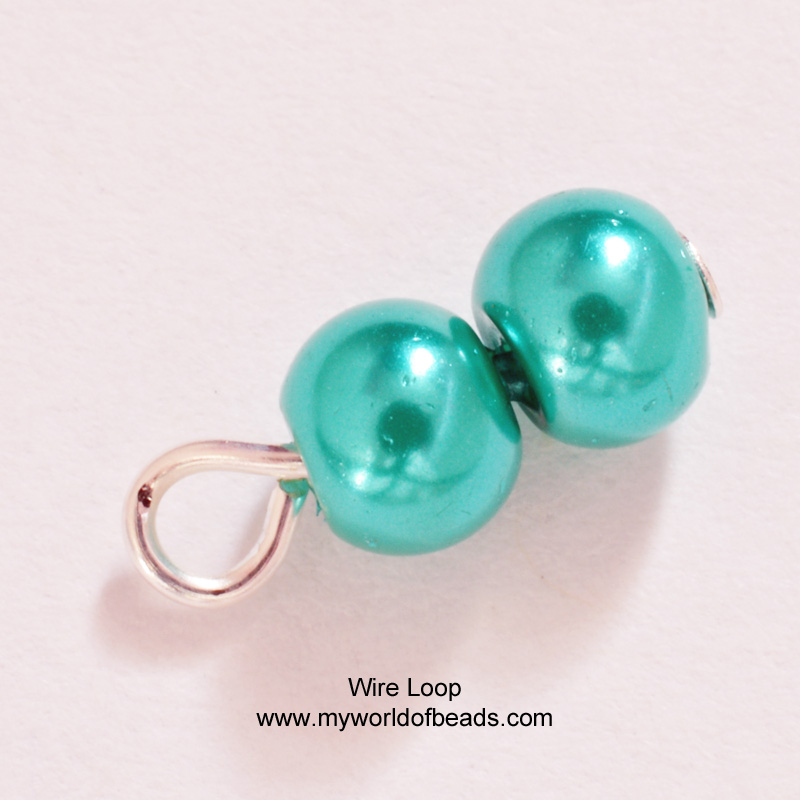 so holding it or including my hands would add nothing to the information I was trying to convey. If you are photographing steps for a bead-weaving project then think carefully about where the needle appears: do you need to see it to show where the thread goes or should it be out of shot? If you do need to show tools, then try playing around
 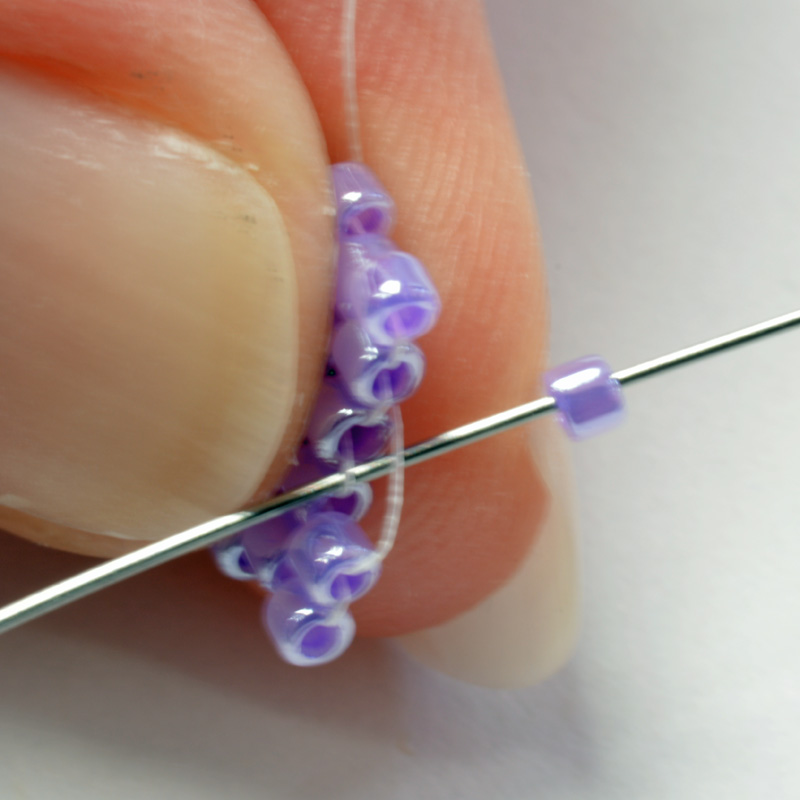 with different angles for the photo to make sure you show the detail as clearly as possible. Is it easier to see if you are looking down on the work, or looking along it or at it face on? Try and put yourself in the shoes of the reader and think about what they need to see in order to make your project successfully. My tip is to take the same step from several different angles and then look at it on a computer screen to see which angle looks best.
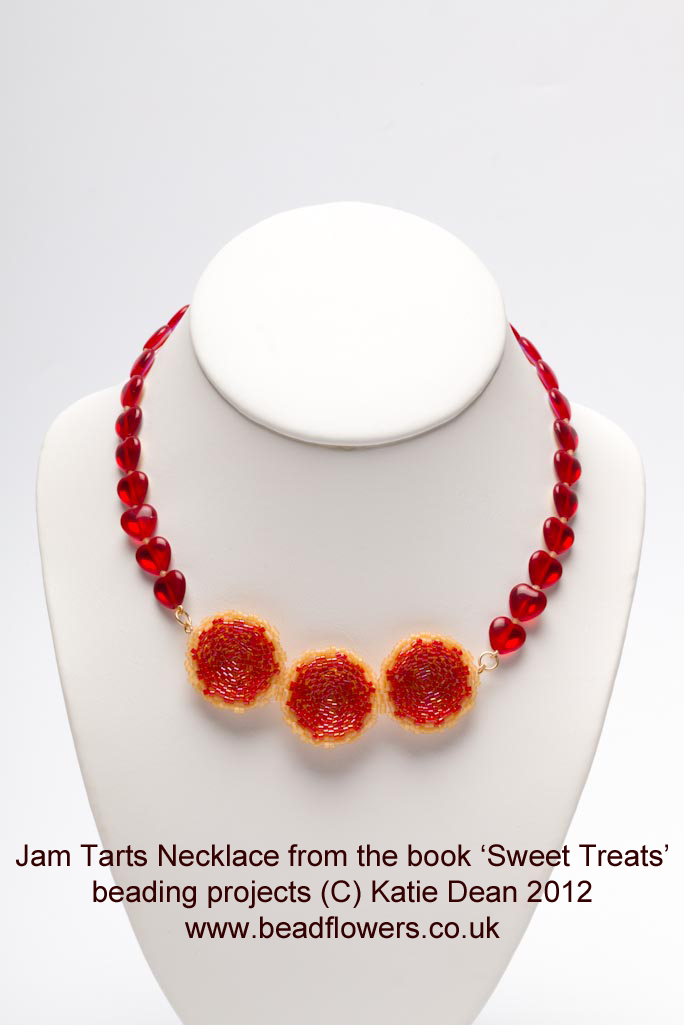
The reality is that a professional photographer is going to spend literally hours setting up a single shot. You will find the camera lens ‘sees’ things differently to the human eye as, like it or not, our eyes are looking at a much wider field of vision. This means that something may look like the perfect setup when you arrange it, but once you take the photo, you can see you need to adjust things. So make sure you check your photos as you go: download them onto a computer screen and really look at them with a critical eye. Is the jewelry really in the perfect position, or should it be moved to the right an inch? Check that your components are all lying at the perfect angle and adjust them if 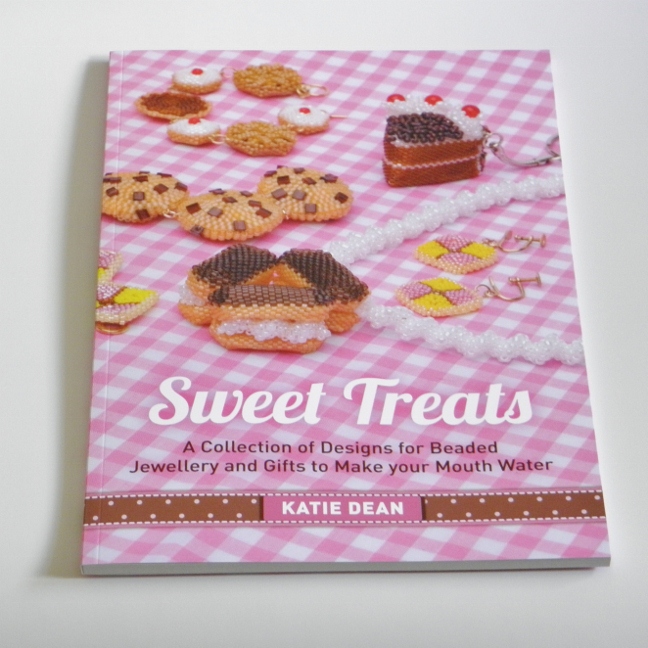 you need to. The photo for the cover shot of my Sweet Treats book took literally two hours to set up and get perfect. I forget how many shots Michael took, but we kept looking at each one and would see perhaps one cake needed adjusting a little, then adjust it, then find it had been too much, so pull it back, then think perhaps it would be better if we swapped this one with that one, and so on, until we had that perfect shot that just cried out to be used. If you are playing with positions like this and checking them each time, then remember to leave both your camera and the jewelry standing ready whilst you check the photo. If you move the camera, then you will alter the view or angle through which the lens is viewing and will effectively be starting from scratch with the setup as you find that the change you have made won’t work because you’re now looking at the scene from a new angle. My best advice for all of this is don’t be afraid to make mistakes and ask for constructive criticism from people you can trust…it’s the best way to learn!
So I hope these tips will help you to find ways you can convey your jewelry and beadwork in its best possible light for all occasions.


I’m very glad I found your blog. because of a search about color in peyote beadwork I came upon your book about perfect clasp,
Thank you so much Stephanie – I’m so glad I was able to help