How to increase the size of a beading project
I’ve just had a very interesting question from Gail. She wanted to know how to increase the size of a beading project. Now, although that’s a great question, it doesn’t have a simple answer. You see, it depends entirely on what stitch you’re using and what kind of thing you’re making. Gail didn’t give me any specifics for her plans, so let me talk you through some of the basics. That should give you enough guidance to figure things out on your own, or delve deeper into techniques in this part of the website.

How to increase the size of a beading project very easily
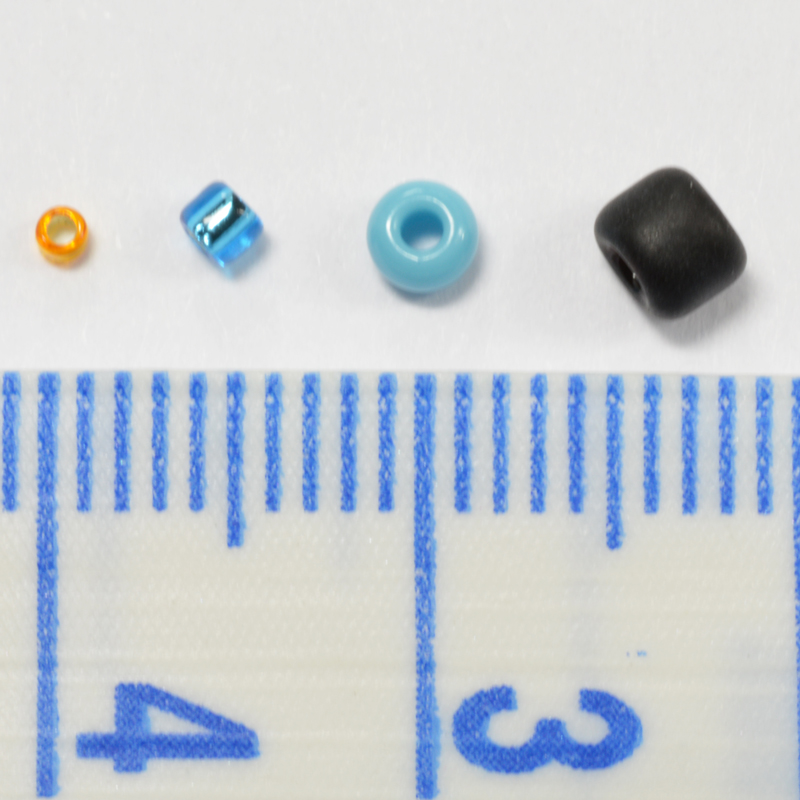
The simplest way to increase the size of any project is just to use bigger beads!
However, you do need to keep to the same type of bead. So, if your project is made with cylinder beads, it may not work in seed beads. That means, if you’re using 11/0 cylinder beads, you can’t just switch to 8/0 seed beads. BUT, you could switch to 10/0 Delicas (these are a brand of cylinder beads).
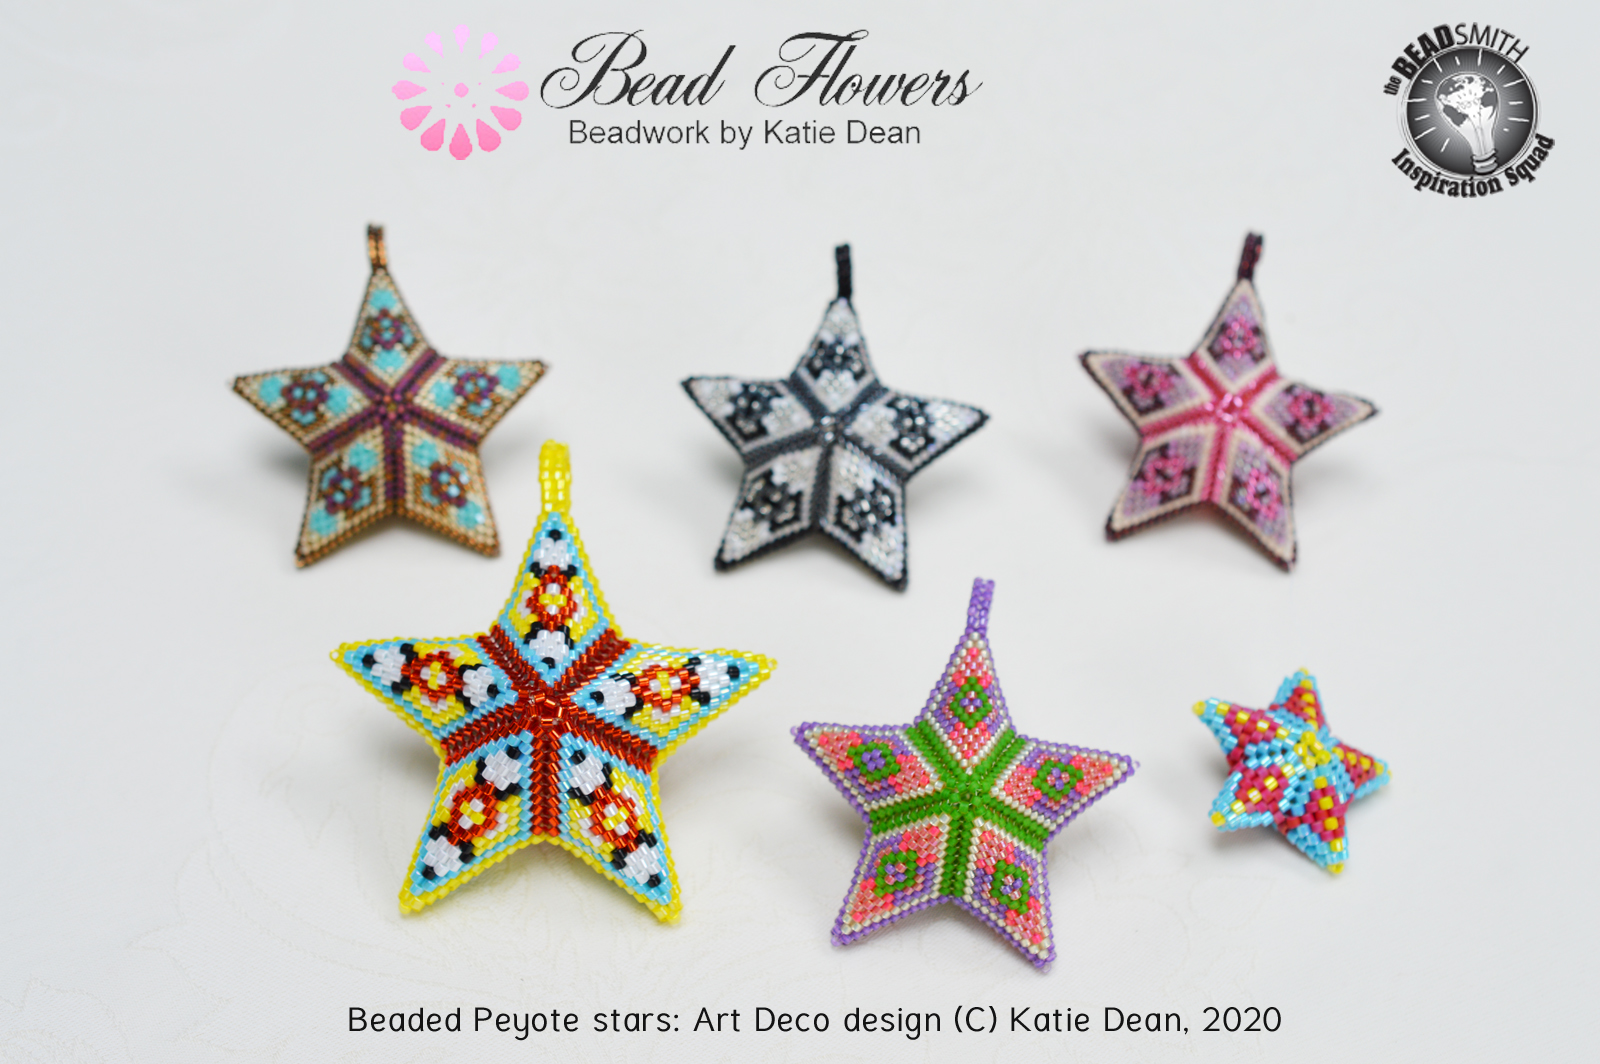
(In the sample above, the orange and yellow star, bottom left, is the same design, but made with 10/0 Delicas – the others are all made with 11/0 Delicas. You can get a free taster class learning how to make these stars by using this link.)
If you’re already working in 11/0 seed beads, then you could switch up to 8/0 seed beads.
You can also reduce the size by switching to a smaller bead (same rules – stick to the same type of bead).
So, in a lot of cases, this can work. But it’s not a perfect solution.
For example, if your project is using a variety of beads, you may not be able to switch sizes in all the bead types. Also, there is a risk that a different size of bead makes the technique behave a little oddly. So, you can’t absolutely guarantee success with this method. But it can be an easy win, and is something to think about.
How to increase the size of a beading project by adding more beads
The idea that Gail had in mind was adding more beads. Certainly, if you are beading a flat strip, you can add more beads to each row to make the strip wider. If you want to make the strip longer, then you need to add more rows.
In order to make these alterations, you need to understand the technique that you are using. To increase the width, you will need to add your extra beads in the starting row. This will give you more beads per row, and hence a wider strip.
The number of extra beads will depend on the technique you are working with. So, that’s back to understanding the technique thoroughly before you try to make alterations.
For example, Right Angle Weave is built from units. So, you would need to add on any number of extra units.
Herringbone stitch uses pairs of beads in each stitch. So, you’re going to need to add on an even number of beads – remembering each pair will become an additional stitch in your subsequent rows.
Square stitch works in single beads, so just add on any quantity of single beads and you’ll be fine.
Peyote stitch is the strange one. Your initial string of beads is actually setting up TWO rows. So, although you only add one bead per stitch (unless you’re doing two-drop Peyote), if you widen the starting strip, you will need to remember you are dealing with two rows, not one. That means, adding an even number of beads. If you added an odd number of beads, you would end up converting your Peyote from even count to odd count, or from odd count to even count. That’s fine, you just need to understand that’s what you’re doing.
So, before you start playing around with patterns, learn the technique basics so that you understand what you’re doing.
Adding more rows is very simple – just keep beading as you have been until your strip is the length you want.

What about dimensional beadwork?
So, that has shown you how to increase the size of a beading project that is flat and a basic strip. What happens if you want to increase the size of something like a beaded box?
Well, you would need to add more rows to the box base. This will increase the size of your flat shape. Again, nothing complicated here – just keep on beading the base rows until your flat shape is the desired size.
Then, you probably want to alter the height to keep it in proportion. So, again, just bead extra rows to the box sides.
If you’ve done that, you will need to mirror any changes you made on the box lid. So, that would mean increasing the size of the lid.
As with the flat strips, you need to understand how the technique works in order to calculate the changes accurately. So, go back to basics and make sure you understand the simple techniques before you try to get fancy with changing things.


Jewellery with shaped beads
It’s also possible you may want to alter the length of a necklace or bracelet. You may be working from a simple seed bead only pattern, in which case, you’ll be using one of the basic techniques. So, the same rules apply as for the flat strips.
However, you may be following a pattern which uses a combination of shaped seed beads. In this case, it’s most likely that the designer will explain how to alter the length. If they don’t, you can try figuring out whether or not you can repeat a bead combination to lengthen the pattern. That may not be possible. So, you might have to accept that the size cannot be altered on some projects.
The problems with doing this
You’re unlikely to encounter too many problems if you’re just altering a flat strip of beadwork.
But, if you’re trying to enlarge a box, you can face significant difficulties. My experience has taught me that there is an ‘optimum’ size for a beaded box. If you get bigger than that, the beadwork stops holding its shape and you end up with a floppy box.
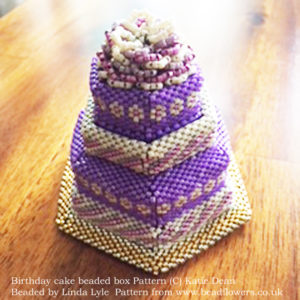
If you’re making a box with shaped beads (here is an example), then things may be even more complicated. The beads may not lend themselves to simply adding more rows and still keeping the integrity of their shape. So, it may not be possible to increase the size of a project like this.

What you may not realise when you’re following a pattern is that a designer often makes decisions for a reason. They might not have been fed up with stitching, or trying to save on the quantity of beads. It may be that the technique simply stops working when it reaches a bigger size. So, for some projects, you are going to have to settle for the size that is given…or take up designing yourself!
Next Steps
Now, hopefully that has given you a taster of the principles. As I said in the beginning, there isn’t a straightforward answer, but learning how to increase the size of a beading project is something that comes with experience.
The first thing you need is to really understand the techniques. So, spend some time learning those, and the rest will evolve! And if you do need to learn some, you can check out these online beading classes for starters!