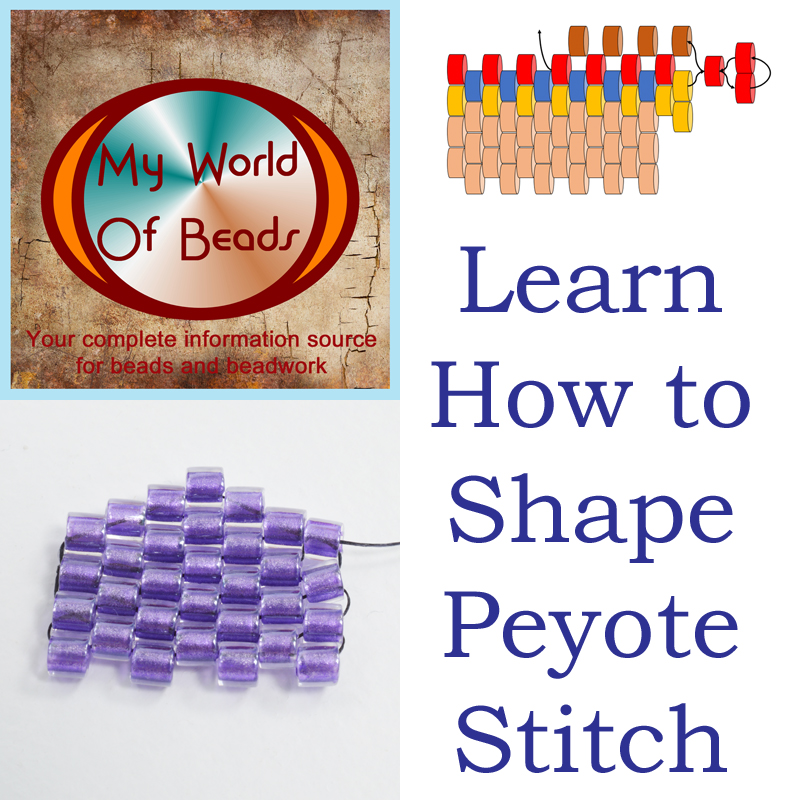
Zipping Peyote Stitch
Zipping Peyote stitch, also known as ‘zipping up’, is really easy! Hooray!

So, I should be able to keep this a short reference blog as I explain how to zip up and why you might want to.
What is zipping Peyote stitch?
It is literally joining two ends or pieces together. So, there are various scenarios in which you might want to do this.
You might have a strip of flat Peyote that you want to turn into a tube. So, you would just fold your strip to allow the ends to meet, then ‘zip up’ to join them.
You might also have two separate pieces that you want to join together. So, you could do this by ‘zipping’ them.
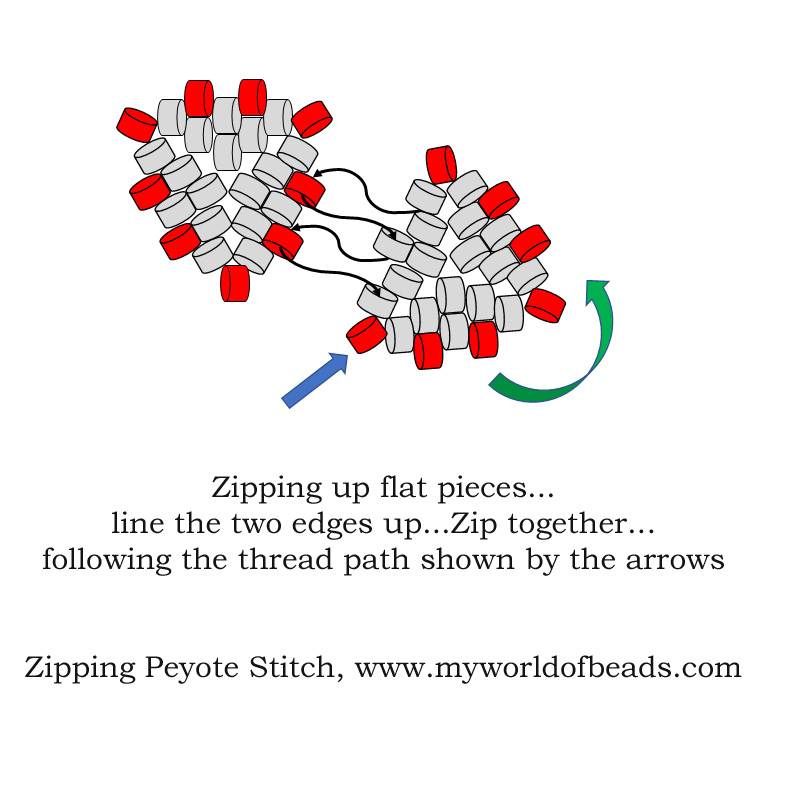
I also use zipping Peyote stitch a lot in the construction of my beaded boxes. Typically, when I am creating a lip to structure the box, I will end up with two ‘walls’ of beads. I would zip the tops of these together to give a neat finish.
Whatever structure or project you are working on, the process of zipping Peyote stitch is exactly the same.
How to zip up in Peyote stitch
The first thing you need to understand is the structure of this technique. So, if you are completely new to beading, pause here and go and read this blog to learn even count Peyote. If you already know what Peyote stitch looks like, then I want you to focus on the ‘teeth’.
You may already be one step ahead of me here… I deliberately referred to the ‘up’ bead, ‘down’ bead structure as ‘teeth’. Hopefully that leads you to think of the teeth on a zipper…
So, picture how they would lock together. The ‘up’ section on one half would lock into the ‘down’ section on the other half.
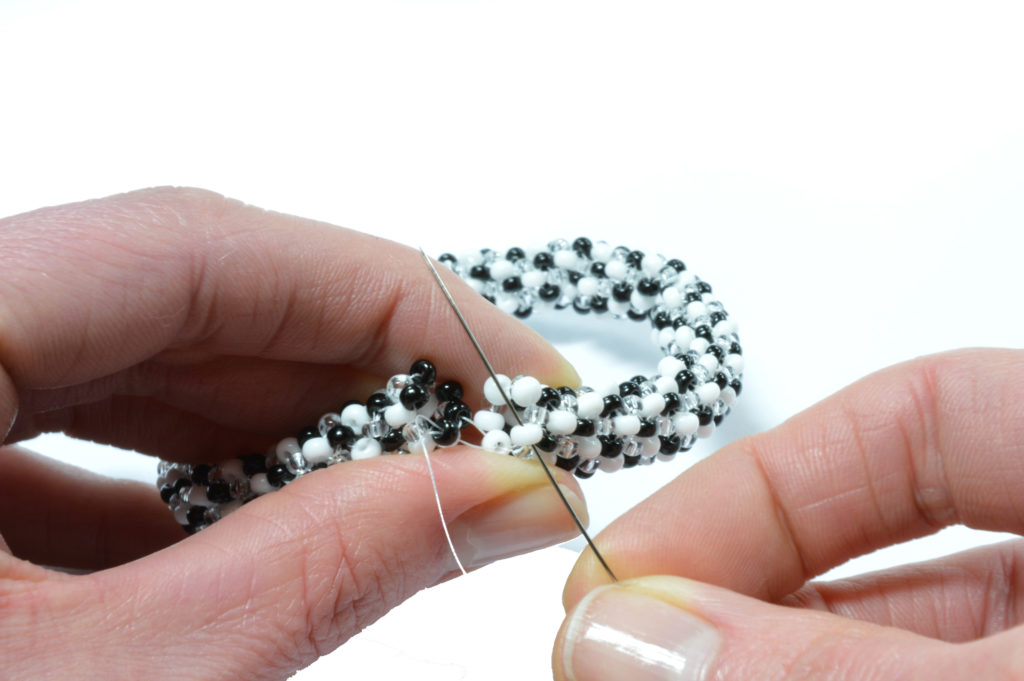
Well, the same is true of Peyote stitch. Then, once you have your beads in position, the ‘zipping Peyote stitch’ is simply stitching them together.
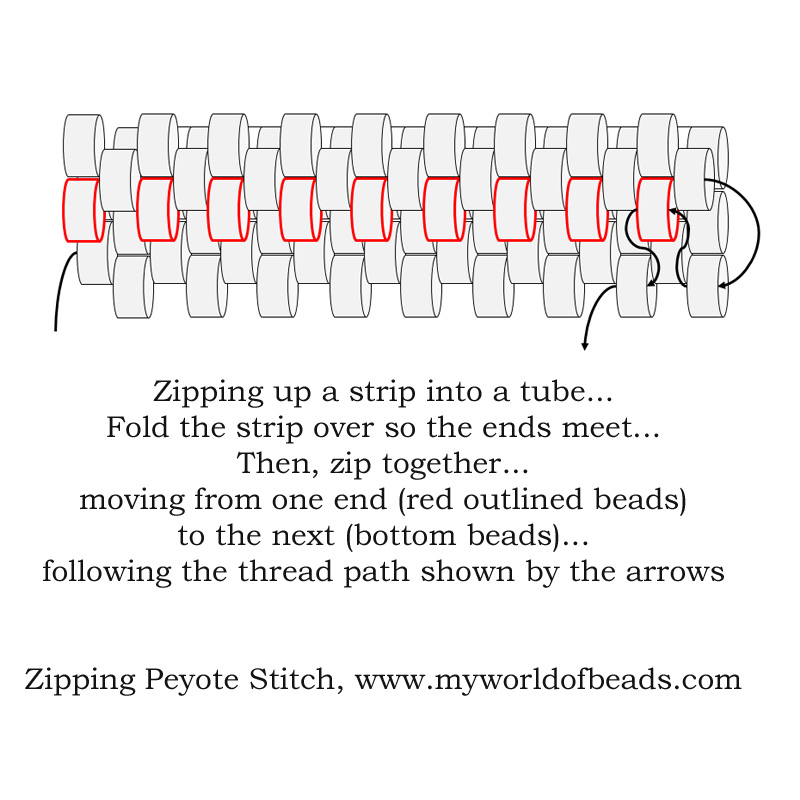
So, you would pass from a bead in one half into the next bead in the other half, then into the next bead in your first half etc. You’re just stitching together the beads as they naturally sit.
You can zip up a flat strip to make a tube. But, if you have been working in tubular Peyote, you can also zip together the two ends of your tube to create a bangle or rope.
So, you’re going to come across this a lot in patterns and tutorials.
Common Mistakes and How to Avoid Them
To be honest, there isn’t a lot that can go wrong when you’re zipping Peyote stitch.
The wrong number of rows
The first thing to check is that you actually have a ‘correct’ zip. So, you need to make sure that your beads will slot together properly.
For example, if you were trying to zip together a strip with an odd number of rows, it won’t work. You would find you had a ‘down’ bead (or an ‘up’ bead) on the edge of BOTH halves. So, if you tried to slot them together, the beadwork wouldn’t line up.
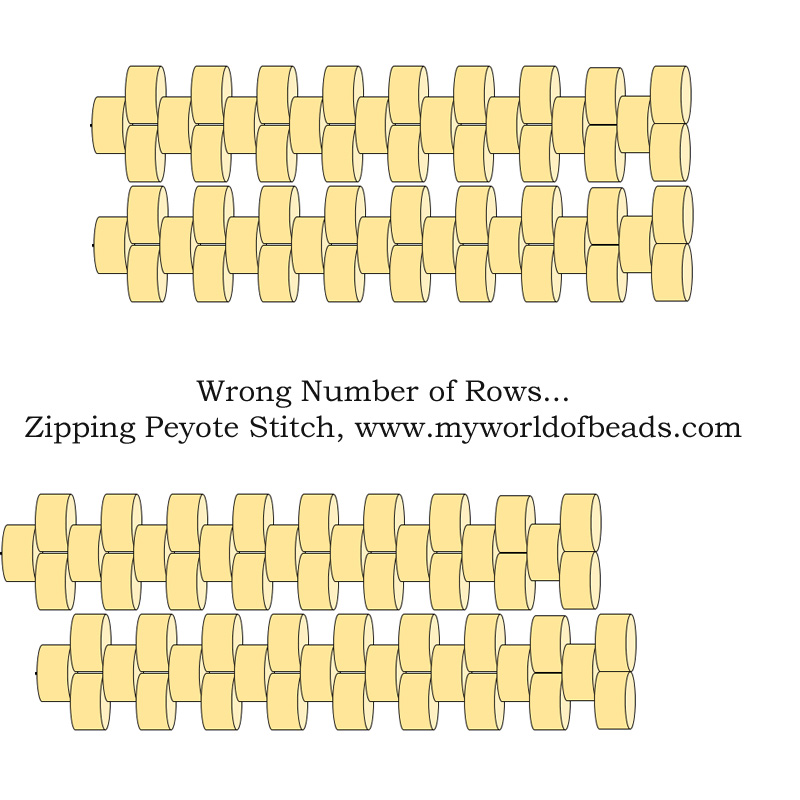
There is a simple solution for this problem. If you’re following a pattern, first check that you have stitched the correct number of rows. (You can reference this blog on how to count Peyote stitch rows if you need to). Then, correct your error by either adding or removing one row.
If you’re creating your own design, then just add a row. You should then find that you have a ‘correct’ zip structure.
The wrong alignment
This isn’t typically a problem with flat Peyote. But, if you are zipping Peyote stitch in any kind of tube (yes, this includes beaded boxes!), you need to take care of your alignment.
After you have checked that the number of rows is correct, you need to look at how you have lined up the two halves.
Look for markers, like a pattern. As you have folded your tube around, have you managed to keep the pattern continuous?
If you are working on a beaded box, or zipping together geometric shapes, have you lined up corners correctly?
When you are making a Cellini Spiral, have you lined everything up so that the beads continue to spiral seamlessly?
Now, if this all sounds confusing, don’t worry. You will be able to tell immediately if something has gone wrong. So, you just need to follow this checklist to correct it.

Practise zipping Peyote stitch
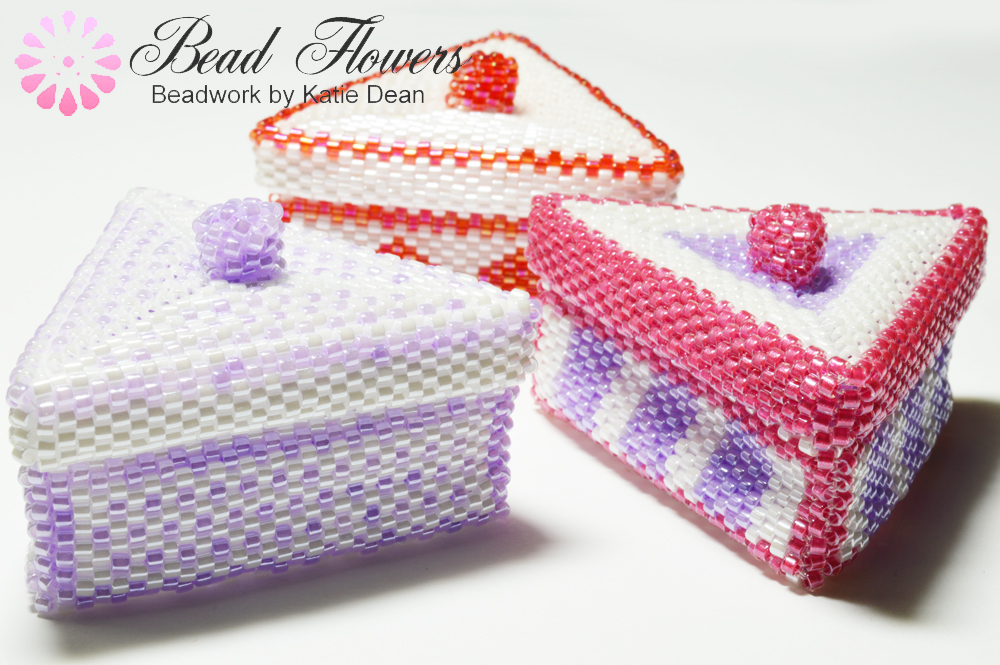
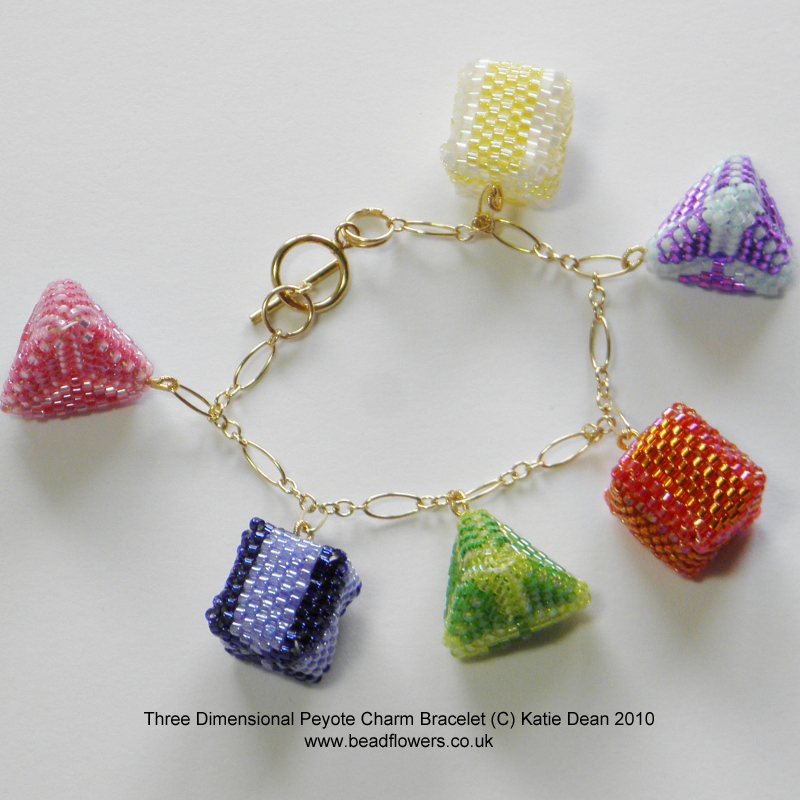
If you want to try your hand at zipping Peyote stitch, all the images here link to patterns. In each of these projects, you will have to do some zipping up. So, depending on your level of skill, and what you enjoy, try one of those projects.
You can also practise on your own. Just follow the odd count, even count, or tubular Peyote blogs to learn one of those techniques. Then zip the ends of your work together.
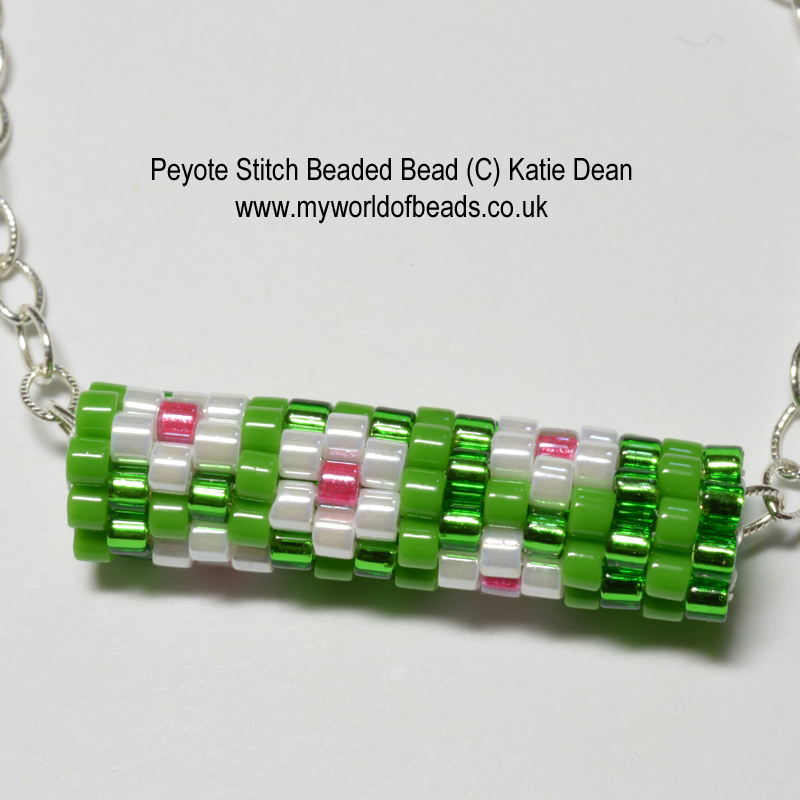
A 10-12 row strip of odd or even count will fold over to make a tube that is perfect to use as a beaded bead.
You can fold a strip of tubular Peyote into a circle to make rings that link together as a necklace.
So, as with all these skills, practice makes perfect!

Don’t forget, you can bookmark this page to use as a reference. You can also check out this blog to learn other variations of the Peyote stitch technique.