
Learn even count Peyote
This blog will help you to learn even count Peyote. It is the best variation to begin with if you are new to Peyote stitch.

Before you start, it may help if you are vaguely familiar with what Peyote stitch is. So, if you don’t already know, then take a look at this blog to get a general outline. (Don’t worry, it will open in a new window so you won’t lose your place here!)
Now, start by gathering together the materials and tools you are going to need…
Tools and Materials
You will need a basic set of bead weaving tools. So, this comprises:
- Beading mat or board
- Beading needle
- Scissors
If you’re completely new to beading, then you may well have questions about those tools. Happily, I have answers! So, if you need more information about any of them, check out this section of the website. It contains blog posts on all of these topics.

Next, you need to find yourself some beading thread and seed beads. Again, if you’re unsure, this blog will give you some helpful advice about which beading thread to choose. (Hint: there is no right or wrong answer – you need to try a few and find out what you feel most comfortable using).
If you need to buy some thread, the photo above links to a good supplier.

When it comes to beads, Cylinder seed beads are the best to use for Peyote stitch.
As you are learning, I suggest using bigger beads to help you see what you are doing. So, my top recommendation would be size 10 Delicas. I have shown these in the photo above and again, if you click on that, it will take you to buy them.
Now, Delicas are more expensive. So, if you’re on a tight budget, or you’re not sure whether you will continue beading, you can also use the rounded seed beads. Again, go for a larger size to help you learn even count Peyote. So, size 8 is a good option.

You can use just one colour. But, as you learn even count Peyote, it may help if you have two or three colours. That way, you can use a different colour for each row and it’s very easy to see what you are doing.
Learn Even Count Peyote
Now you have your tools and materials ready, it’s time to start learning. When you follow a Peyote stitch pattern, you may find yourself following diagrams, or photos. This should be in addition to written text. But in some patterns, designers will rely on just the diagrams
So, I have shown you what to do using both. This will help you feel comfortable using a tutorial later on.
Step 1
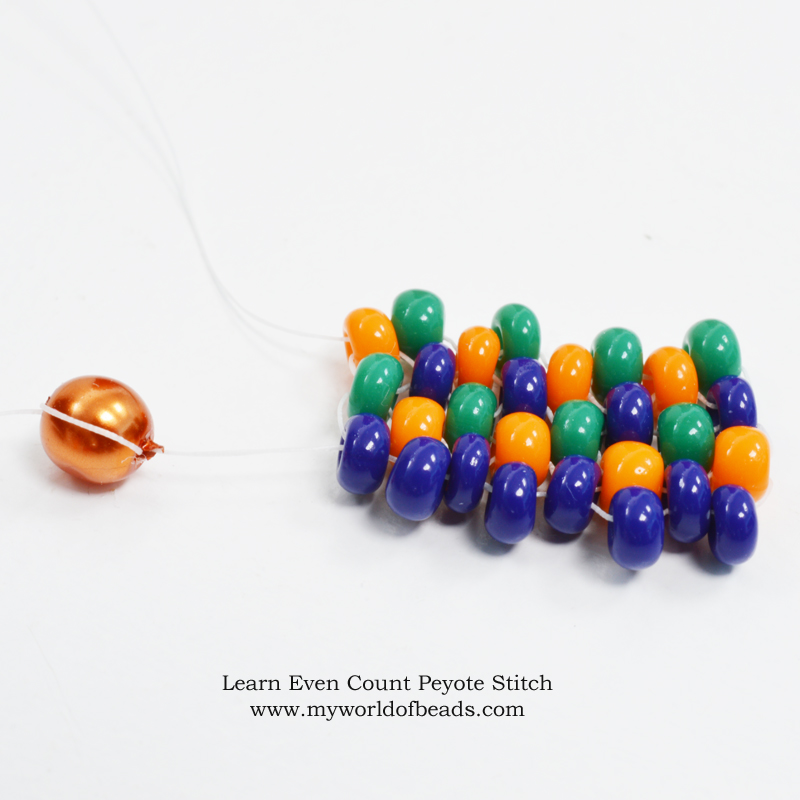
Cut a comfortable length of thread (at least 3′ or 90cm). Thread on a stop bead and move it to about 4″ (10cm) from the end of your thread.
Pass through this stop bead again so that it is firmly attached to your thread and won’t move too easily. DO NOT ever knot a stop bead in place. You are going to remove it later on, so if it is knotted on, you’ll have a lot of trouble undoing it!
For more information about stop beads or any other terms which are unfamiliar to you, check out this blog.
Note: your stop bead can be any kind of bead. Or, in some patterns, you might use the first bead as your stop bead. That is what I have done in the diagrams. In the photos, I used a contrasting bead.
Step 2
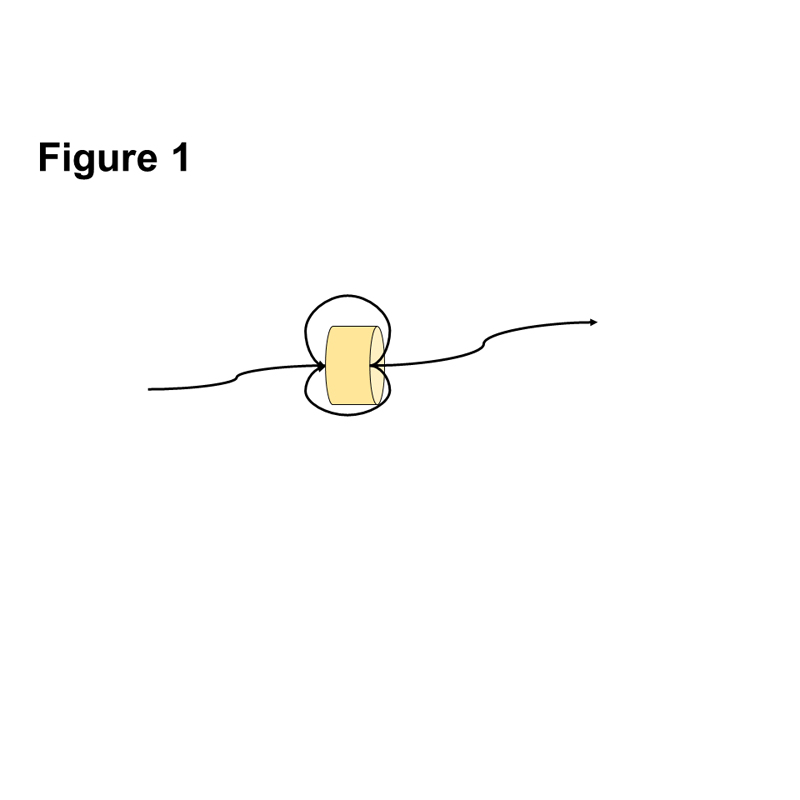
Pick up an even number of beads. This can be any number, so you choose. (Note: if you are using bead 1 as your stop bead, remember to count that in the number you pick up!)
If you are right-handed, you will now have your stop bead on the left and your needle and thread pointing to the right.

If you are left-handed, this will be reversed, so your stop bead will be on the right.
These beads will become rows 1 and 2 of your Peyote stitch strip. As you add the next row, in a minute, this should make more sense. If you’ve already read this blog on Peyote stitch, then it will be making sense already!
Step 3
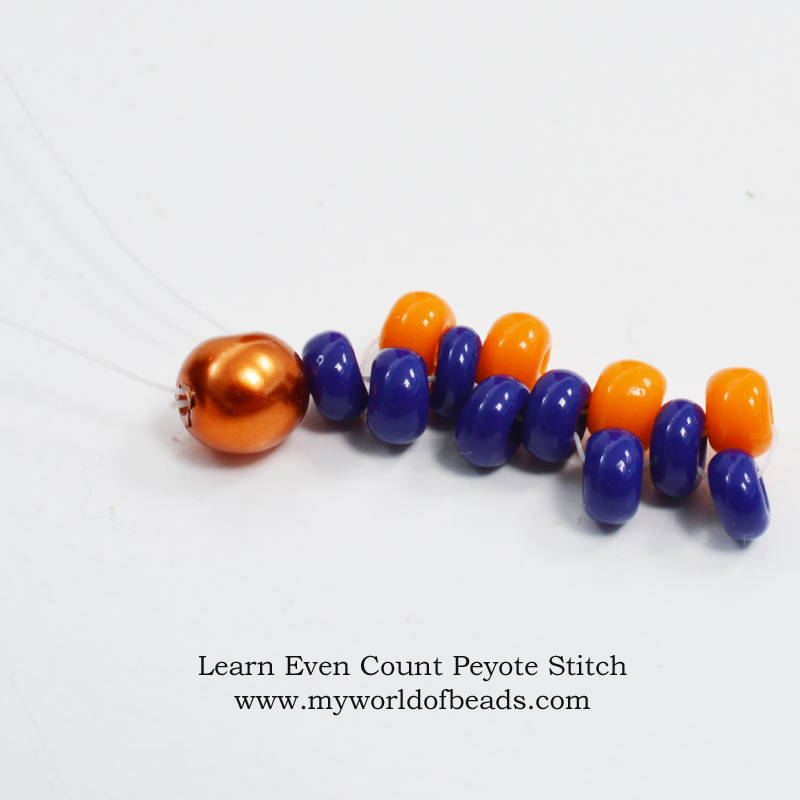
You are now going to add row 3. If you have more than one colour of bead, then use your second colour for this row.
Start by picking up 1 bead. Miss out the final bead in your string and pass through the next bead. Pull your thread tight and the new bead you have just added should sit on top of the final bead in the string, pushing it slightly downwards.
As you add this row, you will be working in the opposite direction from your first two rows. So, if you are right-handed, you will now be working from right to left. If you are left-handed you will be working from left to right.
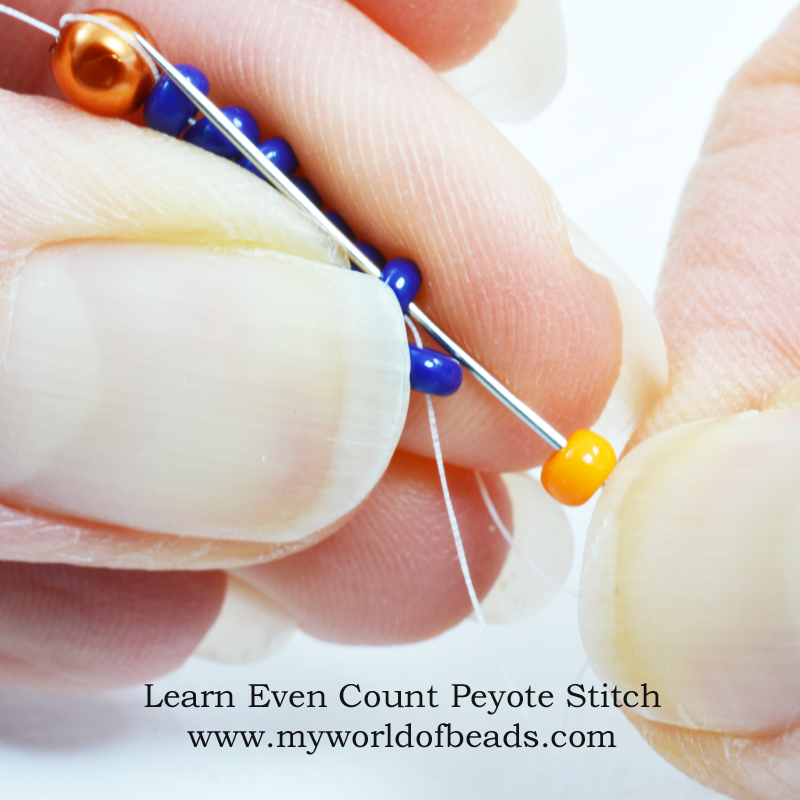
It is possible to lay your beads on the mat and add them, so your beads will look just like the diagram in layout. But, I naturally pick my beads up and hold them. This is going to feel tricky at first because you don’t have much to hold onto.
So, take a look at the photo to see how I am holding mine – my fingers are cupped around the string, so that I am keeping them in place while I work. You don’t have to follow me exactly – you will find what feels comfortable to you as you learn even count Peyote.
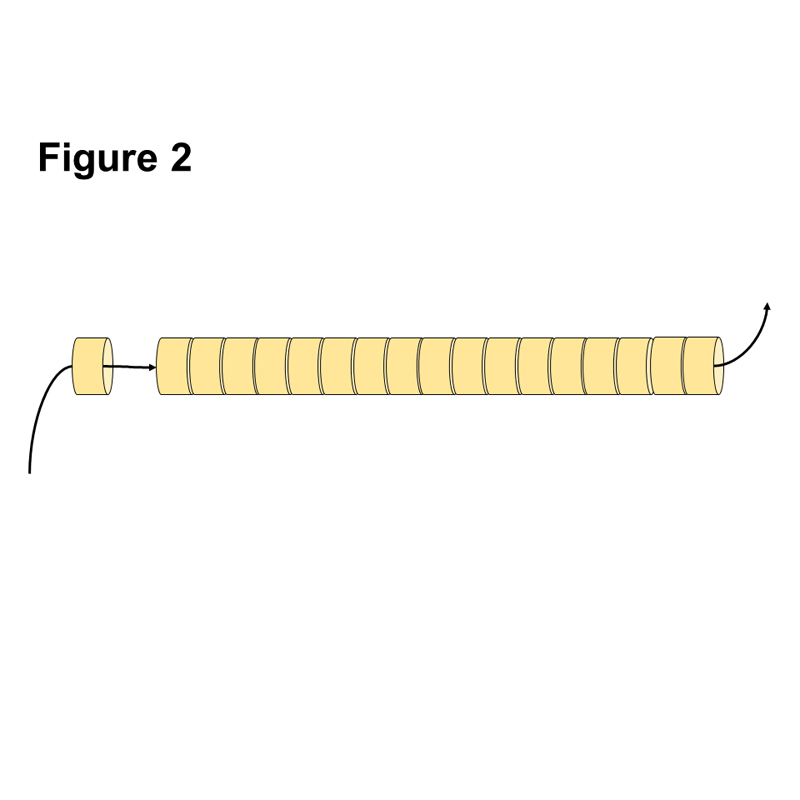
You have your first bead in place. Now continue along the row. In each stitch, you are going to pick up 1 bead, miss the next bead in your initial strip, and pass through the bead after.
Notes and Top Tips
Note: the number of beads you add in the row (total) will be exactly half the number you picked up in your first strip. It may or may not be an even number. So, if you picked up 8 beads initially, you will now have 4 beads per row. If you picked up 10 beads in the first strip, you will have 5 beads per row going forward.
I mention this because you might find a pattern instructions that says: ‘bead an even count Peyote strip with 6 beads per row and make it 10 rows long.’ So, you would know that you need to pick up 12 beads, initially, then you will add 6 beads per row for the remaining rows.
Back to your learning strip… This is how it will look in beads. So, now your thread should be exiting from your very first bead, right next to the stop bead. (Or, if you used the first bead as your stop bead, like I did in the diagrams, you will be exiting from the stop bead).
You need your beads to be pulled into the ‘up’ bead, ‘down’ bead format that you see in my sample. This will set you up with good tension for the rest of your strip.
If your beads are not sitting like mine, then you need to take hold of both ends of thread and pull them tight. This will force the beads into place. If your stop bead then moves slightly away from the edge of your work, just pull on the tail thread (the thread through it) and slide it gently back into place for now.
Step 4
You are now ready to add row 4. As you learn even count Peyote, you’re going to discover that you have a really simple turn around at the end of each row.
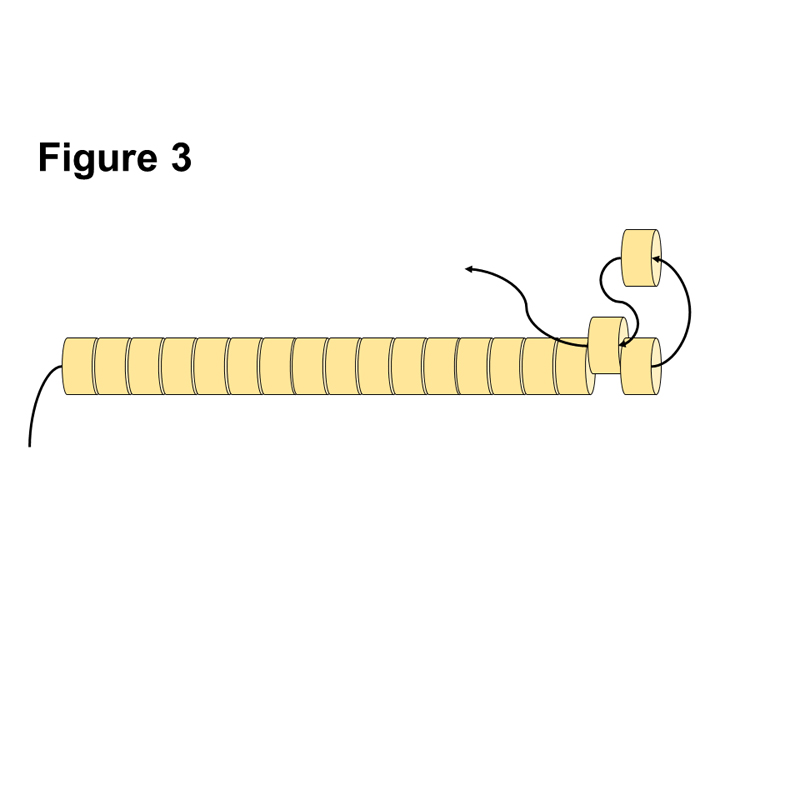
So, all you need to do is pick up 1 bead and pass back through the last bead from row 3. If you got your beads in place, it should be sticking up slightly, as you saw in my photo above.
Again, if you have different coloured beads, you can use another colour for this row. It will just help you to see what you doing.
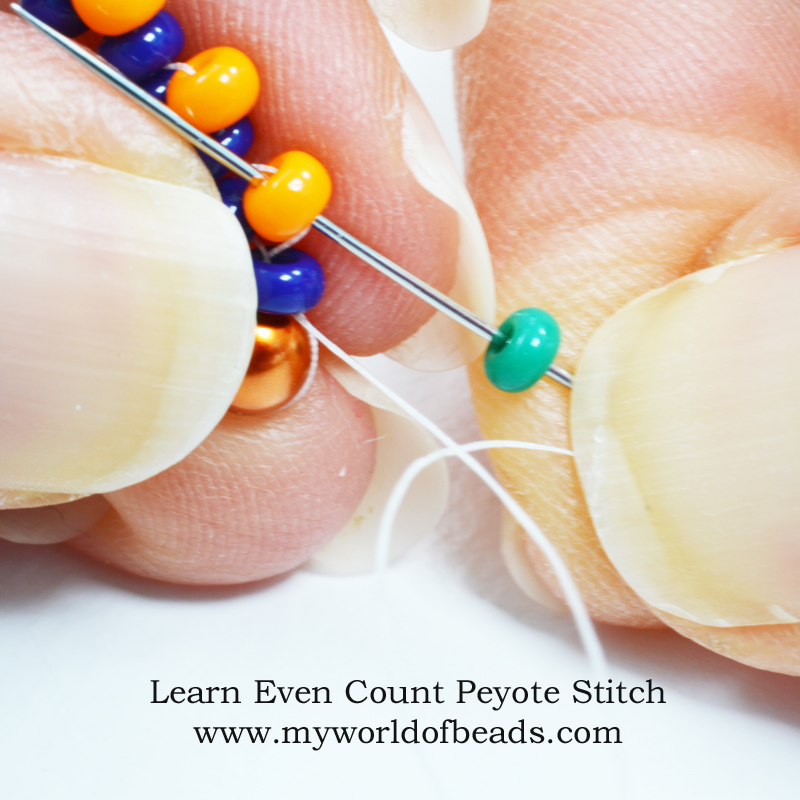
As before, I like to hold my work in my hand as I stitch.
So, notice here: if you are right-handed, then row 4 will be added from left to right, ie moving away from the stop bead/tail thread.
Naturally, if you are left-handed, this will be reversed.
Practical tips
However, because I pick my work up and hold it, I always stitch in the same direction. So, I will have just turned my work around. Notice, in the earlier photo, where I was starting row 3, I was travelling towards the stop bead.
In the row 4 starting photo (above), you can see I am moving away from the stop bead because I have turned my work around. In both photos I can keep stitching in the same way even though my rows are zig-zagging back and forth.
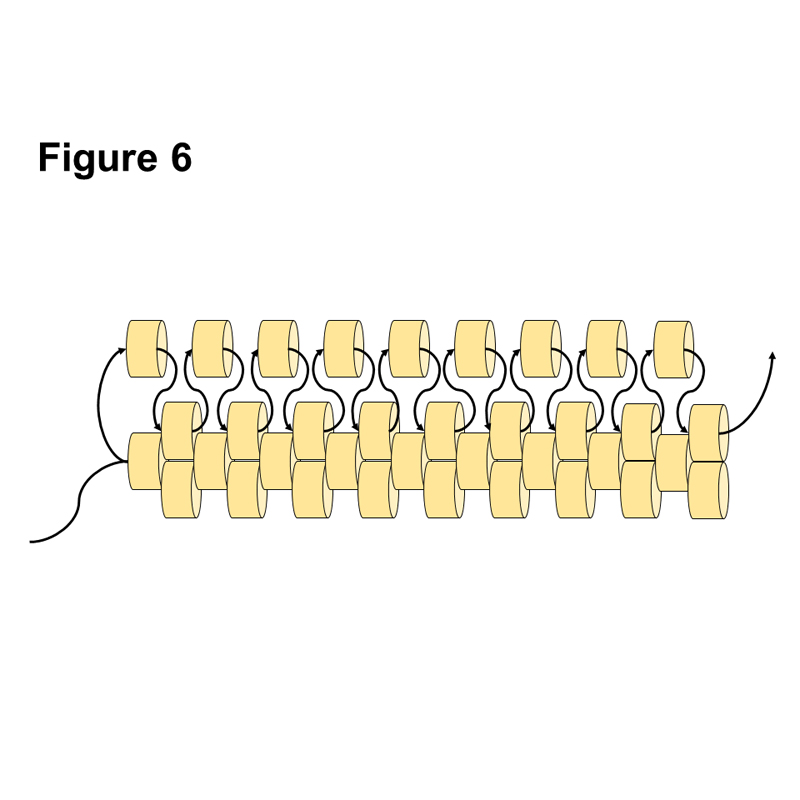
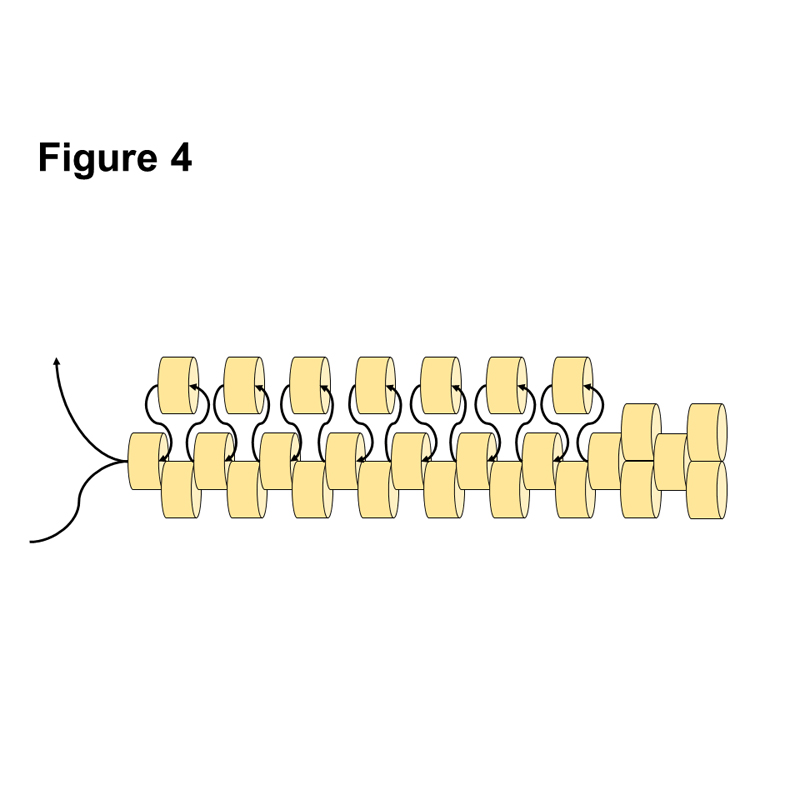
Keep picking up 1 bead and passing through the next bead from row 3, until you are exiting at the other end of the row. You can see this in the diagram.
Your row 3 beads should have been sticking up. As you add row 4, then row 3 beads will become the ‘down’ beads (or gaps) and your new row 4 beads will become the ‘up’ beads (or teeth, or turrets).
At the end of the row, you will be exiting on the opposite side to your stop bead/tail thread.
Step 5
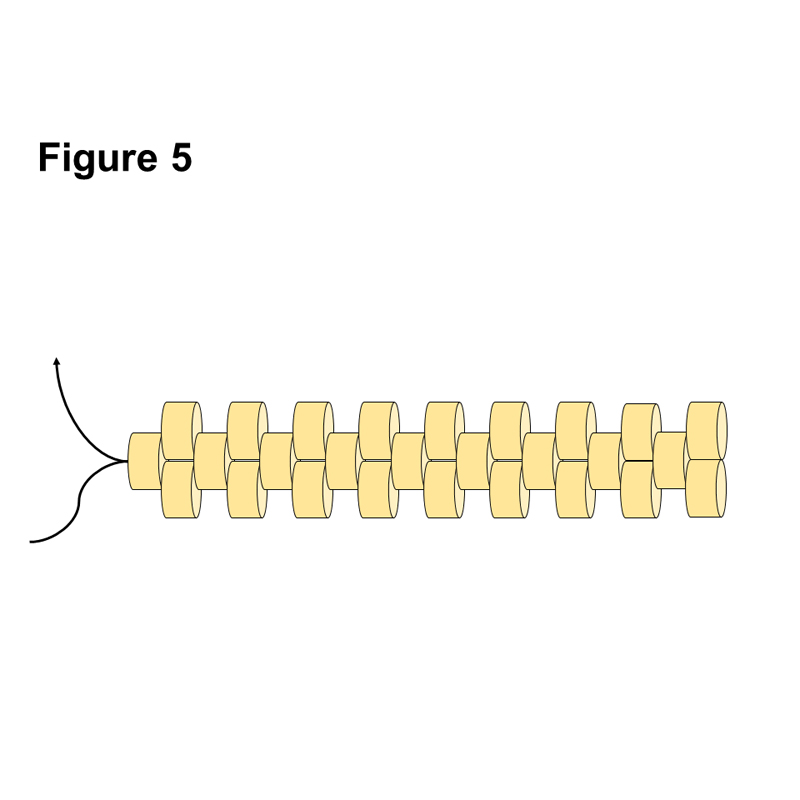
That’s it! Your mission to learn even count Peyote is now over. So, you just need to keep going, adding rows in the same way that you added row 4.
Your odd numbered rows will end up at the side with the stop bead. Your even numbered rows will finish at the opposite side.
When you have enough rows, you can slide the stop bead off your tail thread. Then, weave in the tail thread and working thread. Or, do whatever your pattern tells you.
If you’re not sure how to finish threads, this blog gives you a couple of methods to try. You can also watch this video to see me demonstrate the technique.
Fixing Mistakes as you Learn Even Count Peyote
If you know how many beads you have in a row, then it helps to count them out into a little pile. You can then use the beads from the pile as you add the row. If you run out of beads before the end, or finish the row and have beads left over, this is a sign that maybe something went wrong. So, you can check the row and fix any mistakes before you continue.
(Note: you may just have mis-counted the beads in your pile, so there might not be a mistake to fix!). If your Peyote has good tension, then you will be able to see something is wrong right away.
The most common mistakes are:
- missing a stitch: so, you pick up a bead and accidentally pass through two beads from your work. If this has happened, you will see a ‘tooth missing’ from your row of ‘up’ beads.
- adding extra beads: so, maybe two beads slip onto your needle, instead of one, and you don’t notice. As a result, you would see 2 beads squashed into one gap.
Whichever mistake you have made, you need to undo your work back to the mistake and fix it, then continue.
If you check for mistakes on every row, you won’t go far wrong. It’s only when you leave a mistake uncorrected that things go really astray!
What you can do next
You can bookmark this page and return to it as often as you like. If you would prefer some instructions that you can print out, follow this link to get a free PDF tutorial. That also includes a few extra things you can try.
Two Beginner Patterns to Learn Even Count Peyote
Now you have the basics, it’s time to put them into practise. You will find a lot of even count Peyote projects around if you search. But I have selected two that are fantastic for beginners.
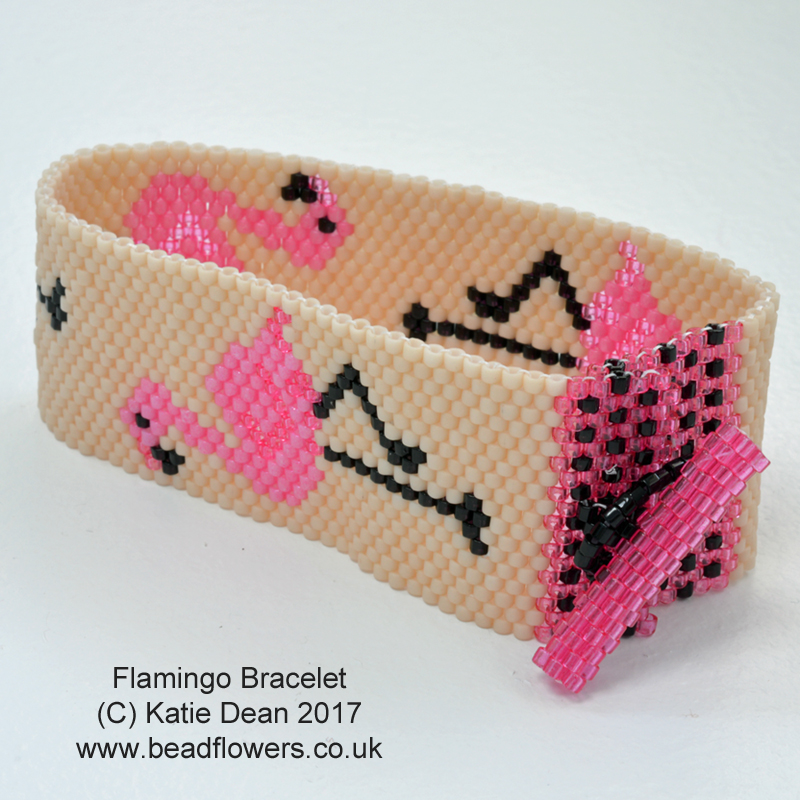
The Flamingo bracelet will teach you how to create a beaded clasp as well. Don’t be put off by the pattern – this tutorial literally takes you through row by row, so it’s perfect for a beginner. Click on the image to get the project.

This cute Amulet purse pendant is another project perfect for a beginner. The colouring is designed to help you and you get to try a little bit of end-of-row decreasing. It’s very simple and very well explained. So, give it a go! (Click on the image to get the tutorial).
Moving on…
Next, you’re ready to move on and learn odd count Peyote. So, follow this link to find the blog that covers that technique.
If you have any feedback on how you found ‘Learn Even Count Peyote’, please leave a comment below.


This is great I can actually follow the pattern Which I couldn’t do properly before.
Thank you Katie your a star
That is wonderful news, Gloria! I’m so happy this has helped. I have more posts coming, to take you through other variations of Peyote, so stay tuned! And if you know someone who would be helped by this, please let them have the link – thank you!
I would like to make beaded tea light
that I bought off of Etsy , there is no word chart .
just pattern .
Do you have a video to help me please ?
Thank you very much
Hi Brenda, yes I have a free online class that teaches you how to read Peyote pattern charts. You can find it in my beading school at https://my-world-of-beads.teachable.com/courses