
Learn Circular Peyote Stitch
Before you start to learn circular Peyote stitch, you need to understand a couple of basic techniques.

First, make sure you have a simple grounding in the basic Peyote technique – use the ‘Learn even count Peyote’ blog to achieve this.
Second, learn tubular Peyote. This will teach you the concept of the step up.
Third, learn how to increase in Peyote stitch.
You can find all three of these lessons in free blog posts at this link. So, make sure you have these skills first, then pop back here to learn circular Peyote stitch.
Before you start to learn circular Peyote stitch…
…You need to understand that there are two basic variations of this.
The first is a ring. The second is a flat circle.
Both variations share the same technique (increasing) for creating the circular effect. But each starts in a slightly different way.
The Ring Variation
This starts exactly as tubular Peyote. So, you will pick up a string of beads, tie them into a circle, then bead your first row in the normal way and step up.
Then, if you add an increase in evenly spaced places around the row, your tube will start to flatten out into a circle… Or another geometric shape…
The number of increases you add will determine the shape that you create. So, four increases in the row would give you a square or rectangle. Three increases would give you a triangle, five for a pentagon, six for a hexagon.
You would need to think about how many beads you picked up in your initial string. If you want to create a square, then you would need a number that is going to allow you to add your four increases so they are equally placed around the ring, eg 32 beads.
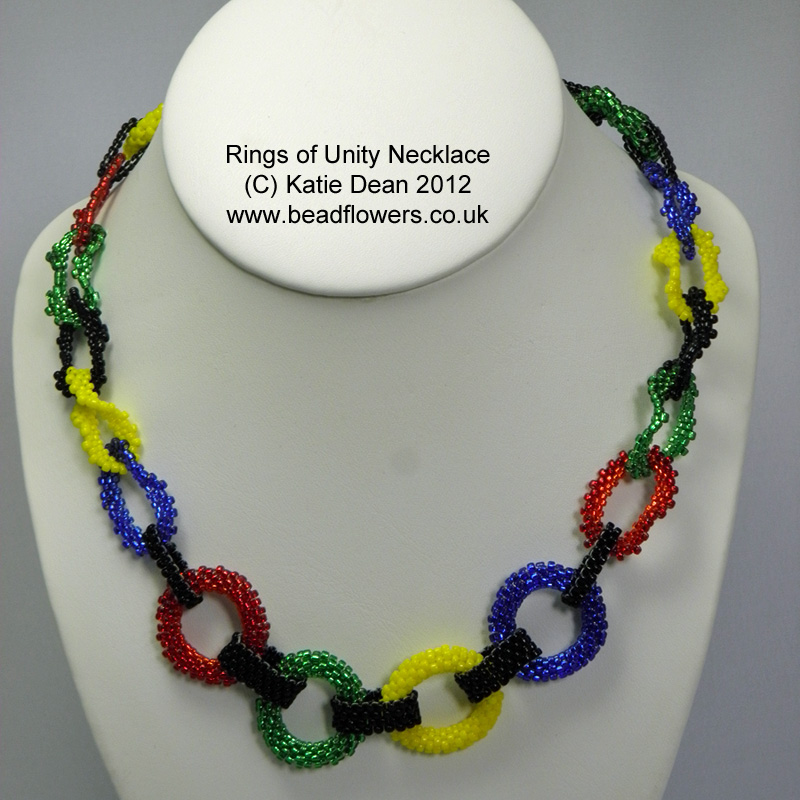
You can play around with these ideas. Or you can try this pattern for my Rings of Unity necklace which will teach you how to make two different styles of rings.
I will share some more patterns with you at the end if you want to explore this variation of circular Peyote.
Learn Circular Peyote
Now, let me move on to the other variation. I’m going to use this to help you learn circular Peyote stitch because it starts in a unique way.
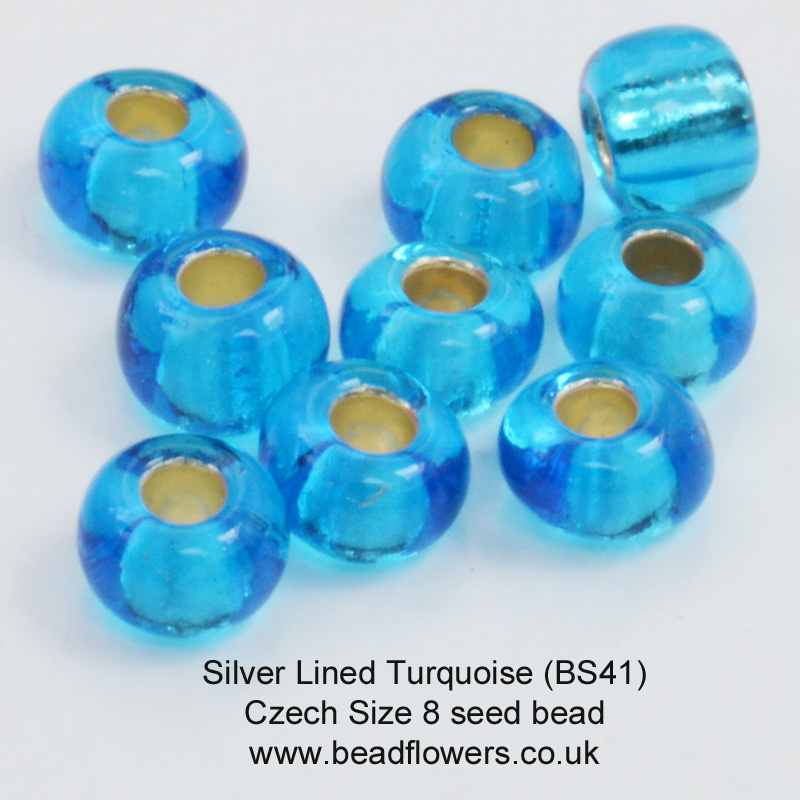
So, grab some beads. Size 8 seed beads are great to use for learning this technique. If you need some, you can click on the image below.
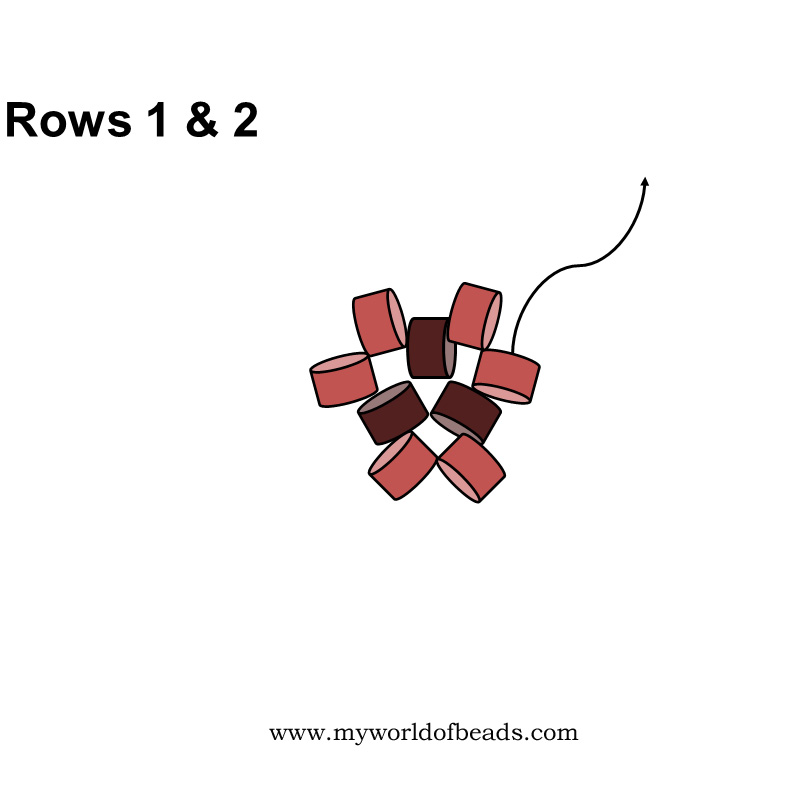
Row 1
Pick up 3 beads, leave a short tail thread that you can stitch in, and tie your beads into a circle.
Row 2
Pick up 2 beads and pass through the next bead in your circle. Repeat this twice more to complete the row, then step up to exit from the first bead you added in this row.
Note: this is a different start than you are used to with Peyote. In straight or tubular Peyote, you would expect to skip a bead in your base row. But in circular, you add beads between every single bead in your starting row.
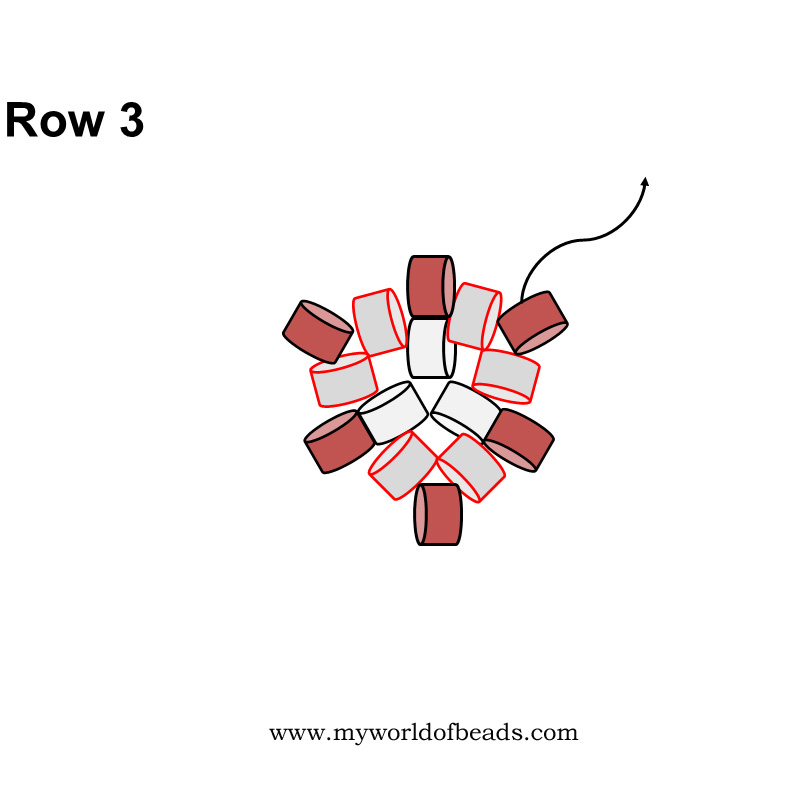
Row 3
Pick up 1 bead and pass through the next bead in your circle. Repeat this five more times to complete the row. Then, step up to exit from the first bead you added in this row.
So, row 2 was your increase row. This row confirms that increase (look back at the lesson on Peyote stitch increasing if you are confused by that idea).
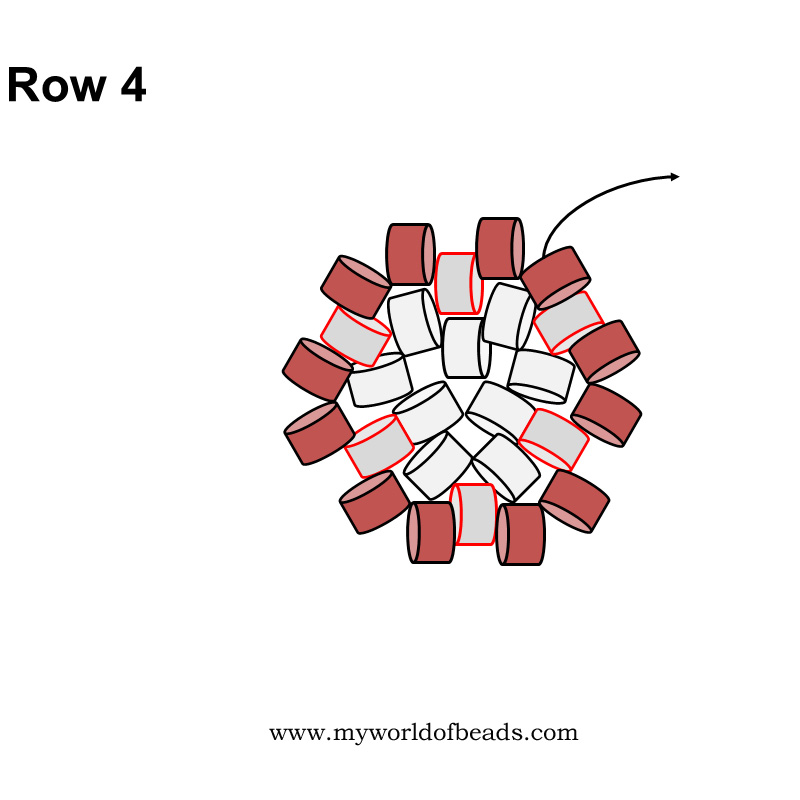
Row 4
In this row, you are going to pick up 2 beads and pass through the next bead from row 3. Repeat this five more times to complete the row. Step up to exit from the first bead you added.
So, you are making another increase straightaway. This should mean your circular shape stays fairly flat.
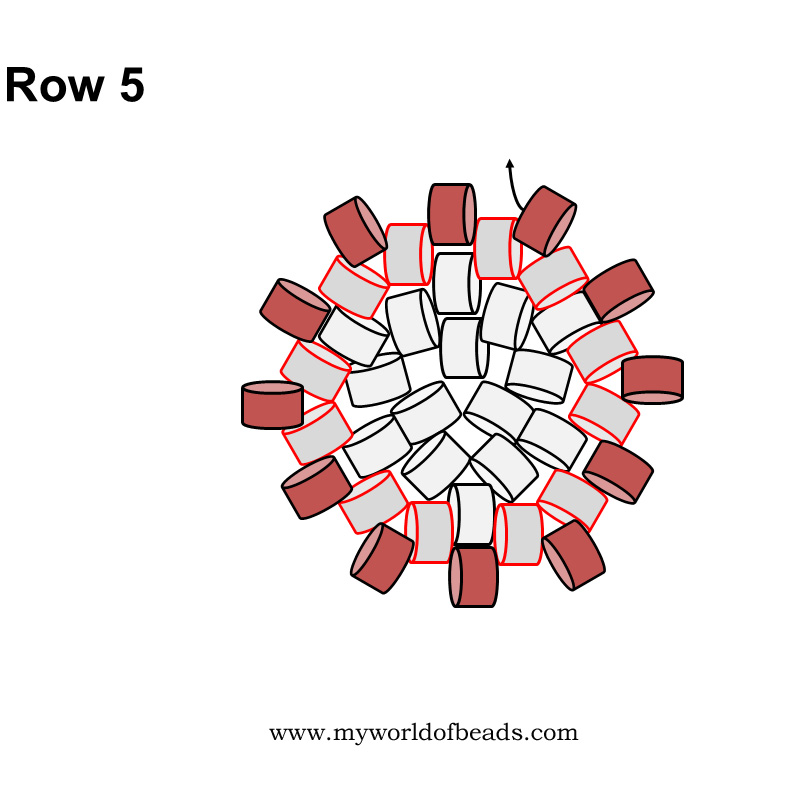
Row 5
This is another ‘confirming’ row. So, you will pick up 1 bead and pass through the next bead from your previous row, a total of twelve times. Step up to exit from the first bead you added.
Row 6
In this row, you will pick up 1 bead and pass through the next bead from row 5, a total of twelve times. So, you are not making an increase. Again, step up at the end of the row.

By now, your beads should be forming a circle. They may not be perfectly flat, although you can help to get a flat shape by altering your tension.
If you pull your thread very tight, the beads will pull inwards and your circle will gain a little ‘dip’. So, if that is happening, you can loosen the tension just slightly. Not too much, though, or you will end up with a floppy shape.
You can carry on increasing the size of your circle by adding another increase row, followed by two more straight rows. Keep to this pattern and your circle should remain fairly flat and even.
What to do next…
So, now you have the technique structure. This is all there is to learn circular Peyote.
As with the rings, you can develop your circles into other flat geometric shapes. To do this, you would follow a specific increase pattern for each shape. But the principle remains the same.
The next logical step on your mission to learn circular Peyote stitch, is to try some patterns…
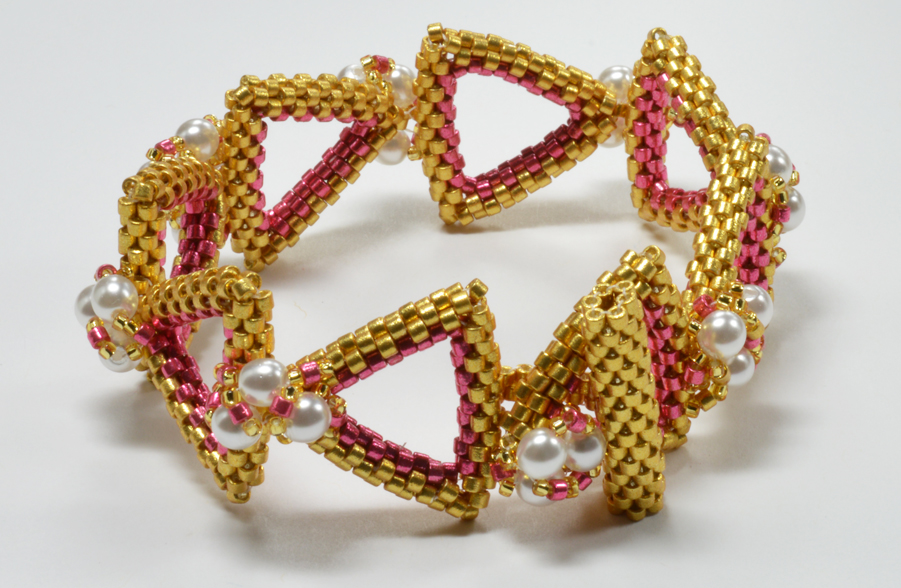
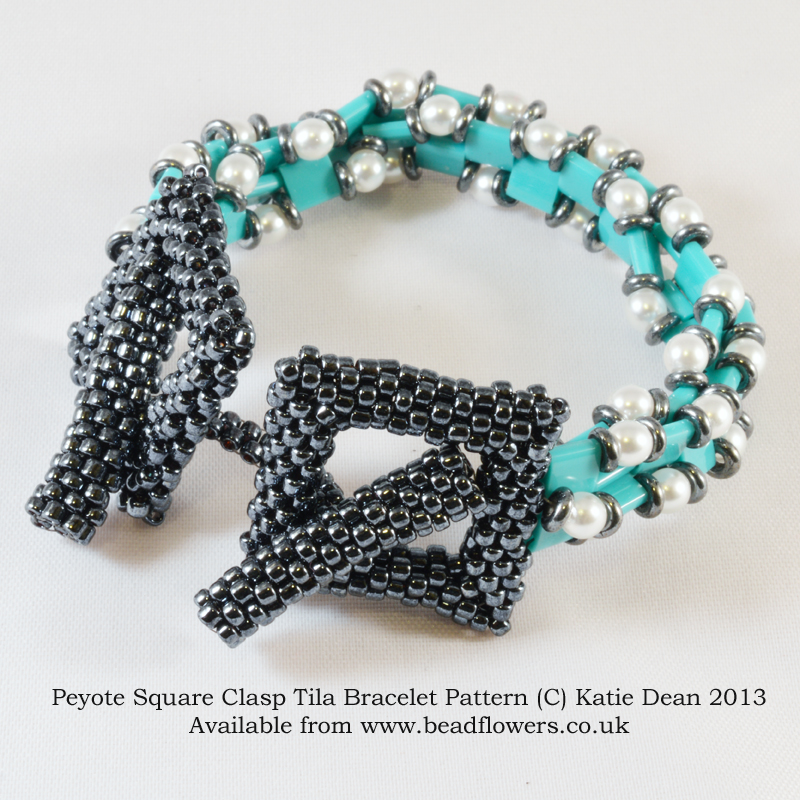
If you want to experiment with shaping rings, then the triangular bracelet above, or the square bracelet, below, are great options.
Just click on the images to get the patterns.
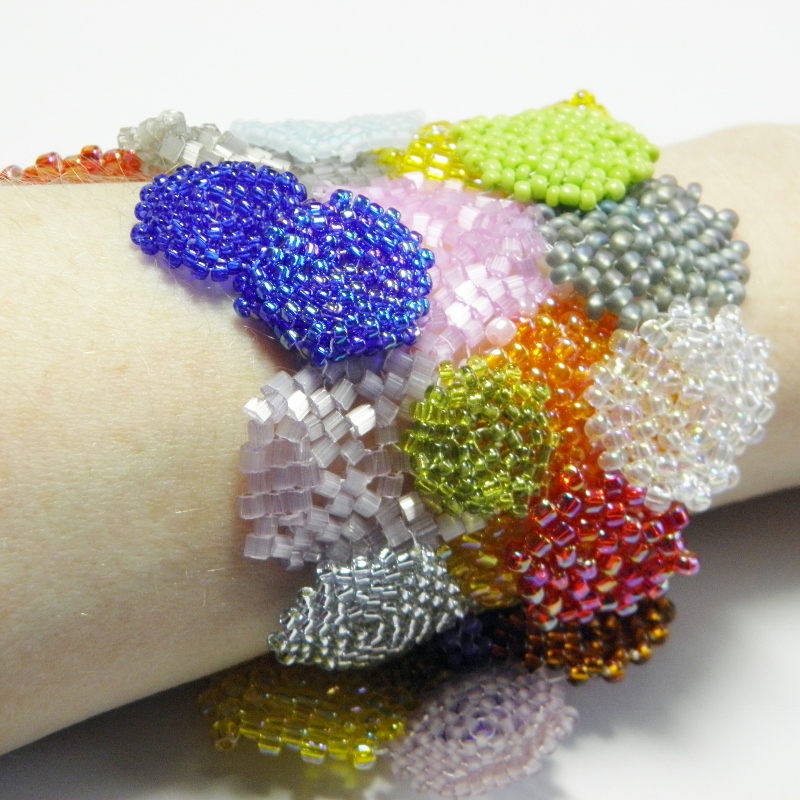
If you want to try a good beginner level project, this patchwork bracelet is a lot of fun. You get to practise the circle technique over and over. And, after all, repetition is the best way to learn circular peyote – or anything else! Again, click on the image to get the pattern.
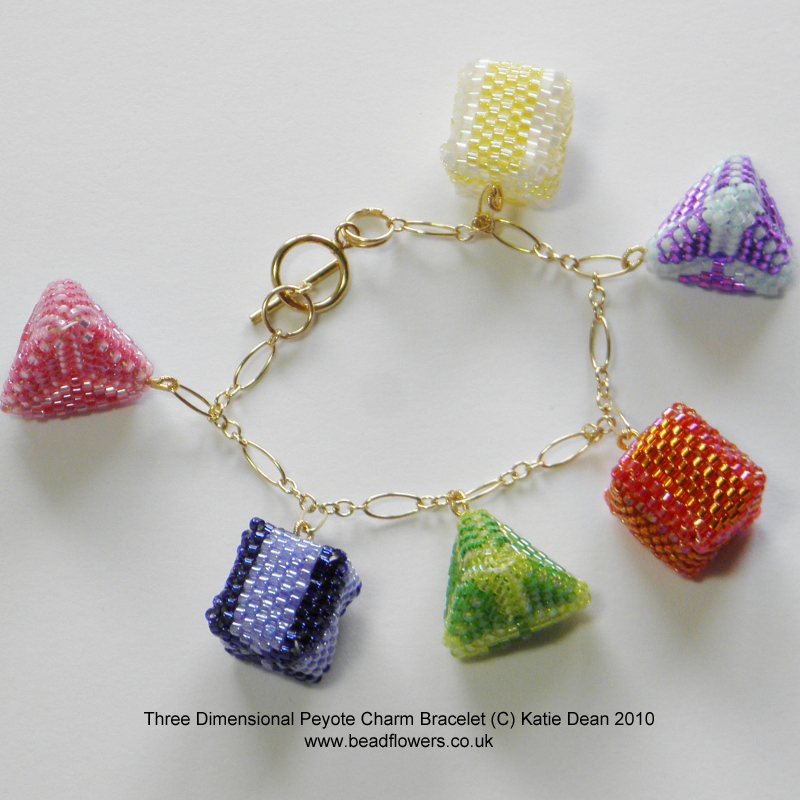
If you are interested in exploring other geometric variations of circular Peyote, then my 3D charm bracelet is ideal. I used colouring to help guide you through the increase patterns that are specific to each shape.
Remember, you can bookmark this page to keep referring back to the technique instructions.
If you would like a printed summary of this to help you learn circular Peyote, then click on this link. It will take you to a free PDF tutorial that you can print out and keep.
When you feel confident with this variation, remember to come back and try learning some more Peyote stitch. This link will take you to all the Peyote lessons.


I found these instructions to be extremely helpful. I make purses with of mizuki delicate and wanted to try something different. This will be a great challenge.
Thank you Sandy! I’m so glad that has helped and great to hear you’re branching out in some new directions. I think you’ll enjoy it 🙂
I’m trying to make a rectangle ring and I picked up 180 beads with the sides being 20 x 70 on the inside and I can’t figure out the math on where to put the corners is there a formula to make this such as side size plus x for corners?
There isn’t a formula for this, Willow. You would just need to calculate the positions. The first thing I see is: if you want a total of 180 beads per row (20 beads on short sides and 70 beads on long sides), you would need to pick up 360 beads. Remember, in Peyote, your first string of beads is actually creating 2 rows!
Then, to position the corners, you would make your increases in stitch 20, stitch 90, stitch 110 and stitch 180 (in row 3 – the row you’re adding on your starting circle). Basically, you really need a thorough understanding of how Peyote works, then you just break that down to do the calculations. Hope that helps!