
Joining Peyote Stitch and Right Angle Weave
The lovely thing about learning more than one beading technique is it gives you more options. So, in this post, I want to look at joining Peyote stitch and Right Angle Weave (RAW). I’m going to show you how to do this and talk about why you might want to.

Techniques for joining Peyote stitch and RAW
Let me start with the good news: there is no special technique for joining Peyote stitch and RAW. You can simply transition from one stitch into the other – and back again, if you desire.
So, how does this work?
Well, take a look at the two stitches:
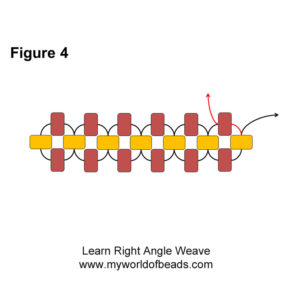
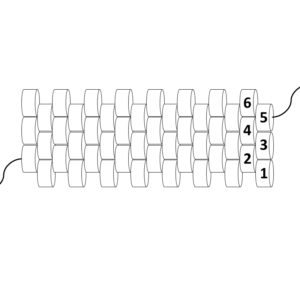
Figure 4 shows a sample of RAW. The diagram on the right shows a sample of Peyote stitch.
What do you notice? Both have beads that stick up, with a gap in between. So, that link between the two structures enables you to move from one stitch to the other with ease.
Before I go on and show you how, please make sure you understand how to work in each technique. If you need a reminder for working in Peyote stitch, use this link.
If you need to learn how to work in basic Right-Angle-Weave, then use this link.
How to move from Peyote into RAW
If you want to transition from a piece of Peyote into RAW, it’s simple. You just treat the ‘up’ beads in your Peyote edge like the top of a RAW row. So, you would follow the thread path for adding row 2 (explained in this blog). Treat the Peyote beads like the ‘top bead from the unit below’, which gives you something looking like this:
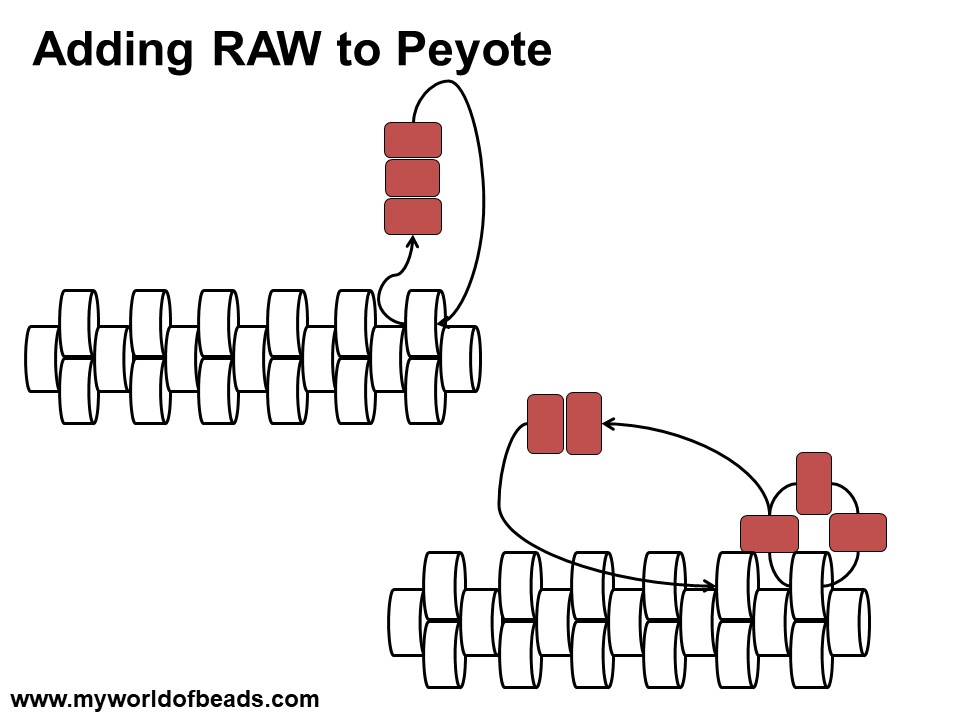
So, from there, you can continue in RAW, or maybe you transition again…
Joining Peyote stitch to RAW
Now, joining Peyote stitch to RAW is just as easy. In this case, you would treat the beads that stick up along the edge of your RAW like ‘up’ beads from a row of Peyote. So, your thread path is simply pick up 1 bead, pass through the next RAW edge bead. It would look like this:
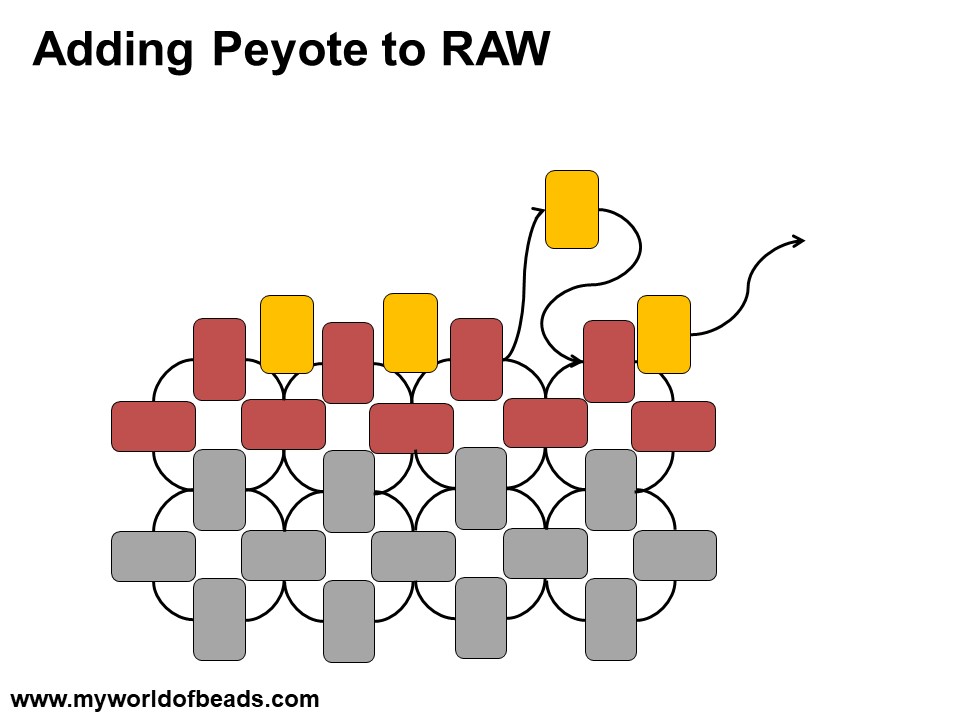
So, that gives you a transition from RAW into Peyote stitch – nice and simple!
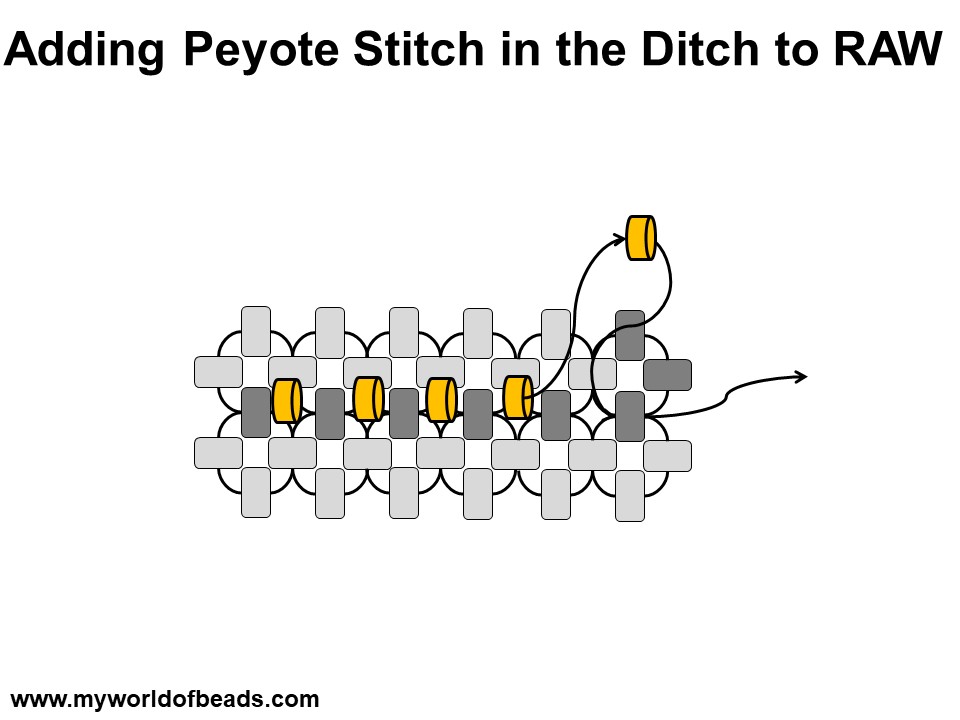
You can also use this to add what you might term a Peyote stitch-in-the-ditch row to the middle of a RAW strip. So, you would pick out the RAW beads that are sitting vertically in alignment along the centre of the strip.
Then, again, just use the Peyote thread path: pick up 1 bead, pass through the next RAW bead. Make sure you keep to the same alignment along the RAW strip, and you have something that looks like this:
Why would you want to link these stitches?
So, now you’ve seen how easy it is to transition between these two stitches, why would you want to do it?
Well, I use this idea in a few different scenarios.
Firstly, I often bezel cabochons using RAW (or MRAW). Then, I can transition to Peyote, working off the RAW casing, to add some extra embellishment around the cabochon. So, this might be petals for a flower. It might be a base onto which I can add two-holed beads. The options are endless. So, it’s great to have that simple transition to open up those options.
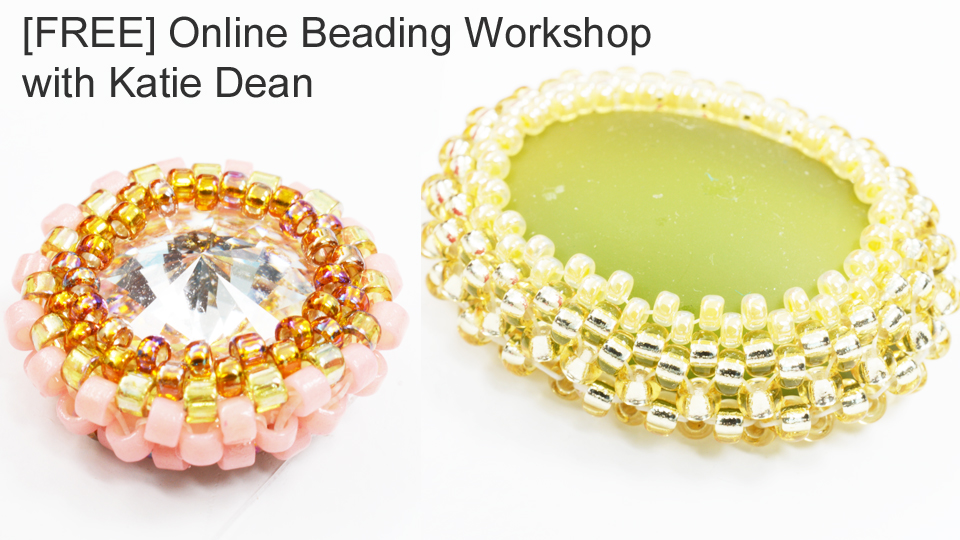 Click here to access the free online beading course
Making use of texture
Now, the other big reason for combining the two stitches is all about their texture. Peyote stitch gives you a very stiff fabric. RAW, in contrast, is much softer and more pliable.
So, if you are creating a design in which you want movement, you can use this combination of stitches.
I should also mention that you can combine these techniques in their tubular versions as well as the flat. So, you might have a Peyote tube, you can then transition seamlessly into tubular RAW. That would give your tube/rope some flexibility.
Naturally, you can also do this in reverse. So, you could take a RAW tube, or a length of CRAW, then transition to Peyote to give areas with a more solid structure. Give it a try!
 I used that technique when I made the ‘Strawberries and Cream’ cuff you see in the photo above. This gave me flexibility to create a length of cream that would weave around the strawberries on the bracelet.
If you want to give that a try, then click here to get a copy of the pattern.
Adding Clasps
Thirdly, I like to make beaded clasps. My go-to technique for this is usually Peyote stitch. So, once I have that Peyote edge on the clasp, I know I then have options for adding jewellery.
In this beaded bracelet project, I made my Peyote clasps, then stitch RAW directly off them. So, I gained the strength I wanted for the clasp, but then the softness and flexibility for the bracelet.
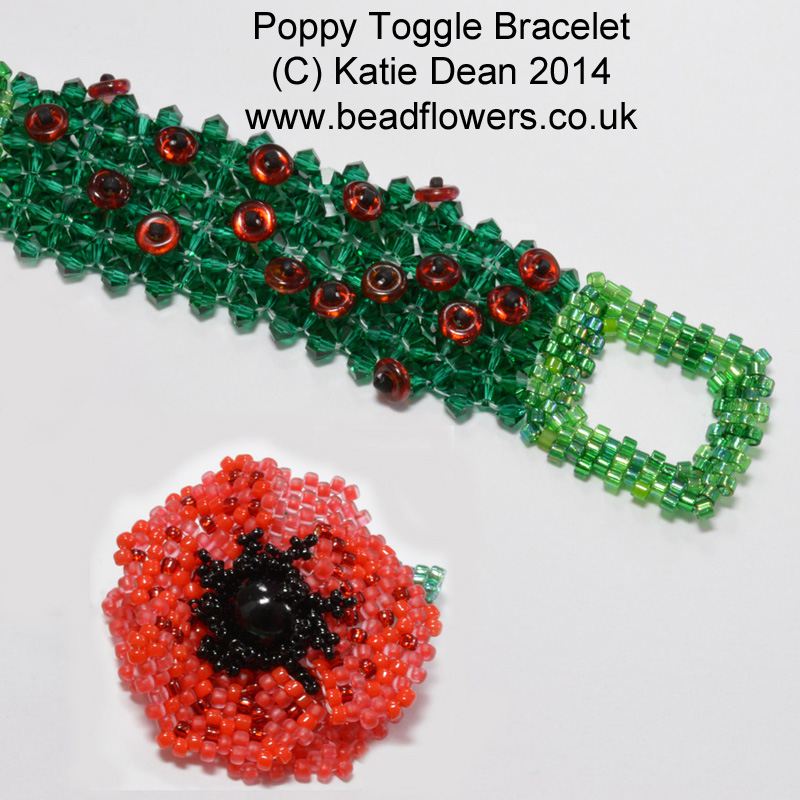 Click here to get the poppy bracelet pattern
Hopefully that now gives you some ideas to explore. And also a reason why you should try and learn more than one beading technique. It just opens up exciting new doors of possibility!


Thank you so much for the above instructions. This afternoon I will endeavor to execute them to complete my poppy bracelet. Will order the strawberry bracelet as well. Wish me luck!!
You’re very welcome, Helen! I have every faith you will manage it 🙂 Thank you so much!