
How to create a colour scheme from an image that you love
Are you stumped when it comes to colours for your beading projects? Well, I’ve got a simple little trick for you to try. In this post, I’m going to be showing you how to create a colour scheme from an image that you love. You see, colouring plays a big role in whether or not we’re attracted to an image. So, if you like an image, you probably like its colouring. And that means it will lend itself to creating a great colour scheme for you to use in a beading project.

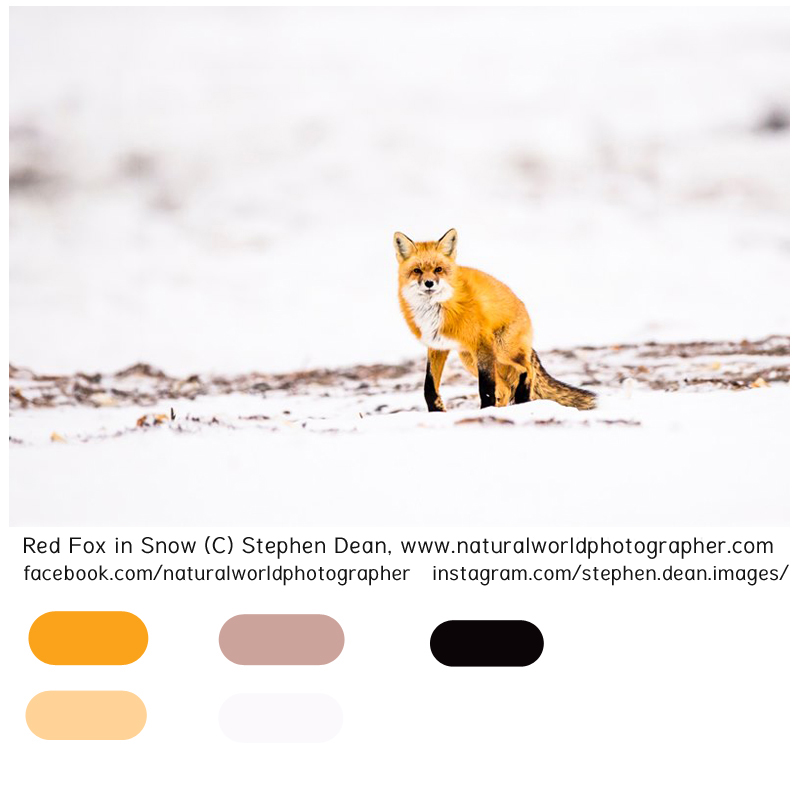
As I talk you through this simple process, I’m going to be illustrating the post with some colour schemes that I’ve created from my brother’s photographs. When he’s not working on his day job, you’ll probably find him behind a camera, capturing stunning shots of nature. He has so many that I love! So, if you want to find out why, check out his website.
Step 1 – select your image
Naturally, the first thing you’re going to do is to select an image that appeals to you. Incidentally, you can also use a piece of fabric for this.
If you don’t already have an image to hand, you can always take one. Perhaps you are looking out on your garden and admiring a flower bed? Well, this could translate into a great colour scheme for beading.
Or, maybe you go out for a walk and see something striking. Just snap a quick photo, and you have your colour inspiration ready to go.
Now, it’s a good idea to gather images whenever you see them, even if you don’t plan on using them right away. You can save them all in a folder ready to use whenever you need some inspiration. We call this kind of project a ‘colour bible’. If you want to learn how to create your own, then check out this blog post.
Step 2 – how to create a colour scheme
So, how do you go about turning your image into a colour scheme?
Well, that image is made up of a collection of colours. So, if you can pick out individual colours and shades from within the image, you can use them together to make a colour scheme.
If you’ve got some photo editing software, then you can use that to create your colour scheme. If you haven’t, don’t worry… good old-fashioned coloured pens or pencils will work just as well!
How to use software
If you are using software, then let me explain roughly how the process works. I use Adobe Photoshop Elements. So, my description will refer to that software. But I am just using standard tools that you should find in other photo editing software too. If you can’t find these in your software, don’t worry, just revert to the traditional method, below!
Start by opening your chosen image in the software.
I like to paste a copy of my image onto a larger, plain white, file. Then, in the space next to, or above or below it, I make a series of boxes. Don’t worry about the colours at this point. Just use your drawing tools to draw however many boxes you want.
Next, the software can really come into its own. You probably have some kind of ‘colour picker’. This would be a tool that allows you to click on a spot in the image. The colour of that spot now becomes your ‘foreground colour’. So, just use that colour to fill in one of the boxes that you’ve drawn.
Repeat this, selecting different colours from within the image, until you have coloured all your boxes. This gives you a colour scheme that you can then translate into beads.
The traditional method
If you don’t have software that you can use, this method is just as easy with pens or pencils.
Start by sticking your image onto a larger sheet of plain white paper.
Then, draw a selection of boxes on the sheet. They can be round, square, or any other shape you want to draw.
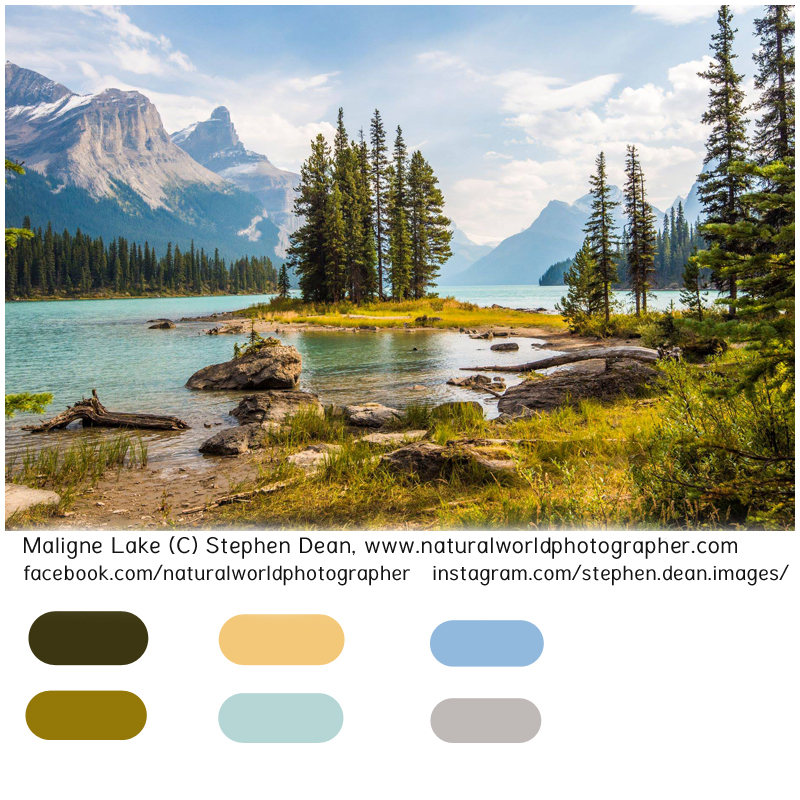
Now, colour each box in one of the colours that you can see within your photo. Remember, shading can be important here. For example, in the image above, I have two different shades of green and two different shades of blue.
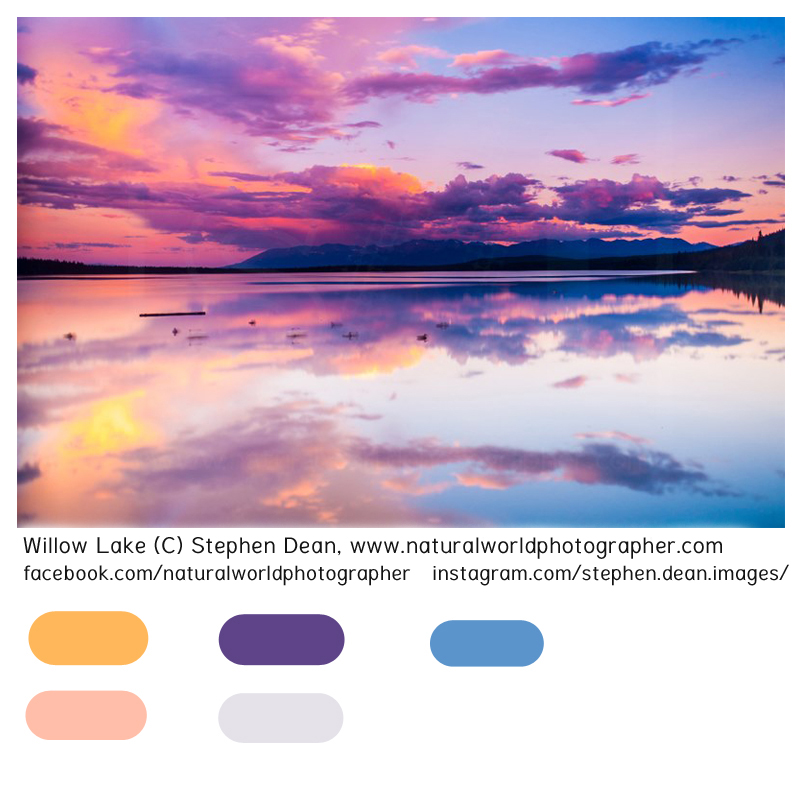
As you’re picking out colours, try to cover the entire range across the photo. So, in the photo below, I have a range of blues and mauves in the sky. Plus, the orange, peach and yellow in the sunset clouds. I have black and dark grey in the silhouettes around the lake. Then, some areas almost tend to white. So, the greater the range of colours you can pull out, the more interesting your eventual colour scheme will be.
What to do next…
So, you’ve just learned how to create a colour scheme from a photo. But how do you translate that into a beading project?
Well, you would start by finding beads that match each of the colours in your little boxes. You can use all or just some, depending on how many colours your design needs.
(My top tip: ‘more is more’, when it comes to colour. Check out my other colour blogs to find out why I say that!)
Then, you just need to decide how you’re going to use your beads in your design. Remember, picking colours is one thing. But creating a good design with them requires you to create an interesting balance of colour.
So, if you need to learn how to do that, why not take my online class? In that I teach you a simple 3-step process for creating a beading colour scheme from scratch. You can use this link to enroll on the class, then enjoy it in your own time, working at your own pace.
A note on copyright
If you are using images that are copyrighted by other artists, please respect that copyright. I did ask my brother for permission before using his photos for this purpose. He was happy for me to share them as long as I also shared his website and social media details so that others can find and enjoy his work.


