
Brick Stitch Shaping: learn how to do this with ease
Now you’ve learned basic brick stitch, so you can make a straight, flat piece. But what if your pattern calls for some brick stitch shaping? What is it and how would you do it?

Well, you’ve come to the right place to learn!
What is brick stitch shaping?
The diagram below shows a leaf shape made in brick stitch. You will immediately see it is quite a complex shape, compared to the straight strips you have learned to stitch so far.

You have rows that indent and extend on both ends. So, how do you deal with this?
Well, basically, you need to learn how to increase or decrease at the end of a row.
Brick Stitch Shaping: End of Row Decrease
Let me start with the simpler piece of brick stitch shaping: decreasing at the end of a row. Basically, this just means finishing your row early.
So, let’s focus on the right hand side of that leaf shape. With its irregular shaping, you need to be able to identify the point at which to stop a row.
Bear in mind that you will be working rows from left to right, then right to left. Take a look at the diagram below: the blue arrows indicate the direction in which the row is worked.

When you stitch row 3, you will be working from left to right. But, if you look carefully at the pattern, this row decreases by an extra bead. So, on the right hand side, it finishes two beads shorter than row 2.
Once you have identified this, it is easy to see where to stop: you want to end up with a thread that has no bead attached at the end of the row (this empty thread is highlighted in red).
For all the other rows in this sample, the new row is just one bead shorter than the previous row, so you will need to have a bead sitting on top of each thread. That means you don’t need to make any more decreases, but just finish each row as you would normally.
However, you may have noticed that these rows also start with a decrease. So, how do you decrease at the beginning of a row?
Brick Stitch shaping: decrease at the start of a row
Normally, when you work in brick stitch you will exit from the final bead in your row. To begin a new row, you pick up 2 beads, pass under the first visible thread and up through the second bead.
This means that you will have an overhanging bead at the start of each row. I have shown this in the diagram below (the overhanging bead is in a darker blue).

As I mentioned above, the leaf has no overhanging beads. So, in effect, you are ‘decreasing’ at the start of each row. How do you do this kind of brick stitch shaping?
Well, it all comes down to where you finish one row and start the next.
You will still need to pick up 2 beads to start the row. So, if you want the row to begin one bead inwards from the previous row, then you will need to ensure that you are exiting from the correct bead before you start your row. That is, the second bead from the end, NOT the end bead. So, how do you get there? Take a look at the diagram below…

As you finish your row, you are exiting at the green arrow. In order to begin the next row in the ‘right’ place for making that start of row decrease, you need to be exiting from the bead labelled 1. So, how do you get there?
Well, you will need to weave down through your rows and back up out of the bead you need. You will be weaving through the beads illustrated in red and numbered one to four, following the red thread path. So, from your exit point (green arrow), pass down through bead 1, down through bead 2. Then go up through bead 3 and up to exit from bead 1 (or 4).
When you begin the next row, you will be hooking under the second thread from the end (highlighted in green). That little detour through the beads has taken you to just the right place to do that.
Decreasing by more than one bead
What if you need to decrease by more than one bead at the start of your row? Well, you just need to work out where to begin. So, take a look at another example…

If you need to start a row that has decreased by 2 beads, you will need to be exiting from the bead that is two in from the end, before you start adding new beads. So, if you have finished the row exiting from the end bead (indicated by the green arrow), just weave down through the second bead (labelled 1 and coloured red) and up through the third bead (labelled 2 and coloured red). When you add your first two beads to start the next row you will be hooking under the third thread from the end (highlighted in green).
The same rules apply wherever you need to start a row inset from the previous row. Work out which thread you will need to hook under. Find a thread path through the beads to take you out of the bead that is immediately before that thread. Then, pick up your 2 beads to start the row.
Brick Stitch Shaping: Increasing at the end of a row
Look back to that basic brick stitch diagram above (the one with the blue beads). Notice how the rows normally have an indentation at the end.
So, what happens if your brick stitch shaping requires an extra bead at the end of your row?
Well, you just need to use the normal technique for increasing. So, you would reach the end of your row. Then, pick up one extra bead and hook under the final thread again. Basically, you have two beads attached to that final thread. Your additional bead will overhang the row, as you see in the diagram below.
 How about if you need to increase by two beads at the end of the row?
Well, you’ve basically run out of threads to hook under (see my question mark in the diagram below). So, you can attach an extra bead by using the ladder stitch thread path that I showed you in the blog on starting brick stitch.
 Brick Stitch Shaping: Increasing at the start of a row
 Brick Stitch Shaping: Increasing at the start of a row
Your normal brick stitch has a natural ‘increase’ – the overhang – at the start of every row. But what if you need that overhang to extend by another bead?
Basically, you would start your row by adding your first two beads as normal. Then, instead of adding your next bead, pass back down through bead 1 (red thread path in the diagram below). Pick up a new bead and pass down through bead 1. So, you have basically used the ladder stitch thread path to add this additional bead.
Then, pass back up through bead 2 and you are ready to continue with the rest of the row.
What have you learned about brick stitch shaping?
 What have you learned about brick stitch shaping?
I hope the over-riding message has been that there is no ‘new’ technique for brick stitch shaping. Because this is all about adding – or missing out – beads at the start and end of a row, you simply need to calculate where to start or finish.
Patterns for practising brick stitch shaping
So, now you have the idea, it’s time to start trying this with some actual patterns.
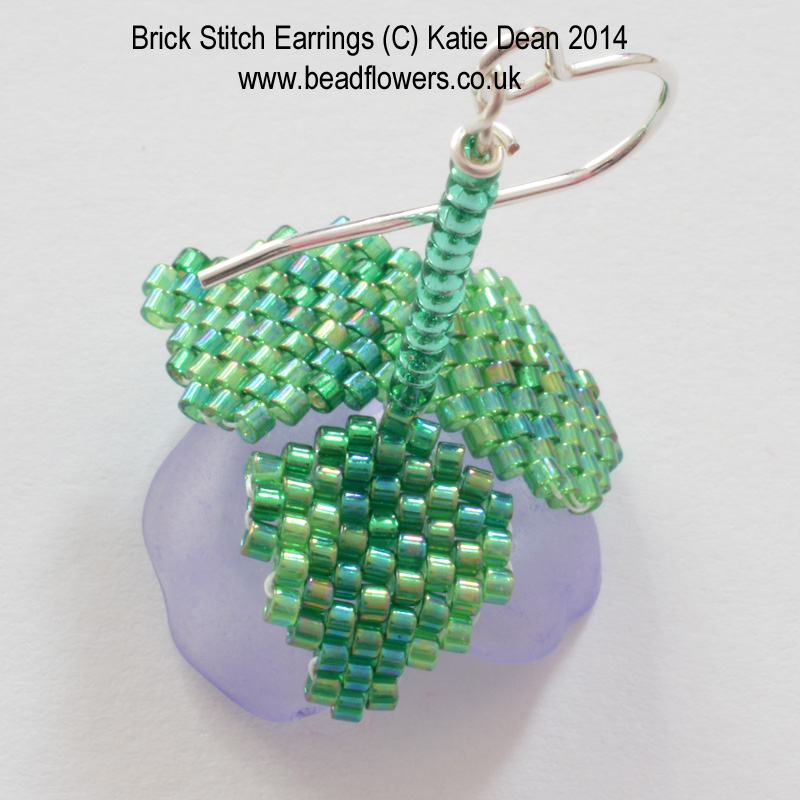
This pair of earrings is a project that I designed specifically to help you learn how to shape brick stitch. So, it’s a great one to try first. It is also quick to make!
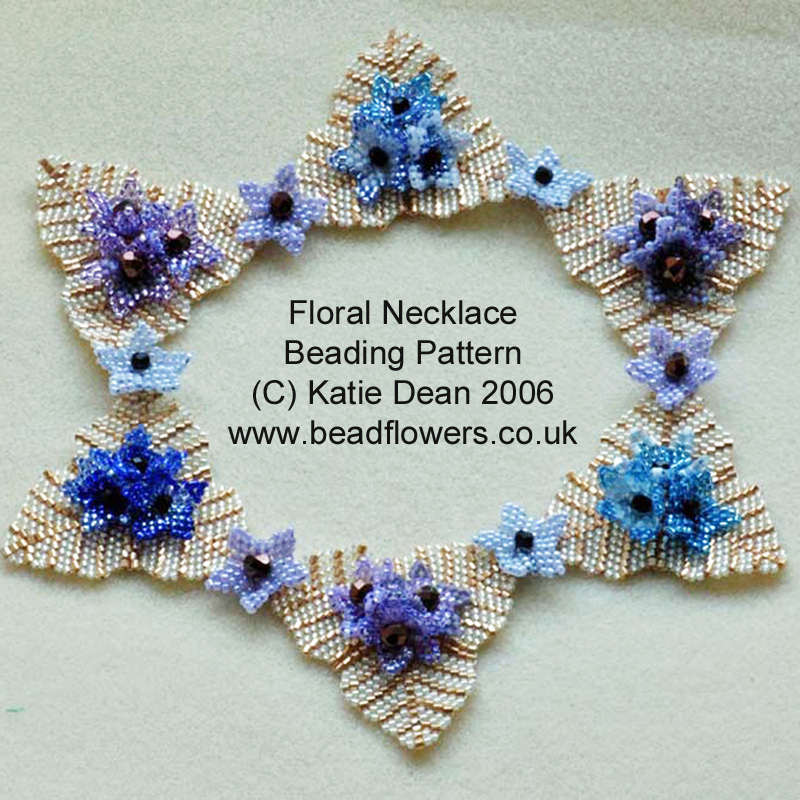
The summer flowers necklace is all about brick stitch shaping. You will be making a lot of shaped leaves for this one. I used simple Peyote stitch for the flowers. So, this is a nice development to start mixing up techniques and expanding your skills.
This heart shaped beaded bead uses brick stitch shaping to create the heart. Then I have used a simple method to turn your flat brick stitch hearts into a 3-D beaded bead. So, you can get that pattern here>>

What next?
Well, if you have found this helpful, I encourage you to share it with your beading friends. You can also bookmark this page to return to whenever you need to.
If you would like a PDF guide that you can print out, then follow this link. The download is free, so will be a great reference for you. And don’t forget to check out the other brick stitch guides on here!


Katie thank you. I know how to do the ladder and brick stitch, but if you’ve not done it in a long time, this is great refresher. I made a whole series of butterflies many years ago and I probably could have done increases and decreases with my eyes shut by the end of that series! Thank you for these great lessons. I find your charts very clear.