
Bead Embroidery Techniques
Now comes the fun part. I’m going to teach you a lot of the basic bead embroidery techniques. So, armed with these, you can begin to create your first design. You may be working from a pattern. Or you may be creating something all by yourself. So, if you’re not sure where to start, then I have also included some links to beginner level patterns that you can try.

Bead Embroidery Techniques
Bead embroidery techniques exist to help you create different textures and ‘paint’ different scenes with your beads. I find bead embroidery a lot more free than bead-weaving, in the sense that you can choose exactly what kind of technique(s) you want to use.
There are no right and wrong choices. But there are choices that will make life easier or allow you to achieve your goal with more success. So, before I talk about the individual bead embroidery techniques, I want to offer you a helpful framework for deciding which to use.
The first question to answer is, what are you trying to do?
If you want to draw a line, then this gives you a choice of two main bead embroidery techniques: backstitch and couching.
If you want to ‘colour in’ an area, then you have different choices to make. Backstitch and couching are still options, but you can also think about using Stack stitch, loops, Stab stitch or just adding single beads.
These are the two main things you will need to do with bead embroidery. But you do have some other choices.
You may decide to add a larger focal bead (or several). Now, you might be able to just stich these on. But, if this larger bead has no hole, you will want to use Stack stitch to secure it.
My main message here is that you can make an awful lot of bead embroidery with just a very few techniques. So, there is nothing to stop you from jumping in straight away and learning more as you go along.
Techniques for Drawing Lines
Couching
If you have marked lines on your pattern template, then you may want to bead over them, as if you were outlining an area. For straight lines, or for short curves, couching is a good option. Simply pass your needle up through the backing at one end of the line, thread on enough beads to reach to the other end, slide them into place and then pass down through the backing at the point marking the other end of the line.
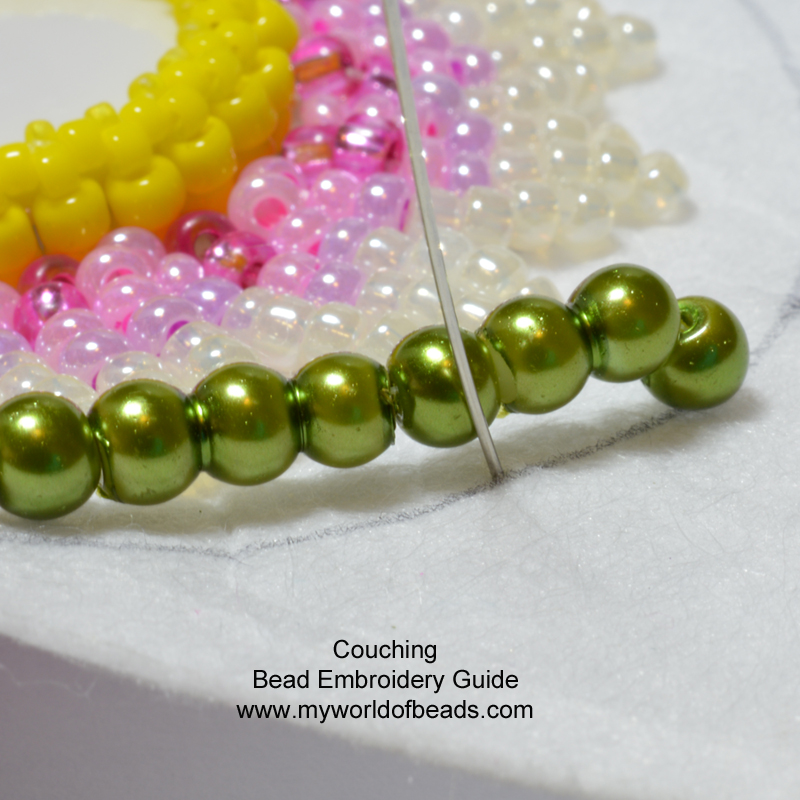
You now need to bring your needle back up through the fabric, at a point on the marked line, but between two beads, say 3-4 beads from the end. The photo above shows the work to this point.
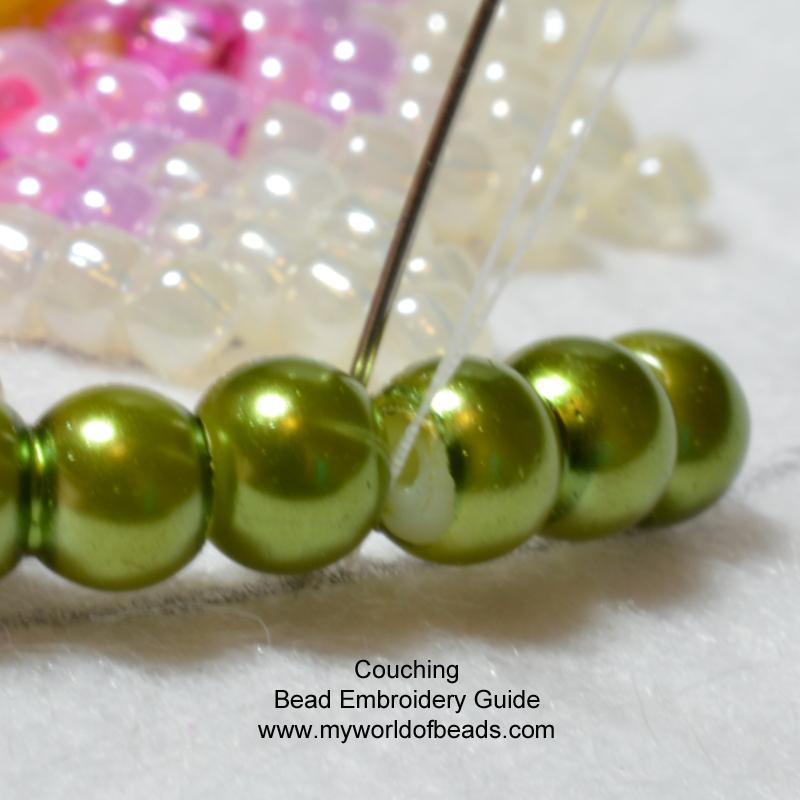 Now take your needle and thread over the top of the line of beads. Pass back down through the backing, as close as possible to where you came up. Your thread should pull down over the top of the thread, between the beads, as you pull the needle through. Make sure the thread is pulled through fully and this will keep your beads anchored in place. See the photo above.
Once again, pass up through the fabric, on the marked line, but a few beads back towards the beginning. Pass the needle and thread over the top of your line of beads and take them back through the fabric to anchor the next part in place.
Keep repeating this all the way along the line until you are a few beads from the start. If you are working along a curved line, then by using the marked line as a guide, you will pull your beads into the curved shape that you want. If you are working on a straight line, then keep your beads as straight as possible.
The problem with couching
One word of caution: if you are working with a very curved line, try to cover it in stages, with just a few beads. It is difficult to see how the beads will sit accurately and the couching that you are about to do may cause them to move. As you have defined the beginning and end of the line, you may find you have too many or too few beads to space accurately along the curved line once you begin anchoring them. So, if you do have to use it, just make sure you take the line in small stages.
But now, let’s look at another option. My personal preference would be to work in Backstitch instead as you have more control over ‘drawing’ as you go.
Backstitch
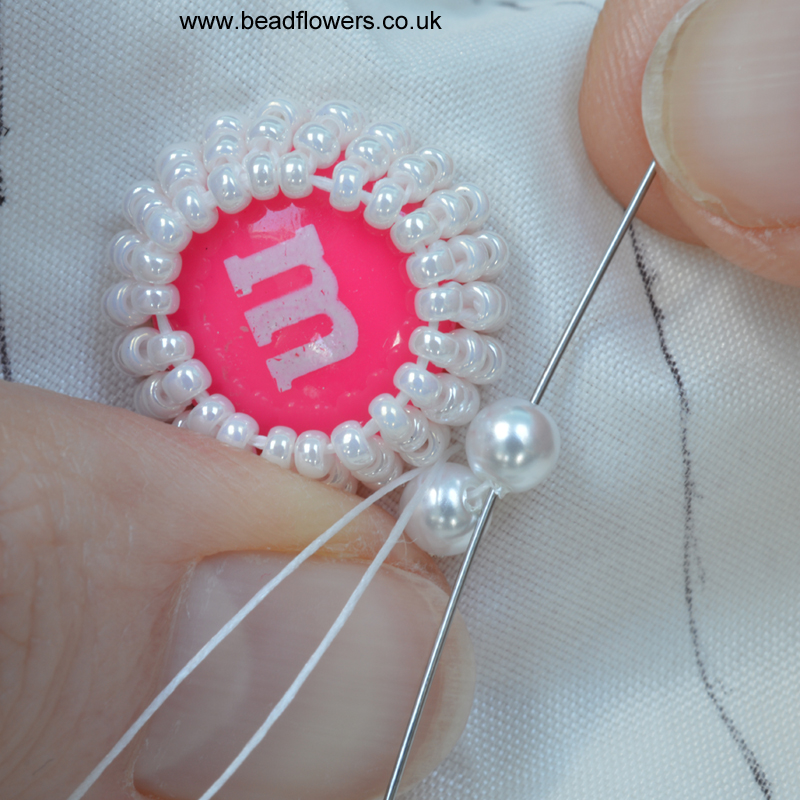
You can use Backstitch to mark curved lines or straight lines and to fill in whole areas. It also looks good circling around a cabochon or large bead.
 Pass your needle up through the backing at a point on the line you will be beading. (Start at the beginning if the line has a clear beginning and end). *Pick up 2-4 beads (if you are using big beads, then pick up 2, if you are using small seed beads, then pick up 4). Slide the beads into place on the backing. Then pass back down through the backing, at the point where the last bead is sitting. Make sure you pass down through on the line you have marked.
 Now pass back up through the backing, making sure you come through on the marked line. Come through at the point in the middle of this group of beads. So, if you added 2 beads, you come back up through between these two beads. But if you added 4 beads, you will come back up through between beads 2 and 3.
 From here, pass on through the last bead (or two beads) so you are exiting from the final bead in your string. Now repeat from * to add your next little group of beads. Keep to the same number in the group each time. Keep repeating this process until you reach the other end of your line.
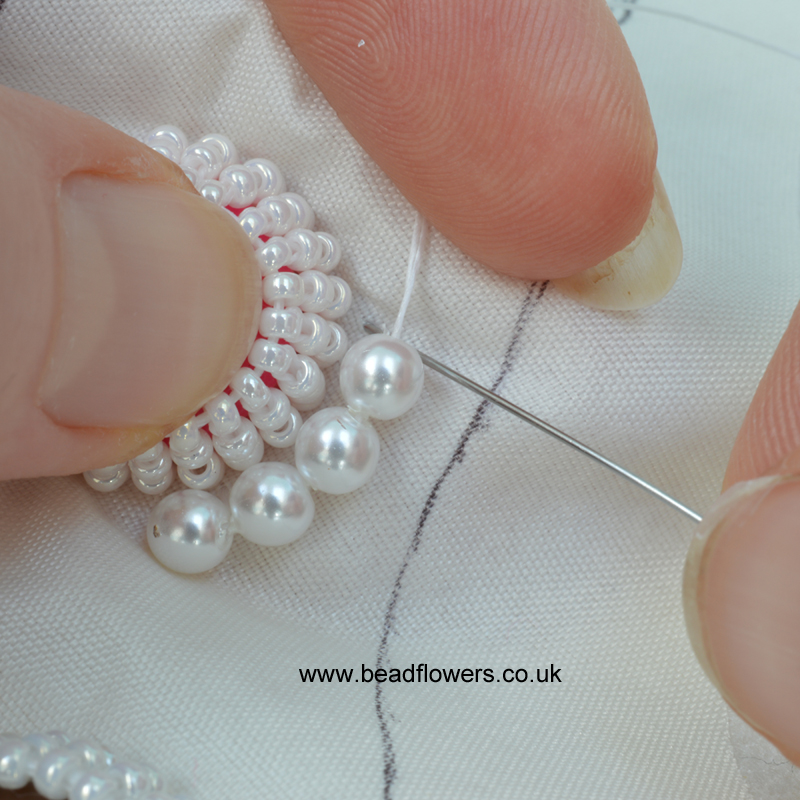
When you are nearing the end of your line, (or circle), you may need to adjust the number of beads you pick up, so that they fit the remaining space. When you have completed the line, pass your thread back through all the beads and this should pull them into place.
The photo series below shows me adding seed beads using this technique. Note, how I am adding 4 beads at a time and passing up between beads 2 and 3.


Bead embroidery techniques for filling spaces
The bead embroidery techniques you choose for filling spaces will depend on the kind of texture you want to create. You can fill a space using back stitch. Take a close look at the two photos above. I am actually using backstitch to add a row of beads immediately to the side of the backstitch row I created with pearls. So, you can keep adding rows next to one another to fill in a space. You can use exactly the same beads for all the rows. Or create some variation by using different colours, or different sizes.
So, that is one option. Now, I am going to show you a few other techniques for filling spaces.
Adding Single Beads
This technique is a personal favourite of mine. If you mix up different shades of the same colour, or create a wilder colour mix, you can create mosaic effects. If you use all the same beads, you still get a lovely random textured effect.
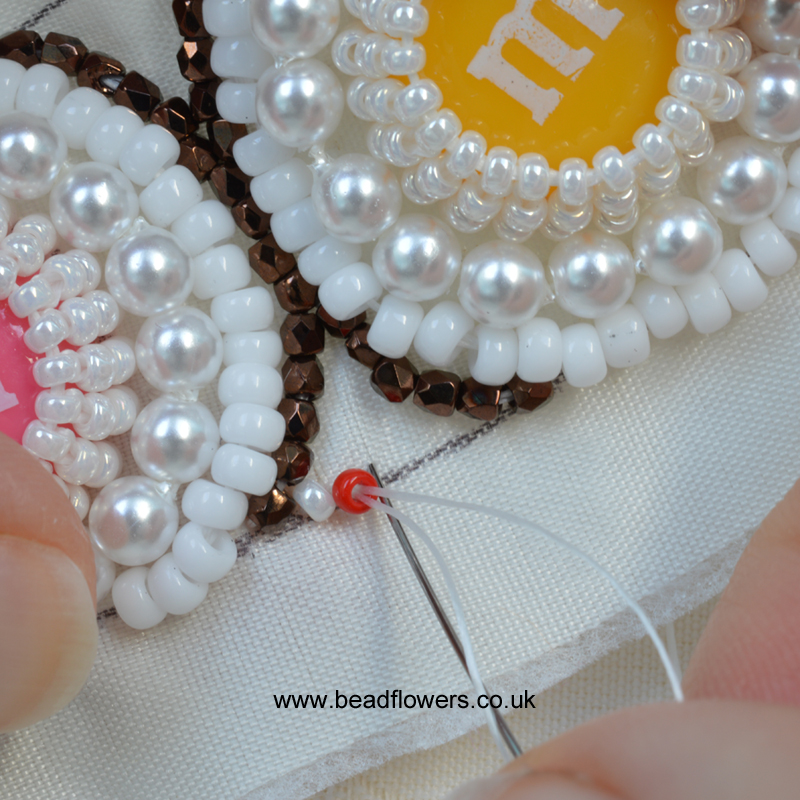 The technique is simple. So, just pass up through from the back to the front and pick up 1 bead. Slide the bead down into place, then pass back down through the material, just on the other side of the bead. Pass back up through to the side of the bead and repeat the process. Keep repeating this until you have covered the area with single beads (see the photo below).
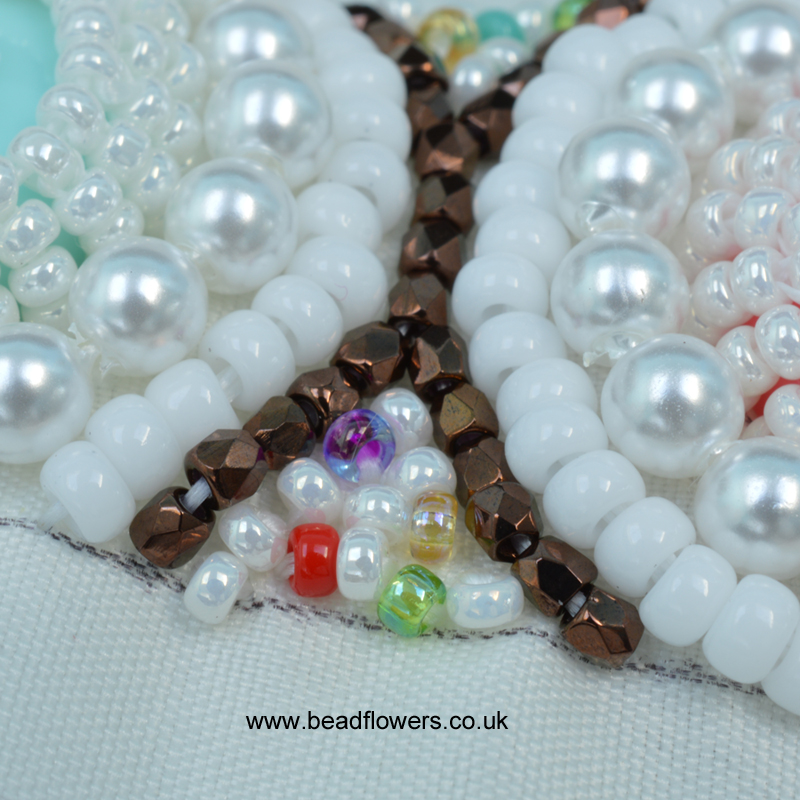
This is a lovely way to use bead mixes and you can use a combination of different sizes as well as different colours. The point to remember is to use accurate spacing. If you leave too much space between the beads, your backing material will be very visible. If you try and add the beads too close together, then they will start to jostle for position and will knock one another out of alignment.
You will also notice that the beads can move once they have been added. So, try to keep the material flat as you are working and this will help with the spacing. If you let it take its own shape and you are squeezing in too many beads, you will end up with the material curving. So, this may mean it doesn’t fit any cuff or necklet blank that you are planning to use.
As with all new things, this comes with experience, so just take a piece of scrap material and try a section to get a feel for how the beads sit.
Loop Stitch
If you want to give your embroidery a more textured feel, you can cover a space with loops of beads. The technique is exactly the same as for adding single beads, but instead of picking up 1 bead, pick up an odd number. The more beads you add, the higher the loop will sit.
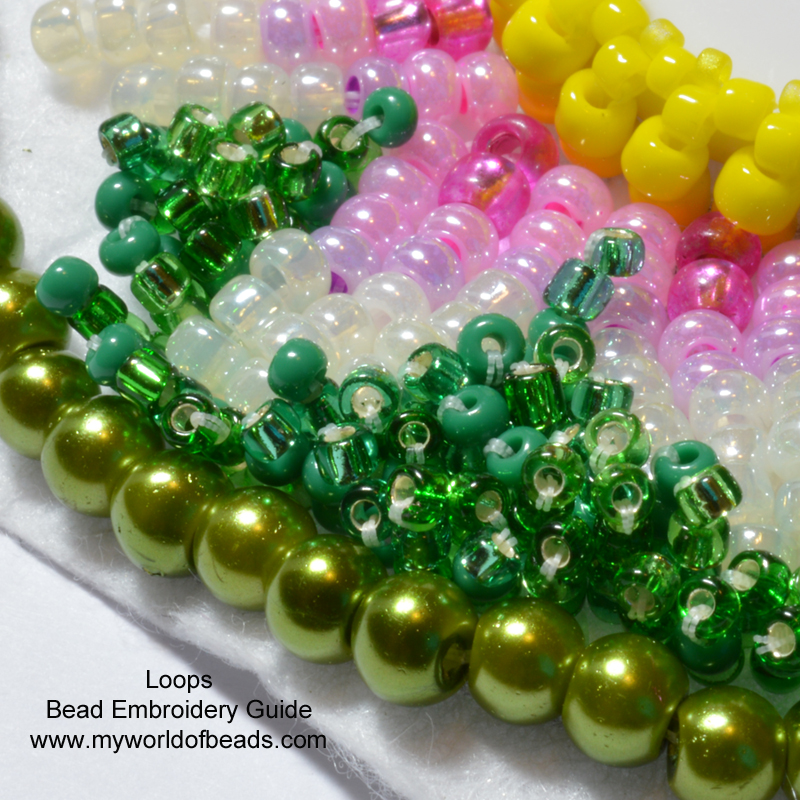
You can also alter the height of the loops according to where you re-enter the fabric. If you enter as close as possible to the point where you originally came through, then the loop will sit very upright.
If you go back through at a point further away from where you came up, your loop will sit more across the material. Take care if you are spreading your loops, as you may end up with backing material visible.
If you mix in different bead colours, you can increase the textured effect. This is something to play around with to see what effects you can create.

Adding Bigger Beads and Textures
An easy way to create points of interest is to add larger focal beads into the work. This could be a single cabochon or rivoli in the centre, or it could be a selection of gemstones arranged around the piece.
Now, you might also want to use some of the larger shaped seed beads for this. If your large bead has a hole through it, then you can just stitch it straight onto the backing. Use the same technique as you would for adding a single bead. So, pass up through the backing (from back to front), pick up your focal bead, slide it into place, then pass back down through the backing at the point where the bead is sitting. For very large or heavy beads, repeat that thread path to give the bead extra security.
If your bead has no hole, then you can secure it using a technique called ‘Stack Stitch’.
Stack stitch – preparing the ground
Start by placing your bead on the backing fabric, in position. Carefully draw around the outside of the bead. This line is going to form your guideline as you start the stack stitch, so you need to make sure it is accurate.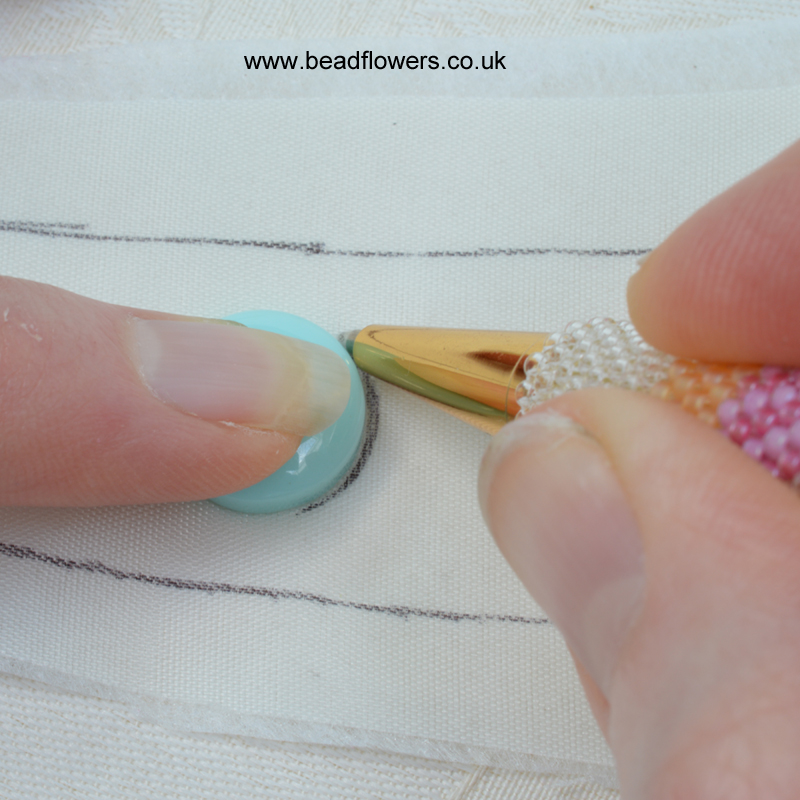
Take the bead away and begin adding your stack stitch. You will need to use seed beads. You can use a mixture of different sized beads. So, use a larger bead at the bottom, then add smaller beads at the top, to ‘grade’ the stack. This is a good idea if you are trying to attach a dome shaped bead. But if your bead is more of a flat disc, then use all the same size seed beads.
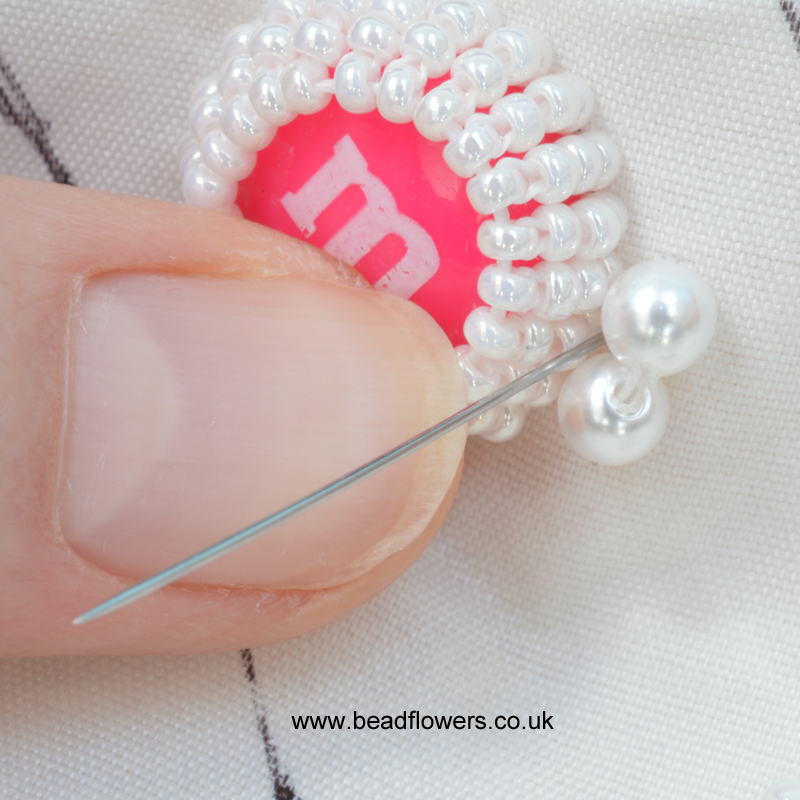
Stack stitch technique
Pass up through the backing on your guideline. Pick up enough beads so that they sit just slightly higher than your main bead. Skip the final bead and pass back down through the other beads in your stack. Pass back down through the backing material as close as possible to where you came up, making sure you pass through on the guideline marked. Pull your stack into place.


Pass back up through on the guideline, about a bead’s width away from your first stack. Then used the same technique to add a second stack.
Keep adding stacks all around the guideline. As you reach the end of your circle, you may have to adjust your spacing slightly – you do not want to end up with a big gap between stacks.
When you have completed the circle, pass back up through the beads in your first stack, so you end up exiting from the top bead. Place your main bead in the centre. If you have stitched accurately, this should fit perfectly. If you want to, you can add a drop of glue to the back of the main bead, but this should not be necessary.
You are now going to pass through the top bead in each stack, pulling them in tight. So the beads should pull over the top of the edge of your focal bead, holding it in place. Reinforce the thread path through this circle of top beads. Then finish by passing back down through the nearest stack and into the wrong side of the backing.


More uses for stack stitch
If you wish, you can also use Stack Stitch to add texture to a piece of embroidery. Just stitch the stacks along a line and do not join the top beads.
For even more interest, you can grade the stacks. So your first might have 3 beads, your second 4 beads, your third 5 beads, your fourth 4 beads and your fifth 3 beads – you have created a little mound. Play with different arrangements of stacks to add depth and movement to an embroidery design.
Stab Stitch
Stab Stitch is a very traditional bead embroidery technique. It is often used to dot sequins on a piece of clothing. But now, with the new shaped seed beads, you can replace the sequin with a bead – O beads and Wheel beads work very well.


The technique involves coming up through the backing, picking up your flat (or larger) bead, then picking up a small seed bead. Slide the beads down onto the backing material so they are sitting in position. Then pass back down through the flat bead and on through the backing material. The little seed bead will hold your larger bead in place.
You can add these little arrangements of beads so they are scattered singly on a piece of material. Alternatively, group them, or even add them in lines. They give a different texture and some interest to a piece, so try experimenting.
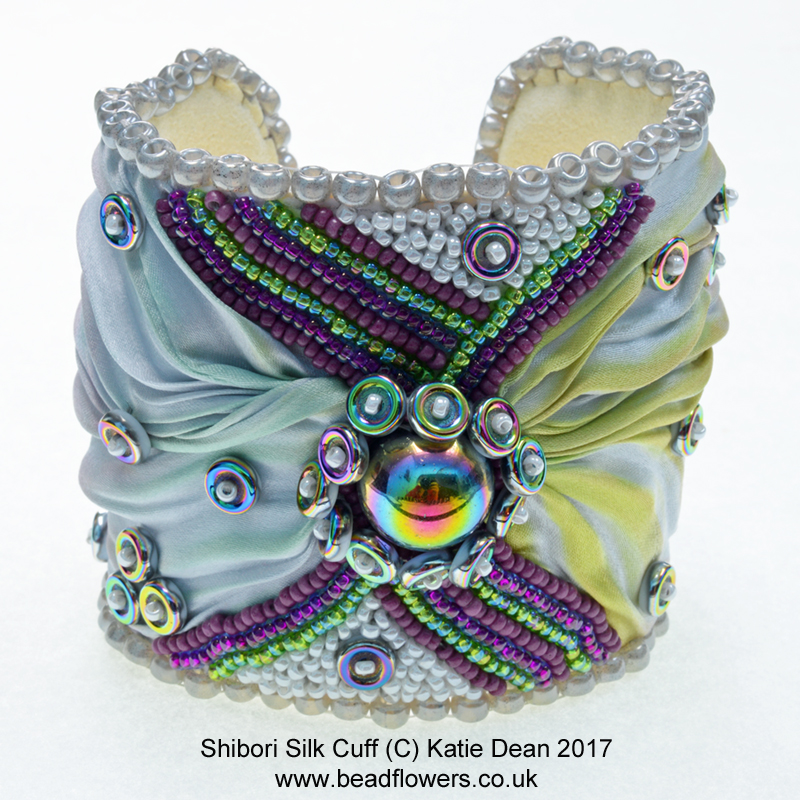
This is the technique I used to make the cuff bracelet, below. So, if you would like to give that a try, use this link to get a copy of the tutorial.
What next?
So, now you are armed with a wide range of bead embroidery techniques. What can you try? Well, I have a range of tutorials on offer at this link. So, I suggest you start experimenting.
Now, you might want to work from a tutorial. Or, you might want to just grab some scrap material and start trying some of the techniques. Whichever you decide, the key to mastering bead embroidery is practice. So, just go and have some fun!
In the next post, I will show you how to finish off your project. Don’t forget, you can find free guides to all types of bead embroidery at this link. So, check it out!


Thanks Katie
This has inspired me to have a go at bead embroidery
thanks
Nicola
That’s really wonderful to hear, Nicola – I’m sure you’re about to discover a new beading passion! So, I hope you enjoy it 🙂
Thanks for sharing. It was really helpful.
Again Thanks.
I have a “canvas” that is 10″x10″ of The Lion King. Can I just do the whole picture line by iine changing the color of the beads as I go, or must If ollow the curved lines, etc.?
Thank you for this succinct instruction. I am currently working on reupholstering my sofa in black fauxe alligator skin. I then will draw up plans to add intricage beadwork to the sofa in the shape of dinosaurs and tropical plants. Much cheaper than a new sofa anf much more fun!
That sounds like a brilliant project! Have fun 🙂